Introduction
Clear-cut and descriptive URLs reassure users that they are on the right track and encourage them to explore, share, and bookmark links.
Optimize WordPress permalinks so that users and search engines can easily read and understand links to your pages and posts.
For example, this article's permalink https://ccbill.com/kb/wordpress-permalinks clearly informs users about its contents.
Learn how to configure permalinks in WordPress and increase click-throughs-rates on your website.
What is a Permalink and Why Change the Permalink Structure?
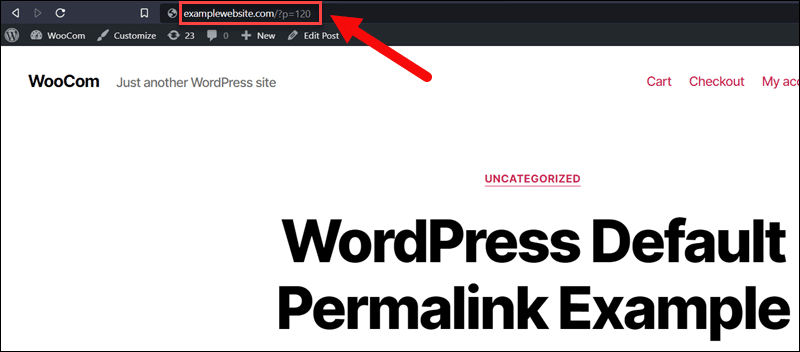
WordPress Permalinks are permanent URLs that link to website content, such as individual pages and posts. WordPress assigns each post a unique ID number. The ID number is incorporated into the post URL by default.
http://examplewebsite.com/?p=120Default WordPress permalinks are not SEO-friendly and do not provide enough details about the post's contents.
By modifying the default permalink structure, you can:
- Optimize pages for search engines - Including keywords in permalinks increases the visibility of a post and has a considerable impact on search engine rankings.
- Create links users understand - If users can figure out the contents of a post from its URL, they are more likely to visit the website, browse its pages, and share content with other users.
- Manage content more efficiently - Website administrators can identify pages at a glance, interlink relevant content, or classify posts based on publication date or author.
How to Change Permalinks in WordPress
WordPress has a built-in feature that helps website owners to customize default permalink settings.
Step 1: Access Permalink Settings
To access the Permalink Settings page:
1. Log in to the WordPress dashboard.
2. Expand the Settings menu.
3. Click Permalinks.
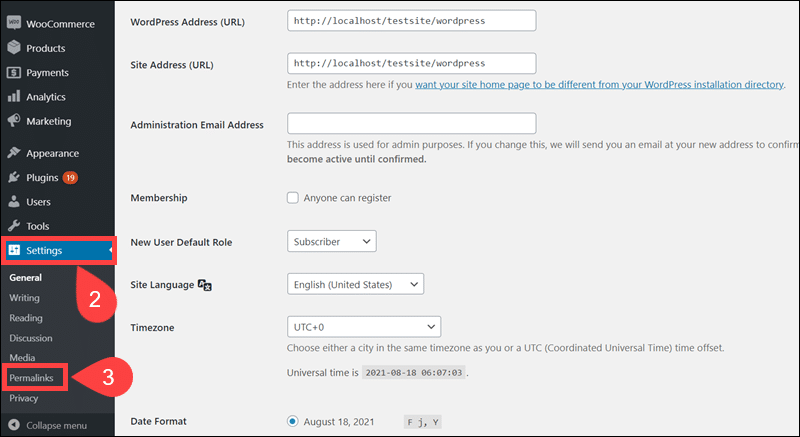
The Permalink Settings page allows you to select and configure basic permalink structures.
Step 2: Select Permalink Structure
Select a permalink structure you want to use on your website.
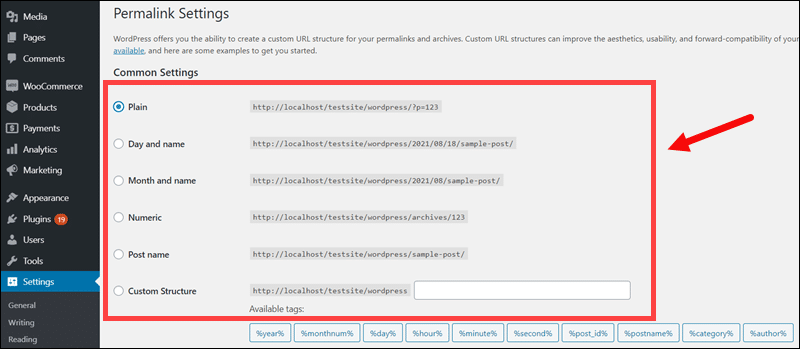
Choose between 6 available options:
| Permalink Structure | Description | Example |
|---|---|---|
| Plain | The system inserts a generated post ID in the permalink. This is the default option. | http://examplewebsite.com/?p=120 |
| Day and name | Includes the publishing year/month/day and post name (slug) in the URL. | http://examplewebsite.com/2021/08/18/sample-post/ |
| Month and name | Adds the publishing year/month and post name (slug) to the URL. | http://examplewebsite.com/2021/08/sample-post/ |
| Numeric | Inserts the post ID numeric value in the URL. | http://examplewebsite.com/archives/120 |
| Post name | Adds the post name to the permalink. Most websites opt to use this simple permalink structure. | http://examplewebsite.com/sample-post/ |
| Custom Structure | Insert placeholders and rearrange the order of permalink elements. | http://examplewebsite.com/%year%/%monthnum%/%author%/%postname%/ |
Only the Custom Structure allows website owners to fully customize the permalink structure.
Step 3: Create Custom Permalinks (Optional)
Use the Custom Structure field to insert placeholders and establish their order in the permalink.
1. Select Custom Structure on the Permalink Settings page.
2. Add one or more tags in the order you want them to appear in the permalink. There are 10 available tags:
- %year%
- %monthnum%
- %day%
- %hour%
- %minute%
- %second%
- %post_id%
- %postname%
- %category%
- %author%
3. Selected tags are visible in the Custom Structure field.
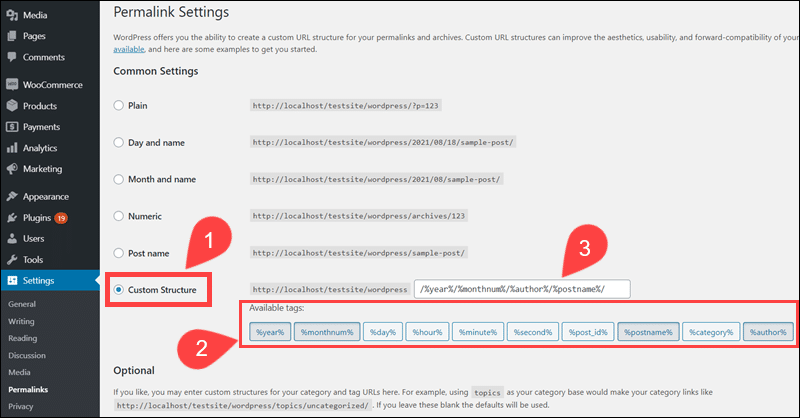
If possible, the permalink structure should end with the %post_id% or %postname% tag to easily identify individual posts.
Step 4: Save Permalink Changes
To apply the custom permalink structure:
1. Click Save Changes at the bottom of the page.
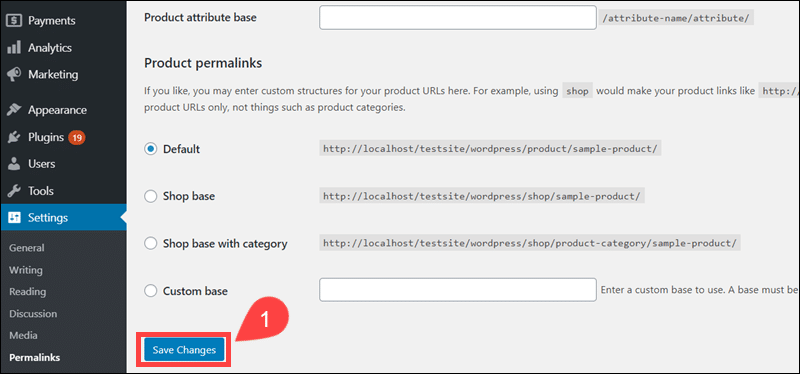
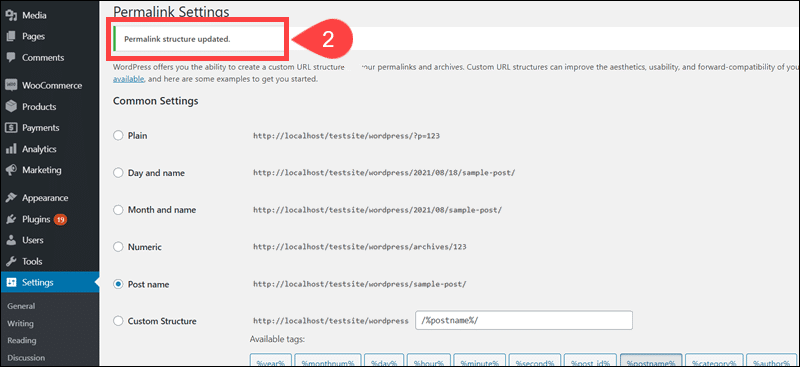
2. The system confirms that the permalink structure is updated.
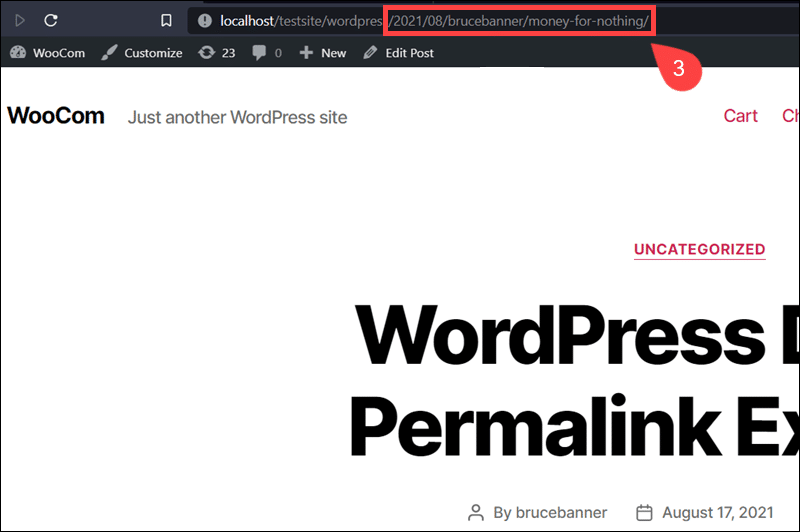
3. Access the live post to review the new permalink structure. For example, the custom structure http://localhost/testsite/wordpress/%year%/%monthnum%/%author%/%postname%/ results in the following permalink:
http://localhost/testsite/wordpress/2021/08/brucebanner/money-for-nothing/The URL contains the year and month of publication, the author of the post, and the post name.
WordPress automatically applies the new custom structure to future posts and also updates existing URLs. Once the permalink structure changes, the old URLs are no longer valid, resulting in 404 Not Found errors.
To inform search engines about the new URL structure and instruct browsers on finding the content, you need to set up .htaccess redirects.
Set Permalinks For Individual Posts and Pages in WordPress
URL Slugs are an element of the permalink that describes the name of the post. By editing the slug, you can streamline the post name and fine-tune permalinks.
How To Alter Post or Page Permalinks (Block Editor)
To customize the permalink of individual posts:
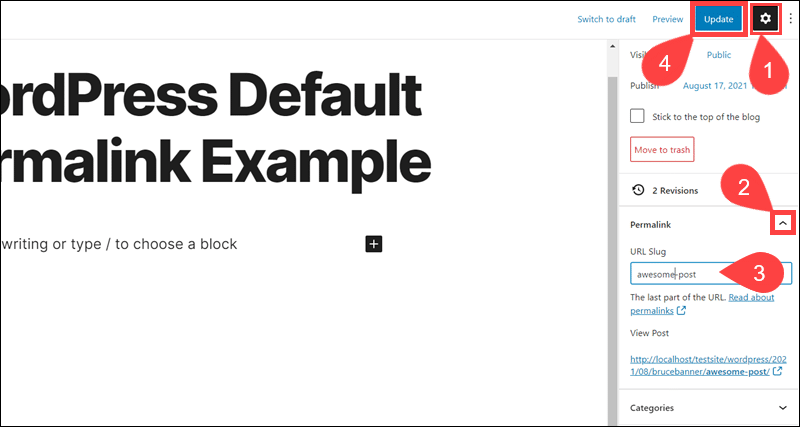
1. Access the post. If the Setting menu is hidden, click the cog symbol in the upper right corner.
2. Expand the Permalink menu.
3. Edit the slug in the URL Slug field. Separate each word using a hyphen (-).
4. Click Update to apply the changes.
Use a browser to access the new post URL.
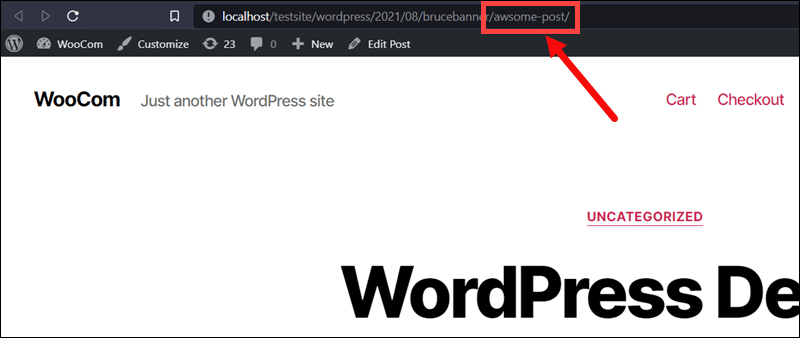
The updated URL Slug is visible in the permalink
How To Edit Post or Page Permalink (Classic Editor)
To modify permalinks on individual pages or posts:
1. Access the post.
2. Click the Edit tab next to the current permalink.
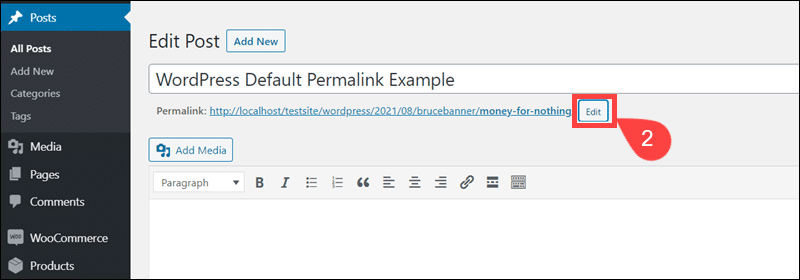
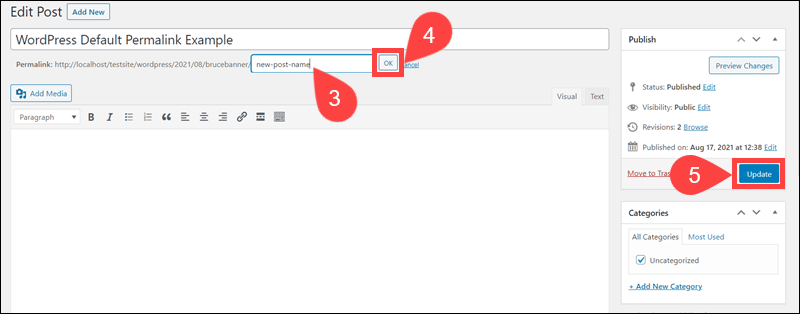
3. Enter a new slug (post name) in the field. Separate each word using a hyphen (-).
4. Click OK once you enter a new slug.
5. Select Update to apply the new permalink.
Access the live post and confirm that the new permalink is active.
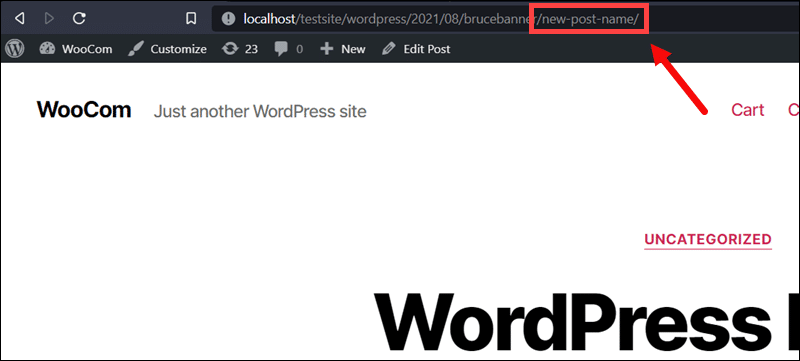
In this example, the permalink reflects the changes to the post slug.
Note: If you cant see the latest page adjustments after reloading the page, make sure to clear the cache of your website. Check out our guide on how to clear the cache in WordPress.
Conclusion
You know how WordPress permalinks work and how to modify them. Custom permalinks are an opportunity to create user-friendly and SEO-friendly links and drive traffic to your website.
Create a consistent browsing experience and reinforce a sense of trust by adding favicons to your website.
