
Numerous articles discuss the best method for setting up your ecommerce and the steps you should take. What is rarely mentioned in detail is how to build and launch your online store using WordPress. Little did the initial developers of WordPress know that their open-source solution would quickly blossom from being a simple blog to becoming a fully functional ecommerce platform? So what makes the WordPress platform so powerful?
 There are a few steps to follow when building your ecommerce in WordPress. And it is reassuring to share that for this task, you don’t need to hire a designer or a developer. Before starting you should have:
 Although Kinsta is the youngest of the listed providers, they are the most innovative one.
Their dedication to great user experience and top performance sets them apart from the competition. Kinsta demonstrates thought leadership through the blog and their proficient support provides great customer service.
Kinsta pricing plans for ecommerce sites start from $100 / month for 100.000 unique monthly visits.
Although Kinsta is the youngest of the listed providers, they are the most innovative one.
Their dedication to great user experience and top performance sets them apart from the competition. Kinsta demonstrates thought leadership through the blog and their proficient support provides great customer service.
Kinsta pricing plans for ecommerce sites start from $100 / month for 100.000 unique monthly visits.
 A veteran in this hosting niche, WP Engine has the biggest market share among managed WordPress hosting providers.
An important advantage of WP Engine is a big ecosystem of solutions, integrations, and features. Most of them were developed internally and some of them are available through the acquisition of other companies.
WP Engine pricing plans for ecommerce sites start from $115 / month for 100.000 unique monthly visits.
A veteran in this hosting niche, WP Engine has the biggest market share among managed WordPress hosting providers.
An important advantage of WP Engine is a big ecosystem of solutions, integrations, and features. Most of them were developed internally and some of them are available through the acquisition of other companies.
WP Engine pricing plans for ecommerce sites start from $115 / month for 100.000 unique monthly visits.
 Among managed WordPress hosts, Flywheel offers the best value for high traffic websites and in case of overages of your current plan.
Flywheel is primarily focused on developers and their product portfolio is a reflection of that approach. For example, Local by Flywheel enables you to develop a WordPress website on your local computer, test it, and migrate it to their cloud.
Flywheel pricing plans for ecommerce sites start from $115 / month for 100.000 unique monthly visits.
Among managed WordPress hosts, Flywheel offers the best value for high traffic websites and in case of overages of your current plan.
Flywheel is primarily focused on developers and their product portfolio is a reflection of that approach. For example, Local by Flywheel enables you to develop a WordPress website on your local computer, test it, and migrate it to their cloud.
Flywheel pricing plans for ecommerce sites start from $115 / month for 100.000 unique monthly visits.
 With 15 data centers around the globe, phoenixNAP is among leading providers of dedicated servers, cloud computing, colocation, compliance, and DRaaS solutions.
Their exquisite partnership with Intel resulted in unique FlexServers offer: You get the convenience and scalability of cloud while using fully-fledged bare metal servers.
PhoenixNAP has a great portfolio of bare metal servers suitable for ecommerce sites starting from $99.99 / month.
With 15 data centers around the globe, phoenixNAP is among leading providers of dedicated servers, cloud computing, colocation, compliance, and DRaaS solutions.
Their exquisite partnership with Intel resulted in unique FlexServers offer: You get the convenience and scalability of cloud while using fully-fledged bare metal servers.
PhoenixNAP has a great portfolio of bare metal servers suitable for ecommerce sites starting from $99.99 / month.
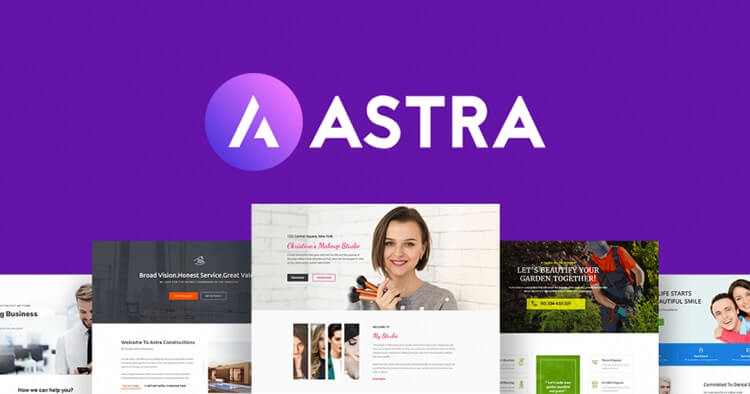
 Astra is a WordPress theme that is clean and free with full WooCommerce support and flexible customization options. It includes a modern homepage layout with several widget-ready areas to quickly drag and drop web widgets. It supports all common page builder plugins to create custom WordPress templates. The theme setup is quick and convenient for beginners.
Maintenance and support
Astra was developed by Brainstorm Force — a WordPress development company with more than 10 years of operation and over 60 employees. Given the solid free edition, most users of WordPress who use Astra on a live website should eventually upgrade to Astra Pro. It provides users with premium support and hundreds of new styling and design choices from just $59 per year.
Those who choose an agency package can also use website templates labeled as ' Agency ' and install other premium Brainstorm Force plugins. Support for page developers is a major selling point for Astra, as many WordPress themes have not been built with modern page developers in mind.
Customization options
Astra is a stunning WordPress theme for portfolios, blogs, companies, ecommerces and more. The free version is used on over 200,000 websites and has amazing support for WordPress page builder plugins — enabling you to customize the entire website through the WordPress customizer theme.
SEO and performance
Its super lightweight and developers say a website using Astra will load in less than half a second with default WordPress information. To do this, they tested multiple steps, including disabling jQuery and keeping assets under 50 kb.
Astra is a WordPress theme that is clean and free with full WooCommerce support and flexible customization options. It includes a modern homepage layout with several widget-ready areas to quickly drag and drop web widgets. It supports all common page builder plugins to create custom WordPress templates. The theme setup is quick and convenient for beginners.
Maintenance and support
Astra was developed by Brainstorm Force — a WordPress development company with more than 10 years of operation and over 60 employees. Given the solid free edition, most users of WordPress who use Astra on a live website should eventually upgrade to Astra Pro. It provides users with premium support and hundreds of new styling and design choices from just $59 per year.
Those who choose an agency package can also use website templates labeled as ' Agency ' and install other premium Brainstorm Force plugins. Support for page developers is a major selling point for Astra, as many WordPress themes have not been built with modern page developers in mind.
Customization options
Astra is a stunning WordPress theme for portfolios, blogs, companies, ecommerces and more. The free version is used on over 200,000 websites and has amazing support for WordPress page builder plugins — enabling you to customize the entire website through the WordPress customizer theme.
SEO and performance
Its super lightweight and developers say a website using Astra will load in less than half a second with default WordPress information. To do this, they tested multiple steps, including disabling jQuery and keeping assets under 50 kb.
 Neto by CSSIgniter - Premium WooCommerce WordPress theme for online and all kinds of sellers of products. This is a best-selling WordPress eCommerce prototype for 2017 and for a long time it will certainly continue to be on top of the list because of its unique features.
If you want to reach online customers as a seller or merchant then this is the right time to start your store. This allows you to sell goods in two ways: either starting a niche-specific shop or sell goods from several niche shops.
Maintenance and support
One of the greatest benefits for this theme is their 24/7 support and updates Including WooCommerce support and visual composer support.
Customization options
All the theme options have been merged with the customizer for WordPress, so there is one place to access all the options. To set up a Header, Single Post, Material, Shop Site, Colors, Fonts, and whatever part you want to customize, you can use customizer. Therefore, choosing right or left sidebar layouts, hero image sections, will take very little time.
The website gives you the international format of Boxed and Full-Width. You can choose to view preceding/next articles, related posts, tags, comments, single posts categories. It also helps you to pick the blog page sidebar template. It offers custom widgets as well.
SEO and performance
As with any theme, making sure the SEO is done correctly is very critical. There are two plugins that you can use to ensure your theme is SEO optimized. The plugin Yoast Premium SEO and the plugin WP Meta SEO.
Neto by CSSIgniter - Premium WooCommerce WordPress theme for online and all kinds of sellers of products. This is a best-selling WordPress eCommerce prototype for 2017 and for a long time it will certainly continue to be on top of the list because of its unique features.
If you want to reach online customers as a seller or merchant then this is the right time to start your store. This allows you to sell goods in two ways: either starting a niche-specific shop or sell goods from several niche shops.
Maintenance and support
One of the greatest benefits for this theme is their 24/7 support and updates Including WooCommerce support and visual composer support.
Customization options
All the theme options have been merged with the customizer for WordPress, so there is one place to access all the options. To set up a Header, Single Post, Material, Shop Site, Colors, Fonts, and whatever part you want to customize, you can use customizer. Therefore, choosing right or left sidebar layouts, hero image sections, will take very little time.
The website gives you the international format of Boxed and Full-Width. You can choose to view preceding/next articles, related posts, tags, comments, single posts categories. It also helps you to pick the blog page sidebar template. It offers custom widgets as well.
SEO and performance
As with any theme, making sure the SEO is done correctly is very critical. There are two plugins that you can use to ensure your theme is SEO optimized. The plugin Yoast Premium SEO and the plugin WP Meta SEO.
 So how can you set up and create an ecommerce page in a day? Using the Shoppe theme, of course. You can choose from 7 different demo sites with just one click. Adjust your online shop's appearance. The themes range from a jewelry store, trendy clothing page for style, to a minimal and colorful online shop of furniture or crafts.
Maintenance and support
Full Support is available from Themify.
Customization options
Design nearly every theme item from header to footer. Simply click and choose, and see the preview live. No need for CSS coding. For font style, you can choose more than 600 + Google Web Fonts.
SEO and performance
The theme is SEO optimized, carefully coded with search engine optimization (SEO) best practices in mind.
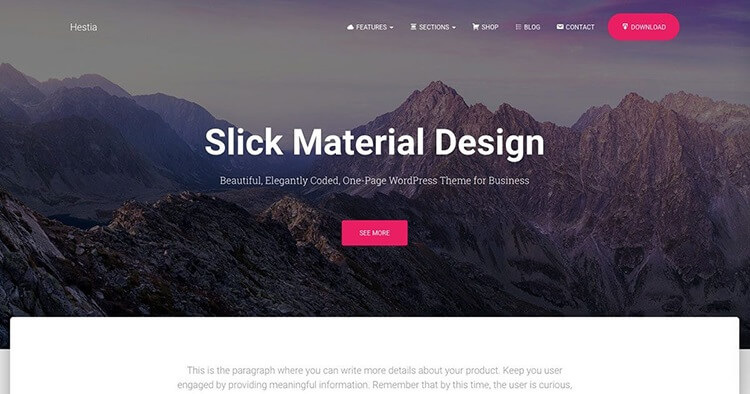
Hestia is one of WordPress's most popular themes and is perfect for both developers and creative thinkers. The functionalities range from event organizers to food and beverage manufacturers to business world professionals across various enterprises. It is also popular among consultants and ideal for blogging as well. Some might even argue that this is 2019's most well-known theme.
Maintenance and support
WordPress offers support and simple one-click updates. And you get access to the docs, forum and video tutorials as well.)
Customization options
Hestia's beautiful material design has been developed for all major sections of your page. Tweak the dashboard or the Customizer's ready-made templates of the website. Enjoy the versatility of a template that works with websites that are basic or complex.
SEO and performance
This theme comes with an SEO-ready structure, plus a clean and optimized source code. It’s easy to set up, built for performance and uncompromised speed.
Sending out emails to your customers can help persuade them to come back and finish their purchase:
First Email (About 1-2 hours)
You need to send your first email right away and it should be a pleasant reminder like, "Oops! Was there a cart issue?" Be sure that your message is not pushy when you send your first email. You have already risked frustrating your prospective client by sending an email right away. Aim to assist, not to sell to the client. Keep the mood light, maybe they had tech issues; maybe the method took too long or their payment was declined. Just check in to make sure things are all right. Try to present solutions and options and ask for feedback.
Second Email (About 24 hours)
Wait about 24 hours for your second email. A second email sent 24 hours following abandonment brings you back to the forefront of their mind and has an average conversion rate of 17.7%. If you wait for another day, this rate will fall from 10% to 7.7%. This email should reassure your customer, but also remind them of what they might be missing if they do not complete their purchase. Let shoppers understand that their item is still available, but their cart will expire shortly, and any discounts or availability are not be guaranteed if they wait to purchase.
Third Email (About 1 week)
Should you send this last message, or shouldn't you? Statistics show that there is little return on sending the third email. Also, you don't want to send too many messages and risk being marked as spam, or worse, turning off this potential customer from returning to your site.
If you chose to send a third email, it should aid the customer in finishing their shopping and checking out. There are numerous ways that you can appeal to them, from giving discounts to offers. This should be done occasionally but the customer should not get used to this. You can try sending different emails to different customers to see which ones get the best responses.
Download the Abandoned Cart Lite Plugin to start sending Abandon Cart Emails in your WordPress store, you can do this by:
So how can you set up and create an ecommerce page in a day? Using the Shoppe theme, of course. You can choose from 7 different demo sites with just one click. Adjust your online shop's appearance. The themes range from a jewelry store, trendy clothing page for style, to a minimal and colorful online shop of furniture or crafts.
Maintenance and support
Full Support is available from Themify.
Customization options
Design nearly every theme item from header to footer. Simply click and choose, and see the preview live. No need for CSS coding. For font style, you can choose more than 600 + Google Web Fonts.
SEO and performance
The theme is SEO optimized, carefully coded with search engine optimization (SEO) best practices in mind.
Hestia is one of WordPress's most popular themes and is perfect for both developers and creative thinkers. The functionalities range from event organizers to food and beverage manufacturers to business world professionals across various enterprises. It is also popular among consultants and ideal for blogging as well. Some might even argue that this is 2019's most well-known theme.
Maintenance and support
WordPress offers support and simple one-click updates. And you get access to the docs, forum and video tutorials as well.)
Customization options
Hestia's beautiful material design has been developed for all major sections of your page. Tweak the dashboard or the Customizer's ready-made templates of the website. Enjoy the versatility of a template that works with websites that are basic or complex.
SEO and performance
This theme comes with an SEO-ready structure, plus a clean and optimized source code. It’s easy to set up, built for performance and uncompromised speed.
Sending out emails to your customers can help persuade them to come back and finish their purchase:
First Email (About 1-2 hours)
You need to send your first email right away and it should be a pleasant reminder like, "Oops! Was there a cart issue?" Be sure that your message is not pushy when you send your first email. You have already risked frustrating your prospective client by sending an email right away. Aim to assist, not to sell to the client. Keep the mood light, maybe they had tech issues; maybe the method took too long or their payment was declined. Just check in to make sure things are all right. Try to present solutions and options and ask for feedback.
Second Email (About 24 hours)
Wait about 24 hours for your second email. A second email sent 24 hours following abandonment brings you back to the forefront of their mind and has an average conversion rate of 17.7%. If you wait for another day, this rate will fall from 10% to 7.7%. This email should reassure your customer, but also remind them of what they might be missing if they do not complete their purchase. Let shoppers understand that their item is still available, but their cart will expire shortly, and any discounts or availability are not be guaranteed if they wait to purchase.
Third Email (About 1 week)
Should you send this last message, or shouldn't you? Statistics show that there is little return on sending the third email. Also, you don't want to send too many messages and risk being marked as spam, or worse, turning off this potential customer from returning to your site.
If you chose to send a third email, it should aid the customer in finishing their shopping and checking out. There are numerous ways that you can appeal to them, from giving discounts to offers. This should be done occasionally but the customer should not get used to this. You can try sending different emails to different customers to see which ones get the best responses.
Download the Abandoned Cart Lite Plugin to start sending Abandon Cart Emails in your WordPress store, you can do this by:
What is WordPress Ecommerce?
The easiest way to understand what makes this platform a worldwide phenomenon and one of the most widely used website software is the ease and speed it offers for creating a website. Many successful brands have built a name for themselves using WordPress. These savvy ecommerce businesses have realized the robust power of WordPress, which allows users to build everything from website pages for blogs to complex portals and ecommerce stores. Its prominence as a Content Management System (CMS) and its various modules have helped users to set up a large number of websites all over the world. The modules that are offered in WordPress make for simple additions to your ecommerce stores, without the need to stress over coding everything on your website. Best of all, WordPress is free to install, utilize and upgrade. Additional benefits of using WordPress are:- Users can manage the platform from any computer
- There is no coding necessary
- Search engines read WordPress well
- Website designs are completely customizable
- It’s easy to use
How to Build a WordPress Store
In addition to the above reasons why entrepreneurs choose to use WordPress, the platform is user community based, so there is plenty of assistance when setting up an ecommerce store. There are tips and tricks that new users can use to help, from online tutorials to user forums, where you can get information on plug-ins, Themes, and images. There are a few steps to follow when building your ecommerce in WordPress. And it is reassuring to share that for this task, you don’t need to hire a designer or a developer. Before starting you should have:
- A web hosting website with the right type of hosting plan to support your business model, WordPress, and WordPress ecommerce plugin. For this showcase we will use WooCommerce, the most popular WordPress ecommerce plugin.
- A catchy domain name, that provides you with unique branding.
- An idea of how you want to customize the design of your ecommerce to support the products you want to sell.
WordPress Hosting
One of the key things for your online store is hosting. A reliable hosting provider will keep your WordPress ecommerce store available during 99.9% of the time or even more. You can find those uptime details in SLA (Service Level Agreement) document where hosting providers guarantees a level of certain services. Besides availability, support is also one of the key aspects. You need knowledgeable professionals who are taking care of the infrastructure by patching software vulnerabilities, monitoring performance and operation of your web server, preventing and remedying DDoS attacks, addressing all the malicious activities such as SPAM and virus threats, etc. There are many hosting providers but we will focus only on two groups:- Managed WordPress hosting providers
- Bare metal server providers
Managed WordPress Hosts
Managed WordPress hosting providers are a great choice for online shop owners who do not have deep IT knowledge or a team of developers and server administrators. These hosts take care not only about infrastructure but also about the whole WordPress environment. Accordingly, their support is very proficient in WordPress, ecommerce plugins such as WooCommerce, WordPress themes, and other WordPress plugins. With such setup, you do not have to worry about technical details and you can focus on growing your online business. Managed WordPress hosts usually charge per number of monthly visitors. At first glance that looks more expensive than regular hosting. And it is. Because providers need to include additional (managed) services. If you pay those managed services to your internal team or freelance professionals, you might end up with a much higher price. Below is a short review of the top 3 managed WordPress hosting providers.Kinsta
 Although Kinsta is the youngest of the listed providers, they are the most innovative one.
Their dedication to great user experience and top performance sets them apart from the competition. Kinsta demonstrates thought leadership through the blog and their proficient support provides great customer service.
Kinsta pricing plans for ecommerce sites start from $100 / month for 100.000 unique monthly visits.
Although Kinsta is the youngest of the listed providers, they are the most innovative one.
Their dedication to great user experience and top performance sets them apart from the competition. Kinsta demonstrates thought leadership through the blog and their proficient support provides great customer service.
Kinsta pricing plans for ecommerce sites start from $100 / month for 100.000 unique monthly visits.
WP Engine
 A veteran in this hosting niche, WP Engine has the biggest market share among managed WordPress hosting providers.
An important advantage of WP Engine is a big ecosystem of solutions, integrations, and features. Most of them were developed internally and some of them are available through the acquisition of other companies.
WP Engine pricing plans for ecommerce sites start from $115 / month for 100.000 unique monthly visits.
A veteran in this hosting niche, WP Engine has the biggest market share among managed WordPress hosting providers.
An important advantage of WP Engine is a big ecosystem of solutions, integrations, and features. Most of them were developed internally and some of them are available through the acquisition of other companies.
WP Engine pricing plans for ecommerce sites start from $115 / month for 100.000 unique monthly visits.
Flywheel
 Among managed WordPress hosts, Flywheel offers the best value for high traffic websites and in case of overages of your current plan.
Flywheel is primarily focused on developers and their product portfolio is a reflection of that approach. For example, Local by Flywheel enables you to develop a WordPress website on your local computer, test it, and migrate it to their cloud.
Flywheel pricing plans for ecommerce sites start from $115 / month for 100.000 unique monthly visits.
Among managed WordPress hosts, Flywheel offers the best value for high traffic websites and in case of overages of your current plan.
Flywheel is primarily focused on developers and their product portfolio is a reflection of that approach. For example, Local by Flywheel enables you to develop a WordPress website on your local computer, test it, and migrate it to their cloud.
Flywheel pricing plans for ecommerce sites start from $115 / month for 100.000 unique monthly visits.
Bare Metal Servers for WordPress
If you are tech-savvy entrepreneur or have an IT team in your company, bare metal servers might be best option for your online store. With a bare metal server you get a physical machine – a dedicated server – and all the freedom to install various software, create staging environments, and utilize resources as you want. Bare metal server is also good if you have multiple online stores that do not have huge traffic. You are not limited by a number of stores that you can host, so you can utilize your resources more cost-effectively. This option is less expensive, but it requires more time and effort for maintenance. You are billed on a monthly basis for selected server and bandwidth configuration. There is no limitation of monthly visits. Below is our recommendation for bare metal server provider.phoenixNAP
 With 15 data centers around the globe, phoenixNAP is among leading providers of dedicated servers, cloud computing, colocation, compliance, and DRaaS solutions.
Their exquisite partnership with Intel resulted in unique FlexServers offer: You get the convenience and scalability of cloud while using fully-fledged bare metal servers.
PhoenixNAP has a great portfolio of bare metal servers suitable for ecommerce sites starting from $99.99 / month.
With 15 data centers around the globe, phoenixNAP is among leading providers of dedicated servers, cloud computing, colocation, compliance, and DRaaS solutions.
Their exquisite partnership with Intel resulted in unique FlexServers offer: You get the convenience and scalability of cloud while using fully-fledged bare metal servers.
PhoenixNAP has a great portfolio of bare metal servers suitable for ecommerce sites starting from $99.99 / month.
Choosing a Catchy Domain Name
Most business owners think the primary purpose of their domain name is to serve as an online address for their customers to find them, But It is much more than that. When coming up with a domain name, keep in mind that this is how people will remember you, and it provides the first impression they get of your store. From the perspective of your future buyers, your domain name should be something memorable and easy to find. You should not confuse a memorable name with a simple name though. If you enter your domain name idea into Google Search, and it returns thousands of results on multiple pages, you know the competition for ranking your site will be stiff. Here are a few tips for choosing your domain name:- If you’ve already picked out a name for your domain or are still in the process of deciding, you are going to have to see if that name is available. Websites like com can help you use keywords and see how your name ranks on Google.
- Keep it short, and secure your domain extension. This helps you get recognized by Google and stops other users from using your domain name. It's best to secure a .com address.
- Avoid using confusing words or ones that have multiple meanings, they can get confusing in speech.
- Think of what your name might mean in other languages or if it can be interpreted as negative.
Set up WordPress and WooCommerce
Your next step should be installing WordPress itself. This installation is pretty simple and takes only a few minutes of your time. Detailed instructions, along with troubleshooting information for problems you might run into when downloading can be found on the main WordPress website. The general instructions however are:- If you have not already, Download and Unzip the WordPress Package.
- Create a database for WordPress on your web server, as well as a MySQL (or MariaDB) user who has all privileges to access and modify.
- (Optional) Find and rename wp-config-sample.php to wp-config.php, then edit the file (see Editing wp-config.php) and add your database information.
- Note: If you are not comfortable with renaming files, step 3 is optional and you can skip it as the install program will create the wp-config.php file for you.
- Upload the WordPress files to the desired location on your web server:
- If you want to integrate WordPress into the root of your domain (e.g. http://example.com), move or upload all contents of the unzipped WordPress directory (excluding the WordPress directory itself) into the root directory of your web server.
- If you want to have your WordPress installation in its subdirectory on your website (e.g. http://example.com/blog), create the Blog Directory on your server and upload the contents of the unzipped WordPress package to the directory via FTP.
- Note: If your FTP client has an option to convert file names to lower case, make sure it’s disabled.
- Run the WordPress installation script by accessing the URL in a web browser. This should be the URL where you uploaded the WordPress files.
- If you installed WordPress in the root directory, you should visit: http://example.com
- If you installed WordPress in its subdirectory called Blog, for example, you should visit: http://example.com/blog
- Create a free account on WooCommerce.com
- Sign-up for an account on WordPress.com and WooCommerce.com
- Select from:
- A pre-installed solution with a trusted host
- Auto-installing WooCommerce if you have a WordPress site already
- Download the zip file and do it yourself
- Download the WooCommerce plugin
- Download the plugin
- Go to your website
- Go to: Dashboard > Plugins > Add New > Upload
- Select the downloaded plugin
- Install
- Activate
- Search for the WooCommerce plugin from within your website
- Go to your website
- Go to: Dashboard > Plugins > Add New > Search Plugins
- Search for “WooCommerce”
- Install
- Activate
WordPress Ecommerce Themes
Customizing Your Ecommerce Store with WordPress Themes Firstly, WordPress ecommerce themes need to be selected in accordance with the ecommerce plugin. Technicalities mentioned above should not take much of your time, and we know they can be tedious, but they are addressed, you can start with the fun part. This means getting your website customized and choosing how your products will look on your ecommerce store. To manage the look of your website, you’re going to have to choose a WordPress Theme. With over 10,000 WordPress Themes available, it’s quite difficult for beginners to find the best WordPress Theme for their needs. Often users wonder if there are WordPress Themes that fit all purposes. There are. WordPress Themes can be used on almost any website to suit different types of projects from blogs to websites while enhancing your business growth. Choosing a theme can be difficult since there are so many to choose from. But adding a Theme to your ecommerce is an easy task. It’s easy to add a Theme from the dashboard. You can look up the "latest" or "most popular" to get some ideas if you're not in the mood for browsing. Once you've chosen the right one, you can simply click to add it to your ecommerce.Astra
 Astra is a WordPress theme that is clean and free with full WooCommerce support and flexible customization options. It includes a modern homepage layout with several widget-ready areas to quickly drag and drop web widgets. It supports all common page builder plugins to create custom WordPress templates. The theme setup is quick and convenient for beginners.
Maintenance and support
Astra was developed by Brainstorm Force — a WordPress development company with more than 10 years of operation and over 60 employees. Given the solid free edition, most users of WordPress who use Astra on a live website should eventually upgrade to Astra Pro. It provides users with premium support and hundreds of new styling and design choices from just $59 per year.
Those who choose an agency package can also use website templates labeled as ' Agency ' and install other premium Brainstorm Force plugins. Support for page developers is a major selling point for Astra, as many WordPress themes have not been built with modern page developers in mind.
Customization options
Astra is a stunning WordPress theme for portfolios, blogs, companies, ecommerces and more. The free version is used on over 200,000 websites and has amazing support for WordPress page builder plugins — enabling you to customize the entire website through the WordPress customizer theme.
SEO and performance
Its super lightweight and developers say a website using Astra will load in less than half a second with default WordPress information. To do this, they tested multiple steps, including disabling jQuery and keeping assets under 50 kb.
Astra is a WordPress theme that is clean and free with full WooCommerce support and flexible customization options. It includes a modern homepage layout with several widget-ready areas to quickly drag and drop web widgets. It supports all common page builder plugins to create custom WordPress templates. The theme setup is quick and convenient for beginners.
Maintenance and support
Astra was developed by Brainstorm Force — a WordPress development company with more than 10 years of operation and over 60 employees. Given the solid free edition, most users of WordPress who use Astra on a live website should eventually upgrade to Astra Pro. It provides users with premium support and hundreds of new styling and design choices from just $59 per year.
Those who choose an agency package can also use website templates labeled as ' Agency ' and install other premium Brainstorm Force plugins. Support for page developers is a major selling point for Astra, as many WordPress themes have not been built with modern page developers in mind.
Customization options
Astra is a stunning WordPress theme for portfolios, blogs, companies, ecommerces and more. The free version is used on over 200,000 websites and has amazing support for WordPress page builder plugins — enabling you to customize the entire website through the WordPress customizer theme.
SEO and performance
Its super lightweight and developers say a website using Astra will load in less than half a second with default WordPress information. To do this, they tested multiple steps, including disabling jQuery and keeping assets under 50 kb.
Neto
 Neto by CSSIgniter - Premium WooCommerce WordPress theme for online and all kinds of sellers of products. This is a best-selling WordPress eCommerce prototype for 2017 and for a long time it will certainly continue to be on top of the list because of its unique features.
If you want to reach online customers as a seller or merchant then this is the right time to start your store. This allows you to sell goods in two ways: either starting a niche-specific shop or sell goods from several niche shops.
Maintenance and support
One of the greatest benefits for this theme is their 24/7 support and updates Including WooCommerce support and visual composer support.
Customization options
All the theme options have been merged with the customizer for WordPress, so there is one place to access all the options. To set up a Header, Single Post, Material, Shop Site, Colors, Fonts, and whatever part you want to customize, you can use customizer. Therefore, choosing right or left sidebar layouts, hero image sections, will take very little time.
The website gives you the international format of Boxed and Full-Width. You can choose to view preceding/next articles, related posts, tags, comments, single posts categories. It also helps you to pick the blog page sidebar template. It offers custom widgets as well.
SEO and performance
As with any theme, making sure the SEO is done correctly is very critical. There are two plugins that you can use to ensure your theme is SEO optimized. The plugin Yoast Premium SEO and the plugin WP Meta SEO.
Neto by CSSIgniter - Premium WooCommerce WordPress theme for online and all kinds of sellers of products. This is a best-selling WordPress eCommerce prototype for 2017 and for a long time it will certainly continue to be on top of the list because of its unique features.
If you want to reach online customers as a seller or merchant then this is the right time to start your store. This allows you to sell goods in two ways: either starting a niche-specific shop or sell goods from several niche shops.
Maintenance and support
One of the greatest benefits for this theme is their 24/7 support and updates Including WooCommerce support and visual composer support.
Customization options
All the theme options have been merged with the customizer for WordPress, so there is one place to access all the options. To set up a Header, Single Post, Material, Shop Site, Colors, Fonts, and whatever part you want to customize, you can use customizer. Therefore, choosing right or left sidebar layouts, hero image sections, will take very little time.
The website gives you the international format of Boxed and Full-Width. You can choose to view preceding/next articles, related posts, tags, comments, single posts categories. It also helps you to pick the blog page sidebar template. It offers custom widgets as well.
SEO and performance
As with any theme, making sure the SEO is done correctly is very critical. There are two plugins that you can use to ensure your theme is SEO optimized. The plugin Yoast Premium SEO and the plugin WP Meta SEO.
Shoppe
 So how can you set up and create an ecommerce page in a day? Using the Shoppe theme, of course. You can choose from 7 different demo sites with just one click. Adjust your online shop's appearance. The themes range from a jewelry store, trendy clothing page for style, to a minimal and colorful online shop of furniture or crafts.
Maintenance and support
Full Support is available from Themify.
Customization options
Design nearly every theme item from header to footer. Simply click and choose, and see the preview live. No need for CSS coding. For font style, you can choose more than 600 + Google Web Fonts.
SEO and performance
The theme is SEO optimized, carefully coded with search engine optimization (SEO) best practices in mind.
So how can you set up and create an ecommerce page in a day? Using the Shoppe theme, of course. You can choose from 7 different demo sites with just one click. Adjust your online shop's appearance. The themes range from a jewelry store, trendy clothing page for style, to a minimal and colorful online shop of furniture or crafts.
Maintenance and support
Full Support is available from Themify.
Customization options
Design nearly every theme item from header to footer. Simply click and choose, and see the preview live. No need for CSS coding. For font style, you can choose more than 600 + Google Web Fonts.
SEO and performance
The theme is SEO optimized, carefully coded with search engine optimization (SEO) best practices in mind.
Hestia
 Hestia is one of WordPress's most popular themes and is perfect for both developers and creative thinkers. The functionalities range from event organizers to food and beverage manufacturers to business world professionals across various enterprises. It is also popular among consultants and ideal for blogging as well. Some might even argue that this is 2019's most well-known theme.
Maintenance and support
WordPress offers support and simple one-click updates. And you get access to the docs, forum and video tutorials as well.)
Customization options
Hestia's beautiful material design has been developed for all major sections of your page. Tweak the dashboard or the Customizer's ready-made templates of the website. Enjoy the versatility of a template that works with websites that are basic or complex.
SEO and performance
This theme comes with an SEO-ready structure, plus a clean and optimized source code. It’s easy to set up, built for performance and uncompromised speed.
Hestia is one of WordPress's most popular themes and is perfect for both developers and creative thinkers. The functionalities range from event organizers to food and beverage manufacturers to business world professionals across various enterprises. It is also popular among consultants and ideal for blogging as well. Some might even argue that this is 2019's most well-known theme.
Maintenance and support
WordPress offers support and simple one-click updates. And you get access to the docs, forum and video tutorials as well.)
Customization options
Hestia's beautiful material design has been developed for all major sections of your page. Tweak the dashboard or the Customizer's ready-made templates of the website. Enjoy the versatility of a template that works with websites that are basic or complex.
SEO and performance
This theme comes with an SEO-ready structure, plus a clean and optimized source code. It’s easy to set up, built for performance and uncompromised speed.
WordPress Ecommerce Plugins
The internet has plugins that you can use to add to your WordPress ecommerce website. It is essential to find the correct choice for your project, as not all plugins are intended for each website. Some plugins are intended specifically for digital products that can be purchased online by your website visitors, while others are more suitable for hard goods or tangibles. With your project in mind, you must list out which features your ecommerce will need to function properly. There are numerous options that you might want to add to your online store, but for now, we have listed a few that are essential when setting up your website.- Payment solutions– By default or by extension, your ecommerce plugin should support your preferred payment gateways. You can choose from a large directory of payment providers.
CCBill Tip The CCBill payment gateway plugin for WooCommerce allows you to easily configure and accept CCBill payments on your WooCommerce-enabled WordPress Website Learn More at https://ccbill.com/partners/integration-partners-detail/woocommerce-2/
- Customization – The design of your store is the first interaction between your customer and your company. Make sure you're projecting your concept for your ecommerce look and brand. There is a large library template available for this purpose.
- Plugins and Extensions – Check for third-party applications such as email advertising services, CRM software, billing software, etc. You will need these instruments to more effectively manage and support your ecommerce business.
- Customer Support – Make sure that there are user support options available for all of the above. In the long run, making sure that you have strong assistance, can save you a lot of time and cash.
How to Import Products in WordPress Store
What happens when you finally have your store set up? Now is the fun part, because it is time to add your products and set pricing. To upload products to your shopping cart, follow the steps below:- Adding your products should not be too complicated, simply go to your wp-admin panel, and click on Products and Add New.
- A page will open, and here you can add a Description, Name and an Image to your product and add as much detail as you like.
- You should also be able to add Pricing and the availability of your product, as well as any information about Shipping and Shipping Fees.
- Once everything looks perfect, you can publish the updated page and the new product will be live and available on your website.

How to setup WordPress Shopping Carts and Payment Gateways
There are several simple steps to help get your Shopping Cart and Payment Gateway set up on your WordPress website. All you need is a Shopping Cart Plugin and a Payment Gateway to aid your customers at checkout. The steps are listed below: Sign in to your Admin Panel and under Plugins click on Add New.- You will be presented with a search option where you can search for Shopping Carts at which point WooCommerce should appear as a top result. You can install it from here.
- The Shopping Cart Plugin will be downloaded automatically, and then once installed you can activate it by clicking a button.
- This will bring you to the plugin's original Setup Wizard. You will be shown the Store Setup section where you can configure the location of your store and other information. To continue to the next phase, select the suitable alternatives depending on the target audience and press the Let's Go key.
- The Setup Wizard’s next step is the setup of your payment type. You can choose from the most popular payment processors for your WordPress and even use one or more of them. Once you have chosen the desired Payment Processor, click the Continue key to continue to the next page.
- Shipping is the next configuration and this is done after deciding on a payment option. Choose your setting and continue.
- Next you are prompted to add your Extras, where you can choose a StoreFront Theme that is designed specifically for WooCommerce by Woocommerce and is a recommended plugin.
How to Setup WordPress Analytics
As with any other website, a WordPress website is no different and every owner will want to know how their website is performing, including the visit rate, bounce rate, and views. You will also want to know the product pages where your buyers are staying the longest and where they stop scrolling. Installing Google Analytics on your WordPress allows you to do all this. It is essential to your success to know how your audience interacts with your website. Your traffic statistics are the best way to understand your crowd, and this is what Google Analytics offers free of charge. To set up Google Analytics on your website and get started: Make an account with Google Analytics Google Analytics is accessible free of charge and you only need to sign up for a Google or Gmail account. To build your Google Analytics profile, pursue the step-by-step directions below. Step 1: Create a Google Account Logging in with your Google Account will be necessary for the next steps. Either sign up for an account or you can use your existing Google Account to sign in. Step 2: Sign in Once you enter your login credentials you’ll be taken to Google’s homepage. Look for and click on the Google Analytics icon. You might be prompted to log in again, even if you're logged in to Google. Step 3: Google Analytics for your Website Once you are in Google Analytics, you will be asked if you want Google Analytics for your Website or Mobile App? We recommend you choose the Website. Enter the account name followed by information about your website. Click on Get Tracking ID and agree to the terms and services. Step 4: Fill out your Website Information Once you have your unique Google Analytics Tracking Code, you can copy it and enter it into your WordPress website. Step 5: Add the Tracking Code to the Website Sign in to your WordPress Console and go to Appearance, click on Editor and then on the header.php file. This is where you will paste the Tracking Code you copied earlier. Paste in and close with . You can then click on Update. Voila!How to Setup Abandoned Carts Emails
Abandonment is an ecommerce word used to define when a visitor on a web page leaves that page before completing the required action, or conversion. Examples of Abandonment include Abandonment of the Shopping Cart, referring to when customers add products to their online shopping cart but leave the cart page without finishing the purchase. The Abandoned Cart Email concept isn't new. If someone leaves their products in their Shopping Cart for a certain period, triggering an email instantly reminds the buyer that they left something behind and/or offers to sweeten their purchase with a deal to close the purchase. These emails work. Whatever the reason that your customer left your store, you've only had a few hours to win them back. To do this you should ask for their email address as the first phase in your checkout process. This guarantees that you immediately collect your contact data. No email means no follow-up. Your initial email should be sent to the customer who has abandoned their cart within one to two hours. It has been shown that this real-time re-marketing approach generates 105% more income than the same email sent 24 hours later. Sending out emails to your customers can help persuade them to come back and finish their purchase:
First Email (About 1-2 hours)
You need to send your first email right away and it should be a pleasant reminder like, "Oops! Was there a cart issue?" Be sure that your message is not pushy when you send your first email. You have already risked frustrating your prospective client by sending an email right away. Aim to assist, not to sell to the client. Keep the mood light, maybe they had tech issues; maybe the method took too long or their payment was declined. Just check in to make sure things are all right. Try to present solutions and options and ask for feedback.
Second Email (About 24 hours)
Wait about 24 hours for your second email. A second email sent 24 hours following abandonment brings you back to the forefront of their mind and has an average conversion rate of 17.7%. If you wait for another day, this rate will fall from 10% to 7.7%. This email should reassure your customer, but also remind them of what they might be missing if they do not complete their purchase. Let shoppers understand that their item is still available, but their cart will expire shortly, and any discounts or availability are not be guaranteed if they wait to purchase.
Third Email (About 1 week)
Should you send this last message, or shouldn't you? Statistics show that there is little return on sending the third email. Also, you don't want to send too many messages and risk being marked as spam, or worse, turning off this potential customer from returning to your site.
If you chose to send a third email, it should aid the customer in finishing their shopping and checking out. There are numerous ways that you can appeal to them, from giving discounts to offers. This should be done occasionally but the customer should not get used to this. You can try sending different emails to different customers to see which ones get the best responses.
Download the Abandoned Cart Lite Plugin to start sending Abandon Cart Emails in your WordPress store, you can do this by:
Sending out emails to your customers can help persuade them to come back and finish their purchase:
First Email (About 1-2 hours)
You need to send your first email right away and it should be a pleasant reminder like, "Oops! Was there a cart issue?" Be sure that your message is not pushy when you send your first email. You have already risked frustrating your prospective client by sending an email right away. Aim to assist, not to sell to the client. Keep the mood light, maybe they had tech issues; maybe the method took too long or their payment was declined. Just check in to make sure things are all right. Try to present solutions and options and ask for feedback.
Second Email (About 24 hours)
Wait about 24 hours for your second email. A second email sent 24 hours following abandonment brings you back to the forefront of their mind and has an average conversion rate of 17.7%. If you wait for another day, this rate will fall from 10% to 7.7%. This email should reassure your customer, but also remind them of what they might be missing if they do not complete their purchase. Let shoppers understand that their item is still available, but their cart will expire shortly, and any discounts or availability are not be guaranteed if they wait to purchase.
Third Email (About 1 week)
Should you send this last message, or shouldn't you? Statistics show that there is little return on sending the third email. Also, you don't want to send too many messages and risk being marked as spam, or worse, turning off this potential customer from returning to your site.
If you chose to send a third email, it should aid the customer in finishing their shopping and checking out. There are numerous ways that you can appeal to them, from giving discounts to offers. This should be done occasionally but the customer should not get used to this. You can try sending different emails to different customers to see which ones get the best responses.
Download the Abandoned Cart Lite Plugin to start sending Abandon Cart Emails in your WordPress store, you can do this by:
- Download and Setup Abandoned Cart Lite
- Term What you Consider an “Abandoned” Cart
- Generating your WordPress Abandoned Cart Emails