Introduction
Angular is a comprehensive front-end development framework. You can use Angular to streamline the creation, implementation, and testing of your web applications. It is based on JavaScript, and developers who are already proficient in HTML, CSS, and JavaScript find Angular easy to use.
Learn how to install Angular on Windows and create a local environment for developing web applications.
Install Angular on Windows
Follow the steps below to easily install Angular on Windows.
Step 1: Install Node.js
Angular bases its build environments on Node.js, and many of its features depend on NPM packages. Conveniently, the Node Package Manager (NPM) client is part of the default Node.js package.
To install Node.js:
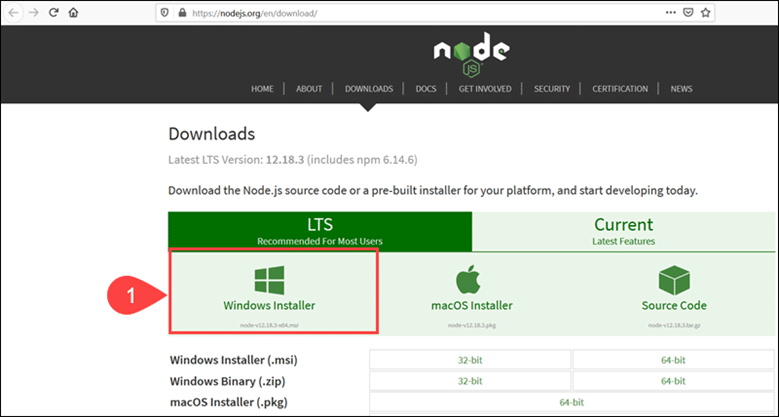
1. Visit the official Node.js page and download the latest Node.js Windows Installer.
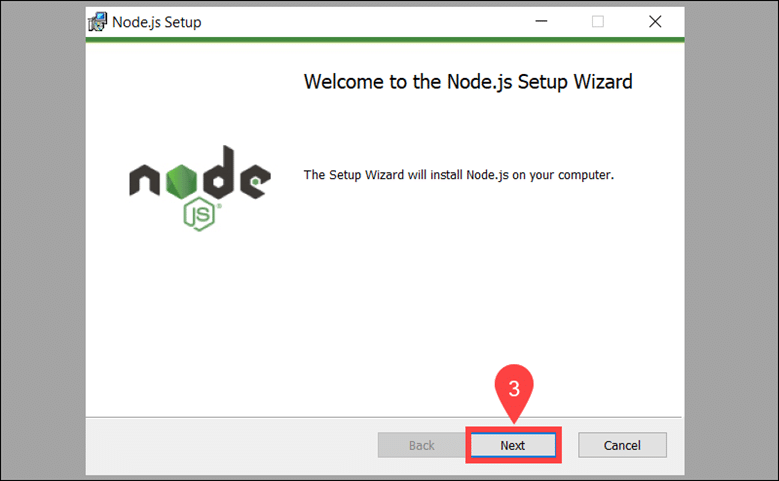
2. Access the download location and double-click the Windows Installer Package.
3. Select Next on the initial Node.js Setup Wizard screen.
4. Accept the License Agreement and click Next.

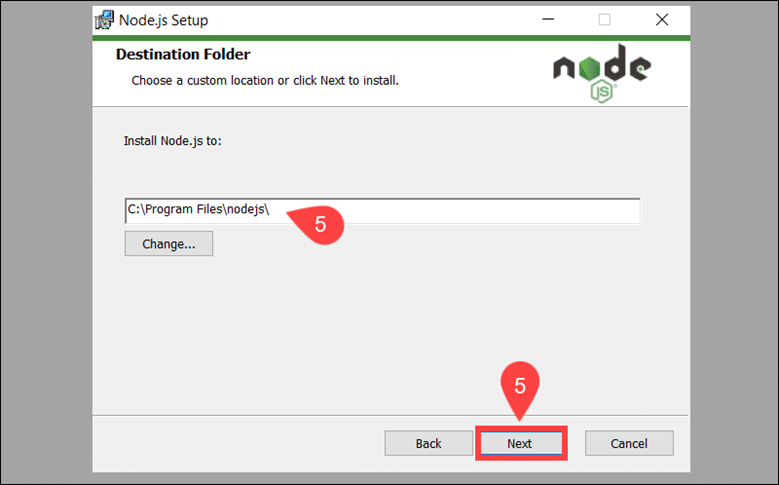
5. Define the destination folder for the installation and select Next.
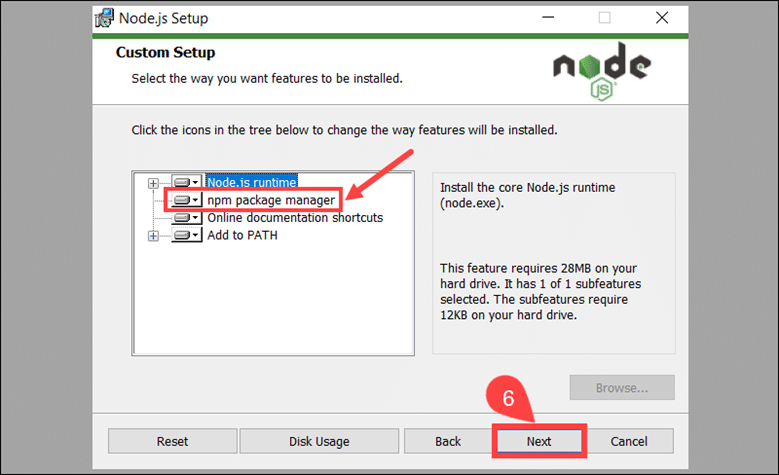
6. You can customize how to install available features. Make sure that the npm package manager is part of the installation bundle. Click Next to proceed.
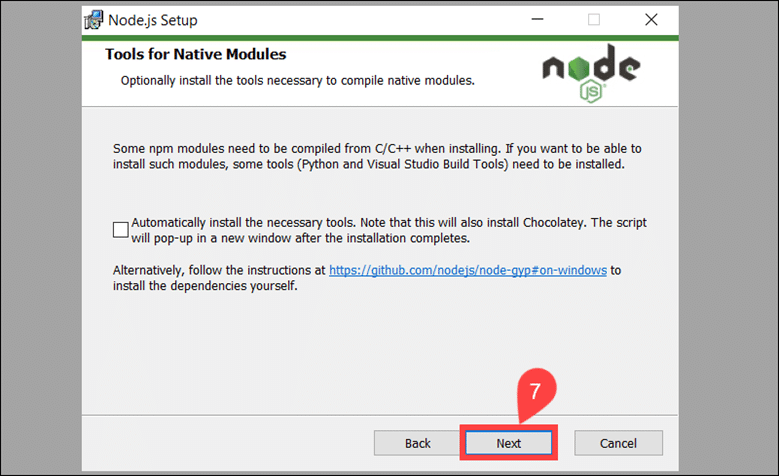
7. Check the box if you would like to install tools for compiling native modules automatically. They are not mandatory and require an additional 3 GB of space. Select Next to continue.
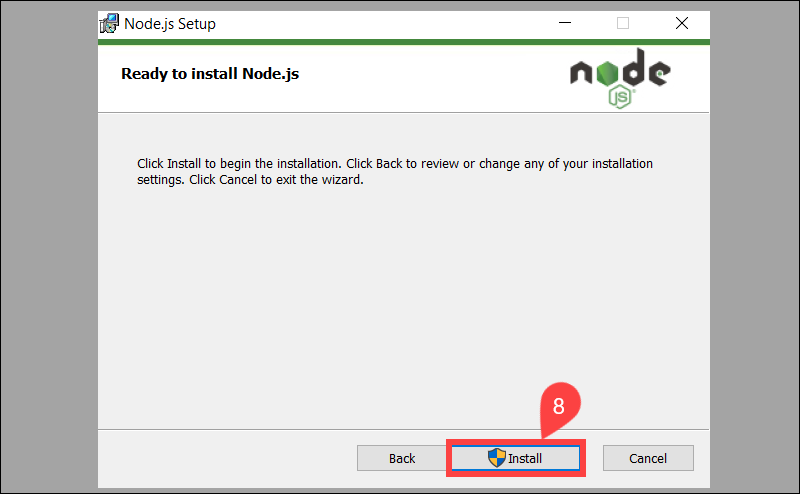
8. Click Install to start the installation process.
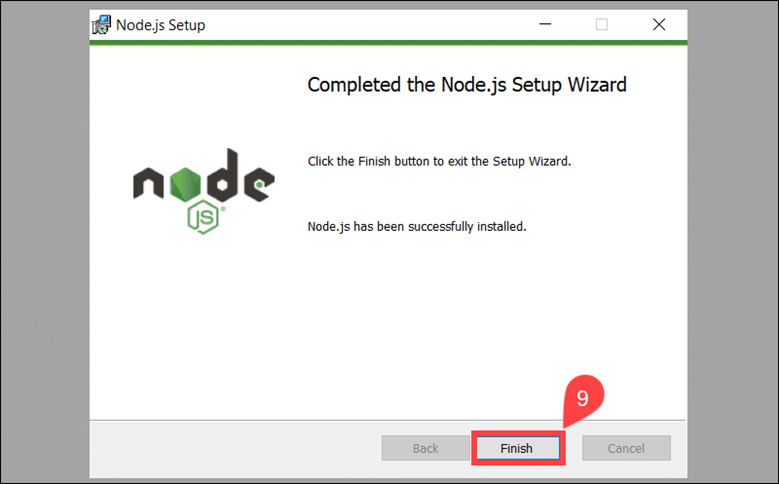
9. Once the installation is complete, select Finish to exit the Setup Wizard.
10. Access the Windows Command Prompt (or PowerShell) and check the Node.js version:
node -v
The system confirms that Node.js v12.18.3 is installed.

11. To verify the NPM version, use the following command:
npm -v
The output shows you have installed NPM version 6.14.6.

If you need to install a specific version, or update an existing installation, read the detailed guide on how to install Node.js and NPM on Windows.
Step 2: Install TypeScript (Optional)
TypeScript makes JavaScript easier to maintain and understand. You can install TypeScript as an NPM package. The installation is optional, as it is not a prerequisite for developing an Angular application.
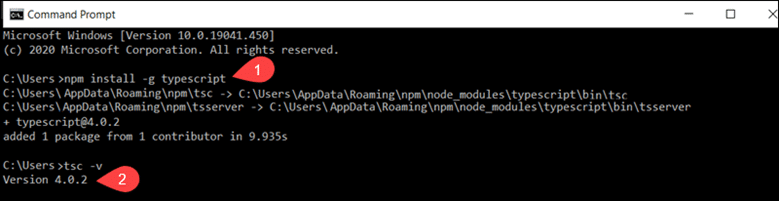
1.. Access the Windows Command Prompt and install TypeScript with the following command:
npm install -g typescript
2. Once the installation is complete, verify the TypeScript version:
tsc -v
In this example, the TypeScript version is 4.0.2.
Step 3: Install Angular CLI
The Angular command-line interface (CLI) tool allows you to initialize, develop, and manage your Angular applications. You can use the NPM package manager to install the Angular CLI.
1. Access the Windows Command Prompt and enter the following command:
npm install -g @angular/cli
During the installation process, the system asks you if you would like to share usage data with the Angular Team. You are free to answer either Yes or No as it does not affect functionality.
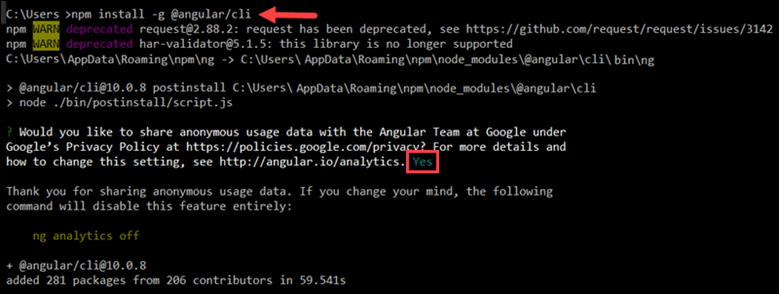
2. Once all packages have been added, verify the installed version:
ng --version
The Angular CLI version is 10.0.8.

Step 4: Create Angular Project
1. Use the Angular CLI to start a new Angular project. It this example, the name of the project is kitchen-sink. You are free to use the name of your choice for your project name. Type the following command in your Windows Command Prompt:
ng new kitchen-sink
Before proceeding, you can customize the application. Define if you would like to use Angular routing and choose a stylesheet format. These settings can be edited at a later point.
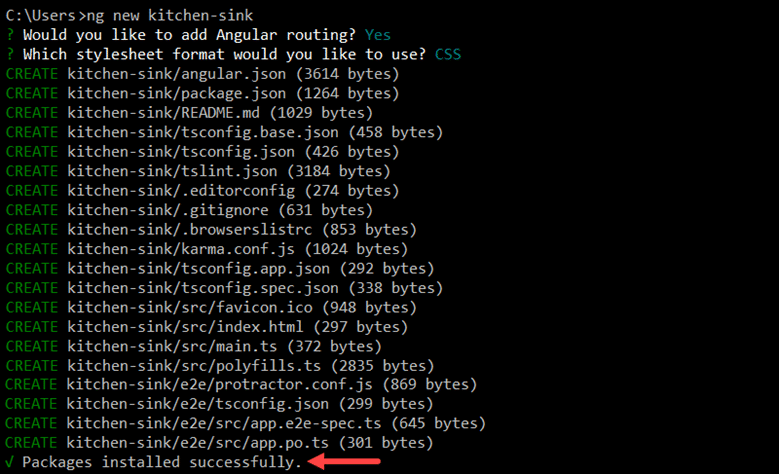
The system takes a few moments to create the project. Once it finishes, you see the “Packages installed successfully” message.
2. Access your project’s root folder (kitchen-sink in this example) from the Windows Command Prompt and enter the following command:
ng serve
The system proceeds to generate the environment for your Angular application.

Keep the Windows Command Prompt running. You can continue using the terminal, and the changes you make will be reflected in the application within your browser.
3. Use any browser to access your Angular local development server on localhost:4200:
You can now start creating new Angular components.

Conclusion
Now you know how to install Node.js, NPM, and the Angular command-line interface on Windows. The initial steps with Angular CLI should not provide too much of a challenge; exploring Angular’s broad assortment of options might take more time.
