Introduction
A successful ecommerce store sells quality products, offers competitive prices, and has a seamless checkout process. However, merchants also need to create an engaging and unique shopping experience.
The PrestaShop open-source platform provides numerous third-party modules and ready-made themes. The themes are easy to install and help merchants design a storefront with a distinct look and feel.
Learn how to install a new PrestaShop theme and turn shopping in your store into a fun and memorable activity.
Why Choose PrestaShop?
Store owners with limited technical expertise can use PrestaShop to build and manage a professional shopping cart website. PrestaShop is ideal for small and medium-sized businesses because it is:
- Open-source and highly customizable.
- Easy to install and maintain.
- Free (with paid premium add-ons).
- Backed up by numerous third-party extensions.
- An integration partner for established payment processors (Amazon Pay, PayPal, First Data, CCBill, etc.).
PrestaShop enables merchants to deploy a comprehensive ecommerce store and start accepting payments in no time. Many essential features are built-in, which considerably reduces the number of work hours spent on development and store design.
PrestaShop Theme Installation Options
PrestaShop themes are compressed in ZIP archives to conserve resources and space. After purchasing a theme from the official PrestaShop page or downloading a free third-party theme, merchants need to save the ZIP archive locally.
Use one of the following 3 methods to import and install a new PrestaShop theme:
- Import and install a theme from your computer.
- Import the theme’s ZIP archive from a public URL.
- Import a theme via an FTP client.
Merchants can install themes using the PrestaShop Admin regardless of the method they choose.
Install PrestaShop Theme From Computer
To install a PrestaShop theme from your computer:
1. Access the PrestaShop Admin.
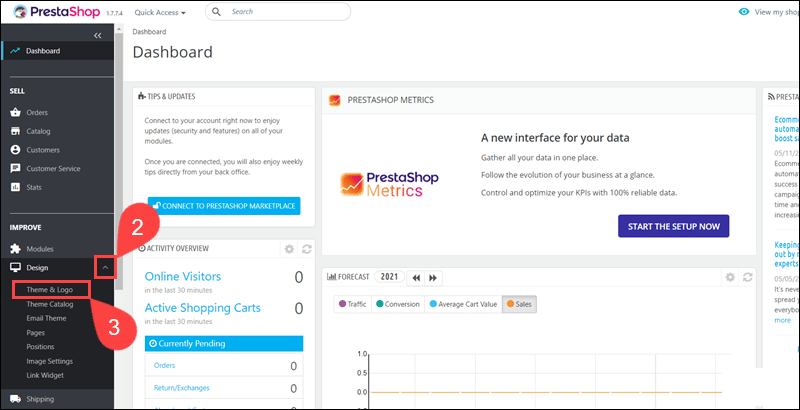
2. Expand the Design menu.
3. Select Theme & Logo.
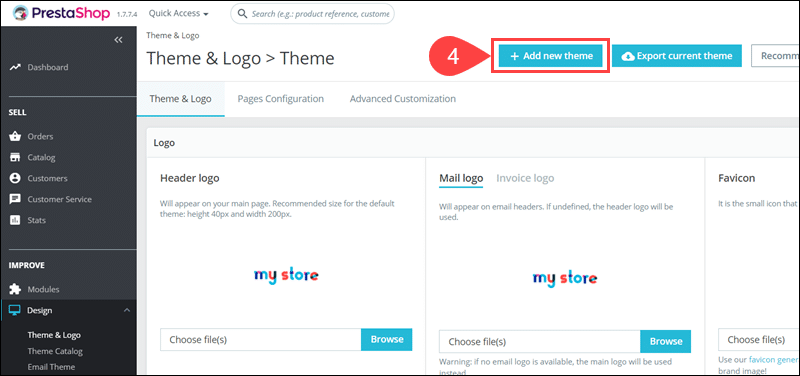
4. Click Add new theme.
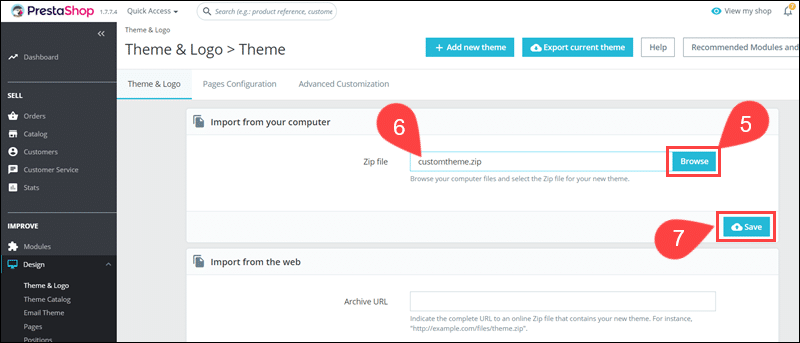
5. Select Browse in the Import from your computer section.
6. Use the file explorer to find the theme’s ZIP archive on your computer.
7. Click Save.
8. Locate the My theme for your-store-name shop section at the bottom of the Theme & Logo page.
9. Place the cursor over the new theme’s thumbnail image and select Use this theme.
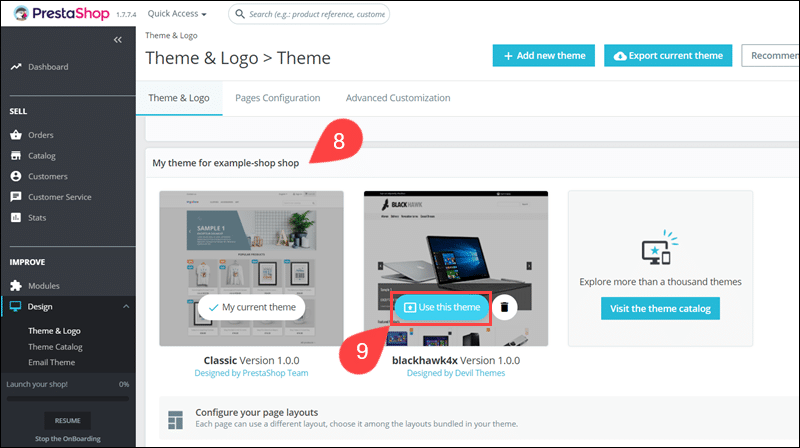
10. Click Yes to apply the new PrestaShop theme.
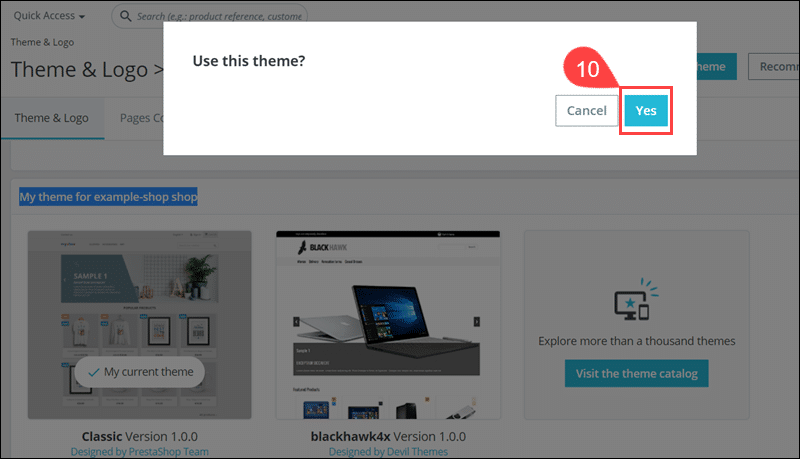
Visit the storefront to check if the new theme was applied and test store functions thoroughly.
Install PrestaShop Theme From Web
To enable and activate the modules you uploaded:
The PrestaShop Admin allows users to import a theme using its public URL:
1. Access the Design drop-down menu.
2. Open the Theme & Logo page.
3. Select Add new theme.
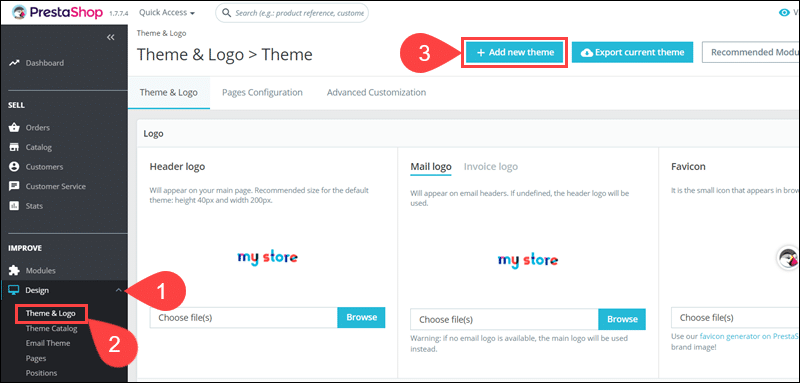
4. Locate the Import from the web section.
5. Paste the URL of the theme ZIP file in the Archive URL field.
6. Click Save to install the theme
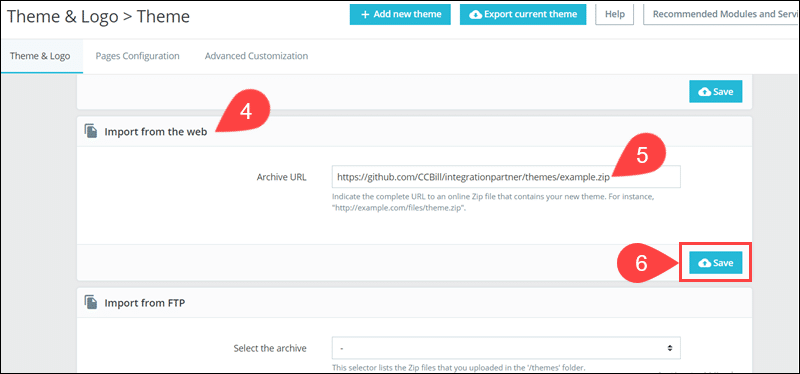
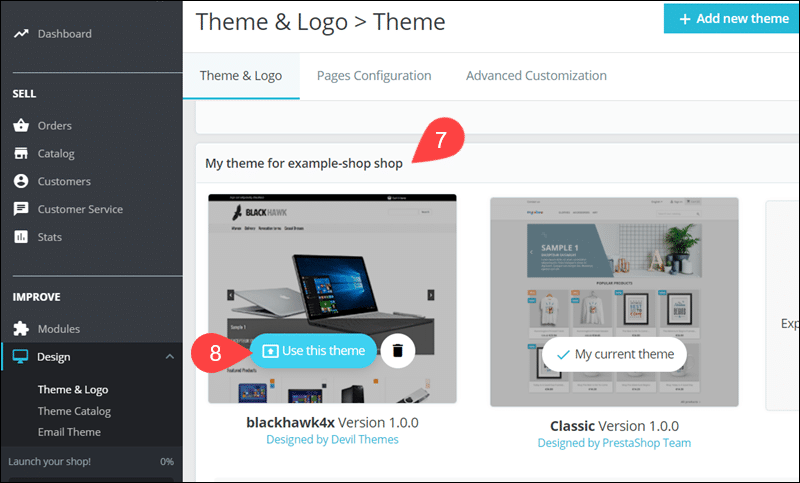
7. Once the installation is complete, find the theme in the My theme for your-store-name shop section.
8. Click Use this theme.
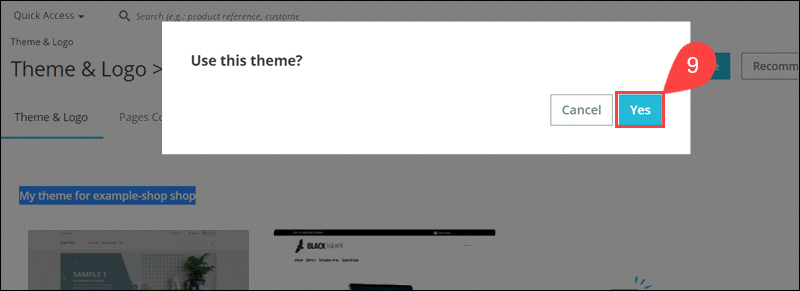
9. Select Yes to start using the new theme.
Access the PrestaShop storefront and verify that the theme is working correctly.
Install PrestaShop Theme via FTP
You can use an FTP Client, like WinSCP or FileZilla, to upload a theme to the PrestaShop store server:
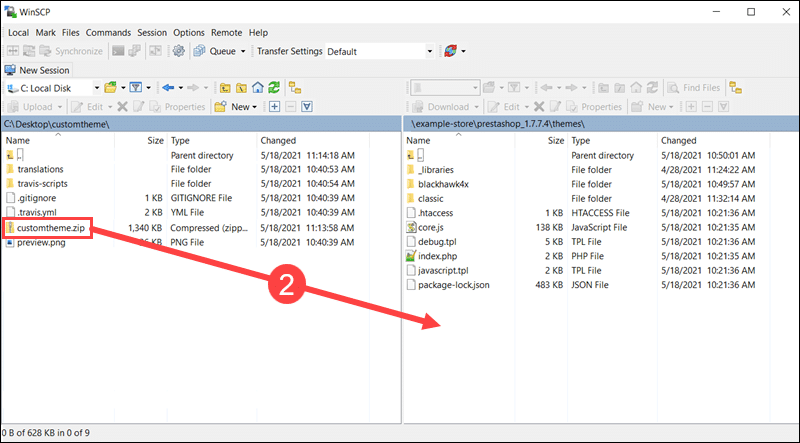
1. Establish a remote connection to the store’s server via a preferred FTP Client.
2. Copy the theme’s ZIP archive to the PrestaShop themes directory.
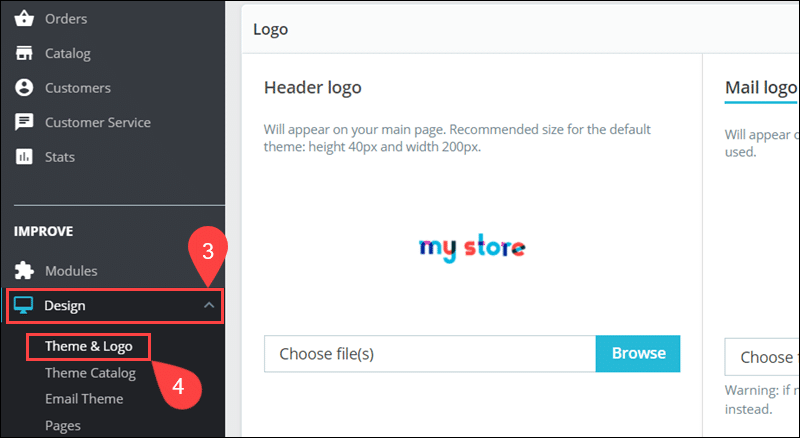
3. Access the Design menu in the PrestaShop Admin.
4. Click Theme & Logo.
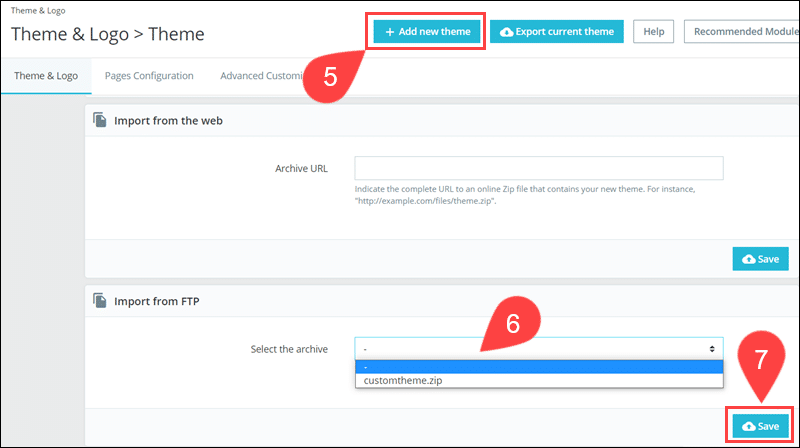
5. Go to Add new theme.
6. Select the previously uploaded ZIP file in the Import from FTP field.
7. Click Save to initiate the installation.
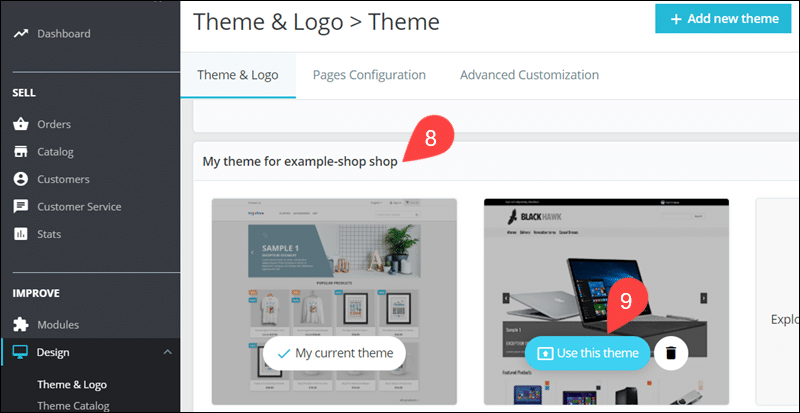
8. Locate the My theme for your-store-name shop section.
9. Click Use this theme on the theme thumbnail image.
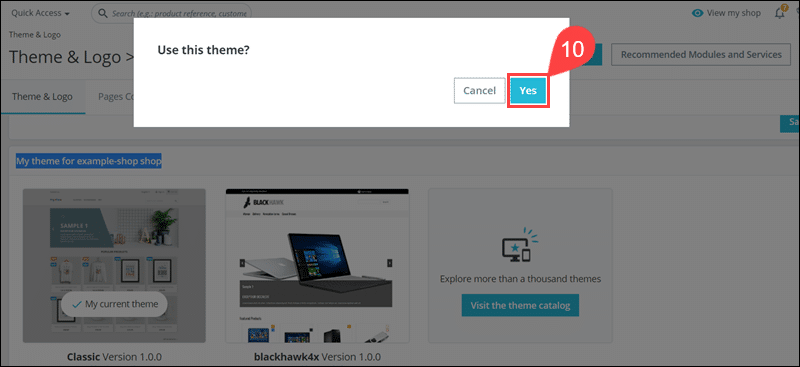
10. Click Yes to use this theme.
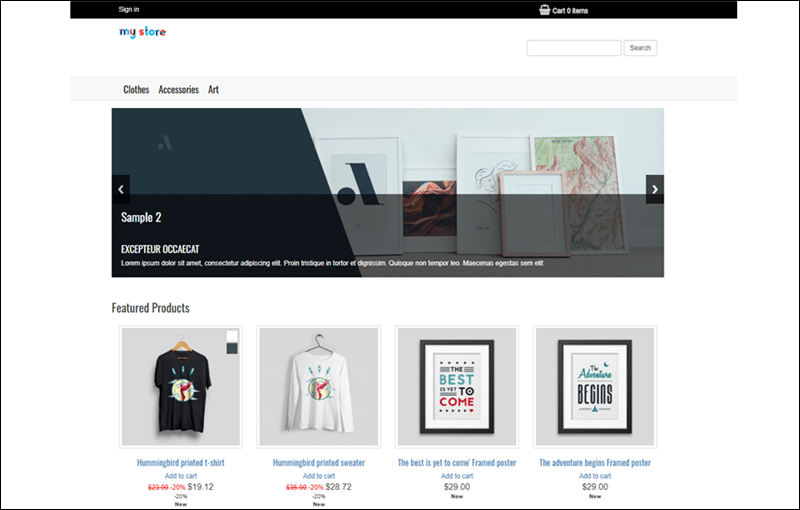
Confirm that the new theme is active by visiting the PrestaShop storefront.
If necessary, customize individual page layouts using the Choose layouts option on the Theme & Logo admin page.
Conclusion
You have successfully installed a new PrestaShop theme using one of the outlined methods. The PrestaShop admin provides many built-in tools for storefront customization.
Use the available features to configure and edit themes and create a unified customer experience across multiple devices and platforms.
