Introduction
An FTP connection enables merchants to transfer files between their local machine and the remote web server.
You need to be able to upload, download, and modify files on the store's server when:
- Installing a new Magento theme.
- Creating a store backup.
- Applying the latest security patch.
- Blocking IP addresses in Magento 2.
Learn how to set up a Magento FTP connection and perform these and other essential store management tasks with ease.
Set up Magento FTP Connection via FTP Client
An FTP client is a third-party application designed to help users set up an FTP connection. They provide a user-friendly interface for transferring files and directories to and from a server.
Before proceeding, install a preferred FTP client (Cyberduck, FileZilla, WinSCP, etc.) on the local (client) computer.
The examples in this guide are presented using WinSCP.
Step 1: Get FTP User Credentials
To establish a connection with the remote server, obtain FTP user credentials from your web host. The required information includes:
- Encryption Type (FTP, SFTP, SCP, etc.)
- Host Name (URL or an IP address)
- Port (The default port number for an SFTP connection is 22)
- Username
- Password
Step 2: Connect To Magento Server
To initiate an FTP session with the Magento server:
1. Open the WinSCP client and enter the FTP credentials on the Login page.
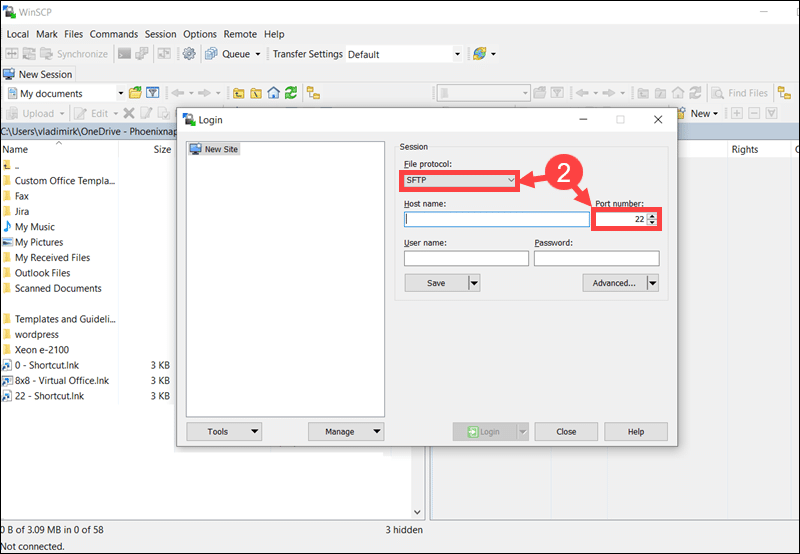
2. WinSCP uses the SFTP transfer protocol and port number 22 by default. Change the file protocol and port number if your web host specified different values.
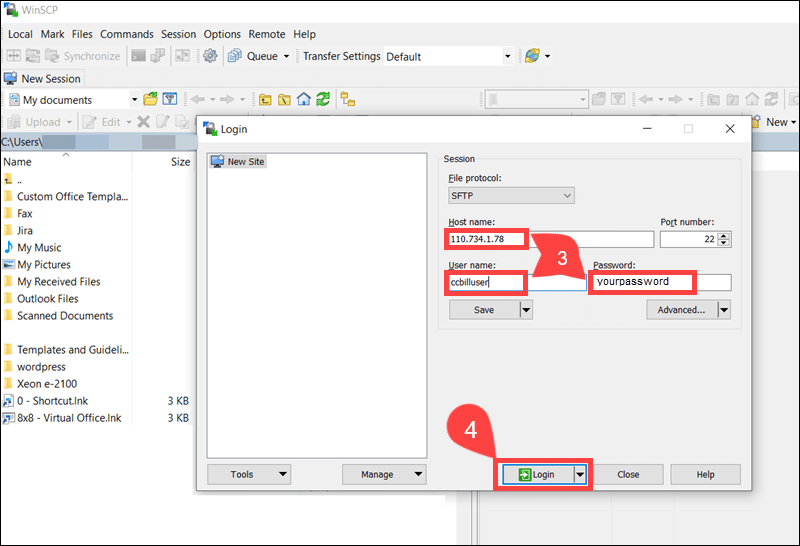
3. Enter the FTP Host name (or IP), User name, and Password.
4. Click Login to access the server.
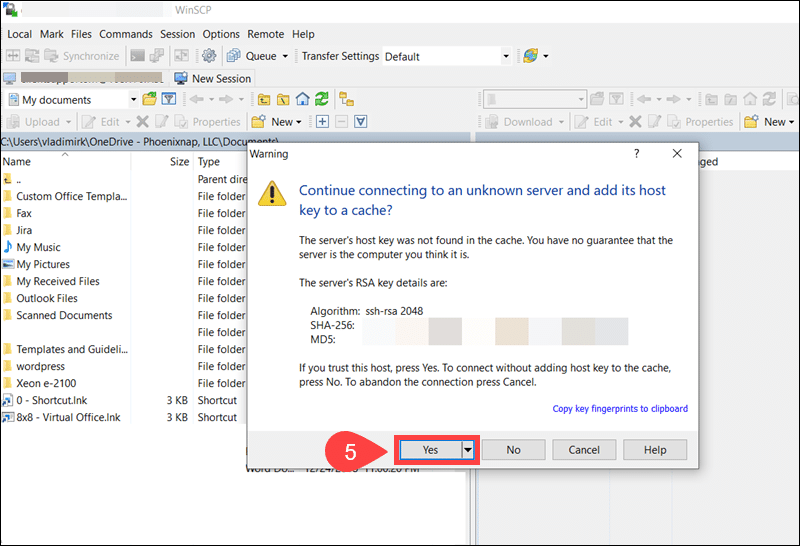
5. WinSCP verifies RSA key details when authenticating a host for the first time. Click Yes to connect and add the server host key to the cache.
6. Once a secure connection is established, the right pane displays a list of files and directories on the remote server.
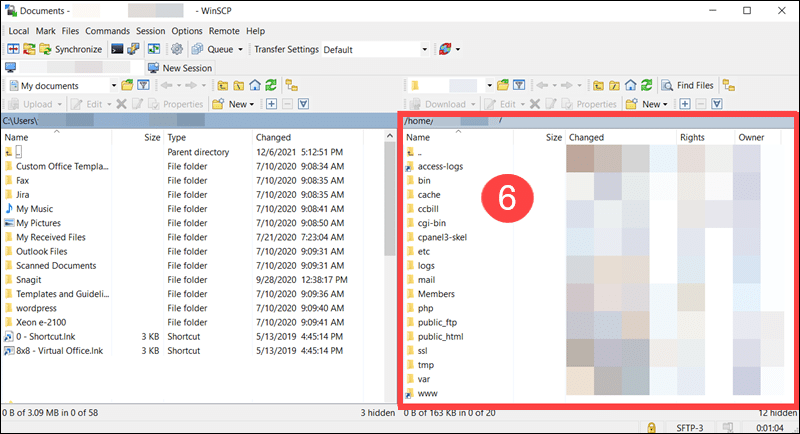
You can add, remove, or edit files as long as the connection is active.
Step 3: Transfer Files Using FTP Connection
An FTP client typically displays two panes. The left client pane shows files on the local machine, while the right, server pane, lists files on the remote computer.
Both sections have a directory tree to allow users to navigate files and directories, much like in a file manager.
To upload files to the Magento server:
1. Access the directory that contains the file you want to upload.
2. Open the target directory in the server pane.
3. Drag and drop the file from the local to the remote pane.
The same principle applies when downloading files. Download a file by dragging the file from the server pane to the local pane.

WinSCP also allows users to drag a file directly from an explorer window into the server pane.
4. Confirm the remote directory path and click OK to upload.
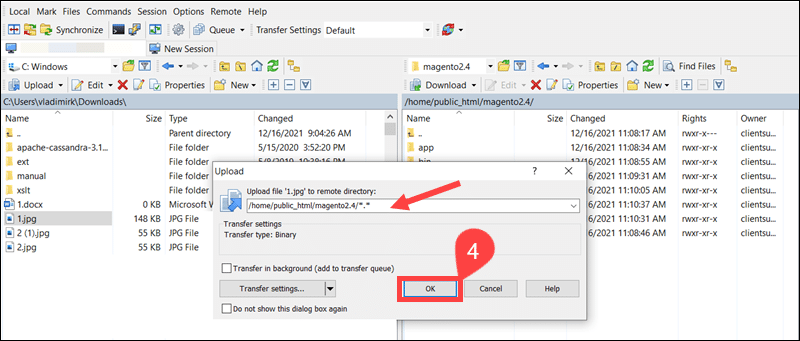
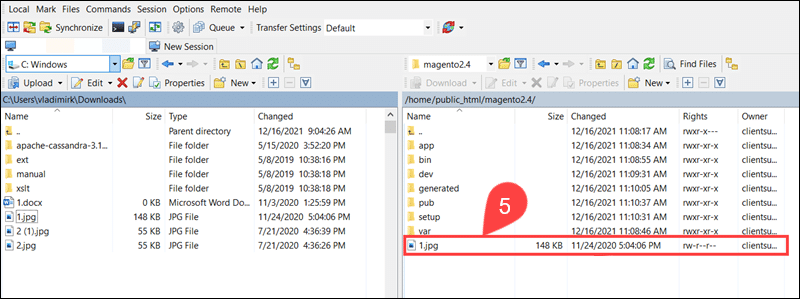
5. The uploaded file is now visible in the server pane on the right side.
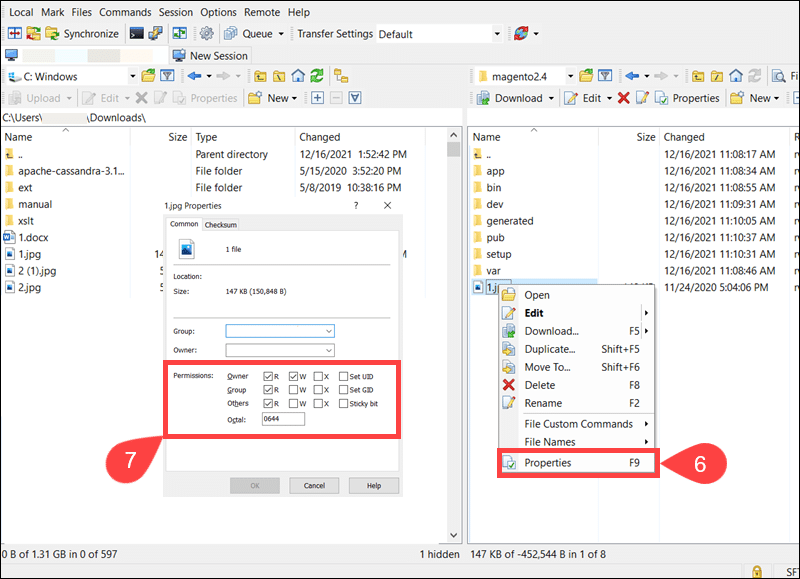
6. Right-click the uploaded file and select Properties to check file permissions.
Incorrect permissions can prevent the website from working properly or lead to severe security issues. For example, setting the file or directory permissions to 777 gives all (unauthorized) users full ownership.
7. If necessary, update the permissions number in the Octal field or check individual boxes in the Permissions section.
Drag-and-drop is a user-friendly feature but can lead to files being uploaded/downloaded to an incorrect directory.
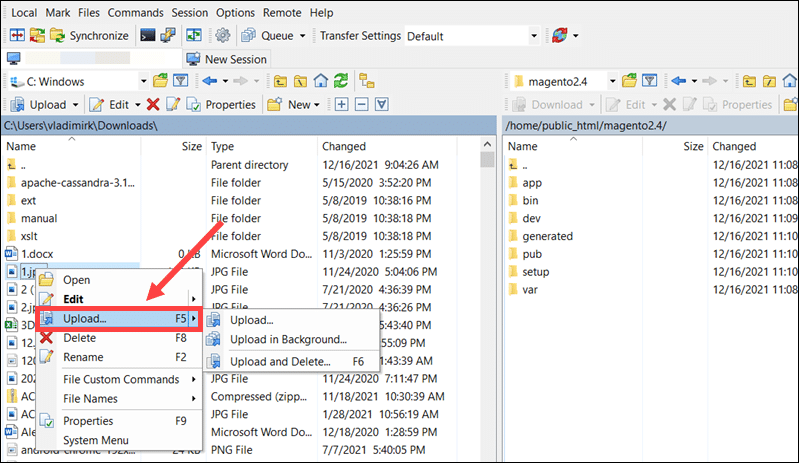
To avoid potential mistakes, right-click a file in the client pane and select Upload instead.
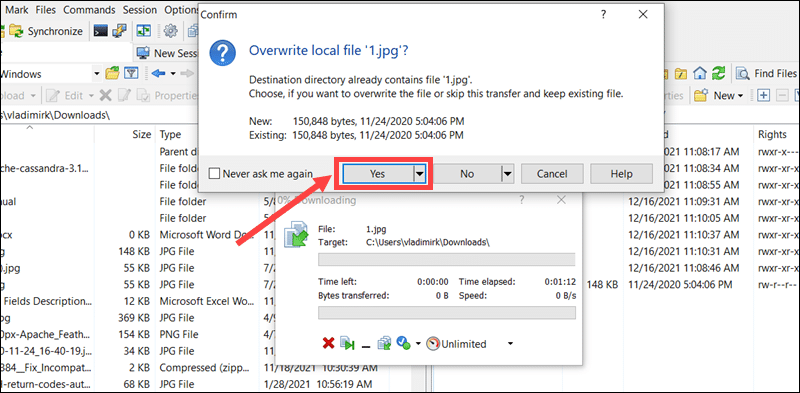
As an additional safeguard, WinSCP also asks users to confirm if they want to overwrite a file when it already exists in the same directory.
Even though WinSCP and other FTP clients provide features that can minimize potential mistakes, it is vital to always back up files before modifying content or updating file permissions on the remote host.
Conclusion
You know how to access your Magento server using an FTP client. It is much easier to implement new Magento features, resolve unexpected server errors, and complete everyday maintenance tasks when you set up an FTP connection.
It is equally as important to take full advantage of the new features available in the latest Magento 2 version. If you are still using Magento 1, find out how to successfully migrate from Magento 1 to Magento 2.
