Introduction
Launching an ecommerce store or updating Magento to the latest version requires lots of preparation and development.
Installing Magento on a local server is an excellent way to explore and test its features. Magento 2.4 is only supported on Linux-based operating systems. However, it is possible to install and configure Magento on a local Windows system.
Find out how to set up a local web server and install Magento 2.4 on Windows.
Setting Up a Local Web Server
Before installing Magento 2.4 on Windows, create a working environment to support Magento's background processes. You need to:
- Set up a local web server using XAMPP.
- Install Composer.
- Install Elasticsearch.
- Enable PHP extensions.
- Create a MySQL database and user.
Step 1: Install XAMPP
XAMPP is a free and lightweight local web development solution. The XAMPP package contains all the elements (Apache, MariaDB, PHP, Perl) you need to create a local webserver.
1. Download a XAMPP package for Windows from the Apache Friends page. Select Download (64 bit) next to the XAMPP version you want to download.
For example, to install Magento 2.4.3, download XAMPP version 7.4.23 / PHP 7.4.23.
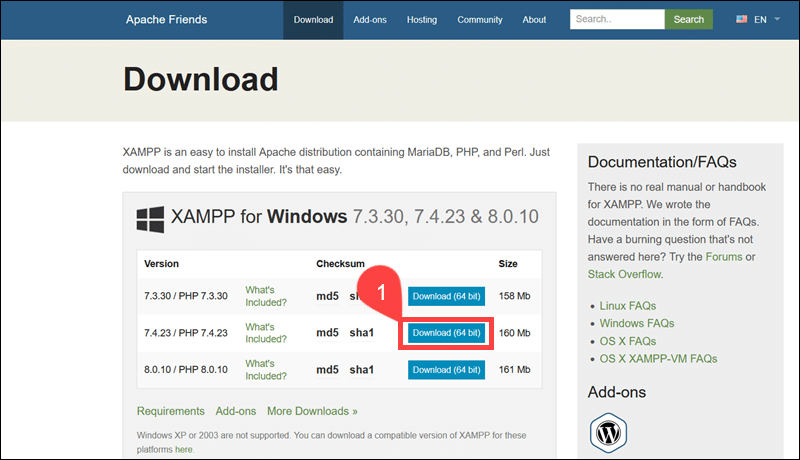
If you plan to install a different version of Magento, check the Magento 2.4 system requirements to determine which XAMPP package has the required PHP version.
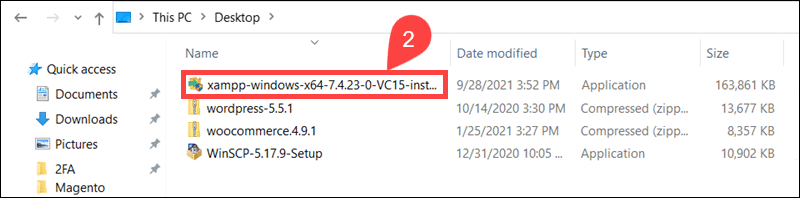
2. Double-click the XAMPP executable file.
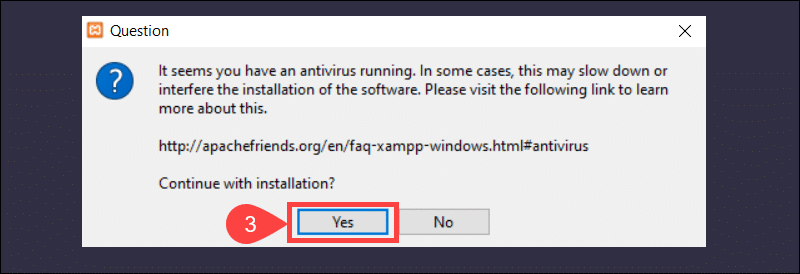
3. Select Yes to continue with the installation.
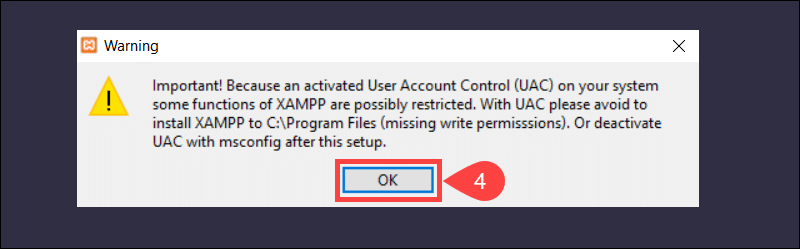
4. Read the warning message and click OK.
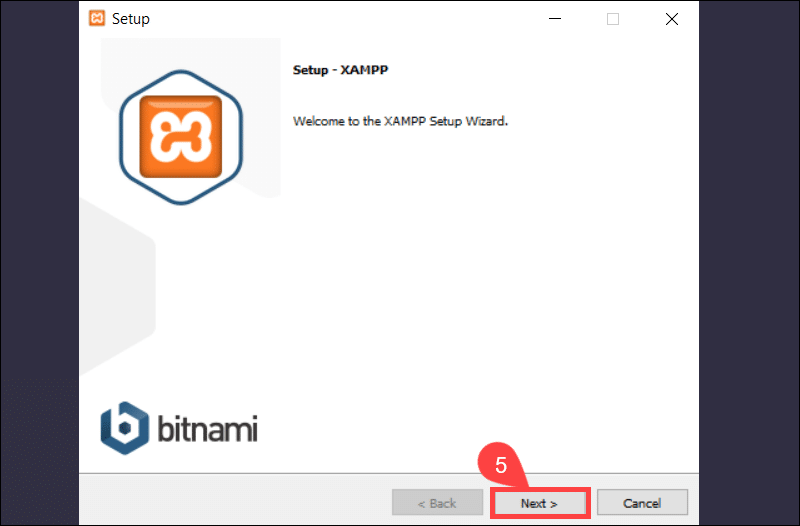
5. Select Next to launch the XAMPP Setup Wizard.
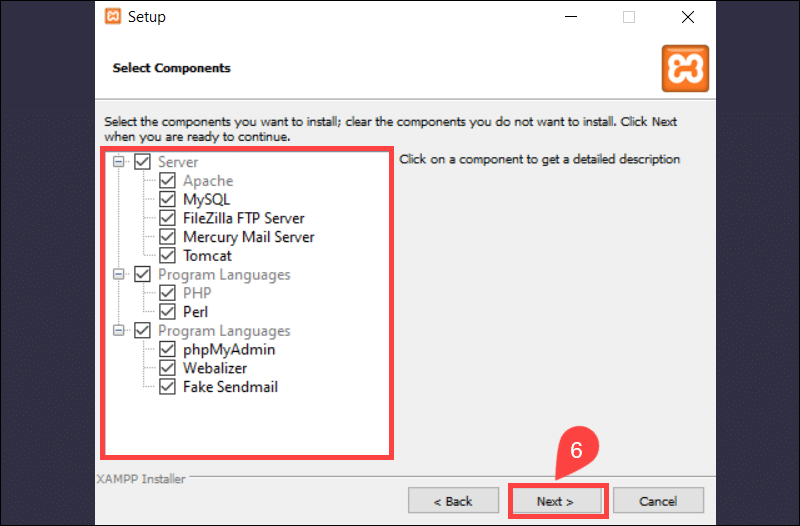
6. Choose which XAMPP components you want to install and click Next. Apache, MySQL, PHP, Perl, and phpMyAdmin are essential for a Magento installation.
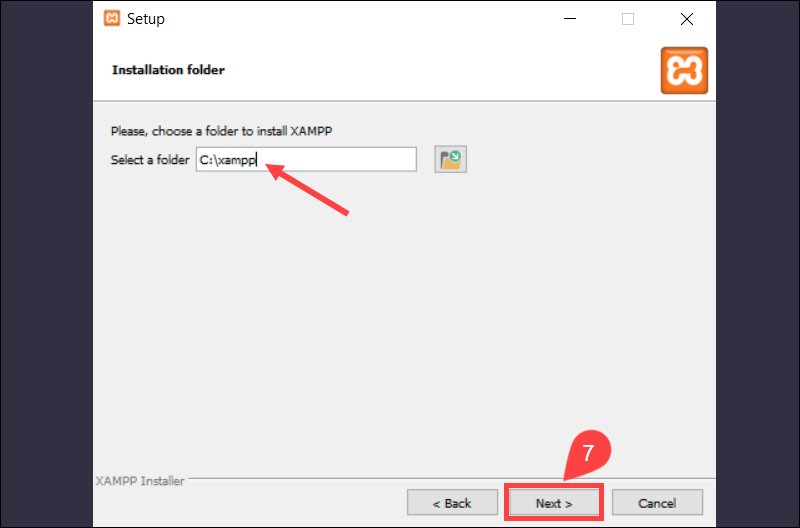
7. Select the XAMPP installation folder and click Next. The default folder for XAMPP is C:\xampp.
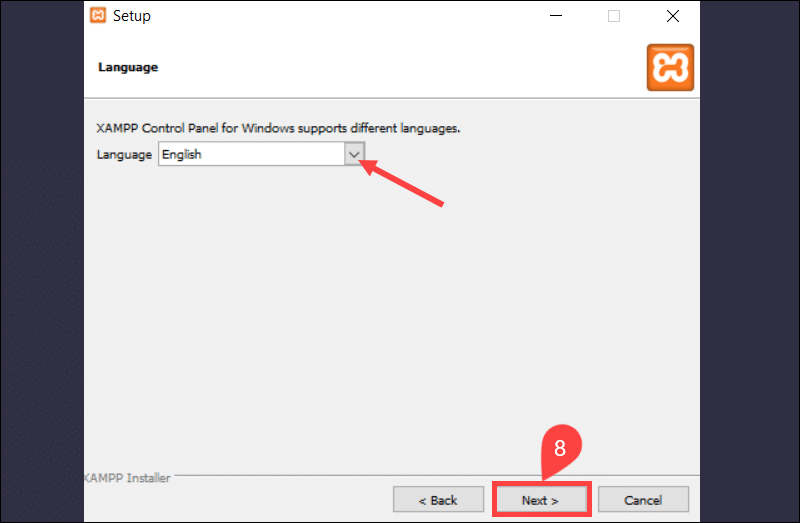
8. Use the dropdown menu to choose the XAMPP language and click Next.
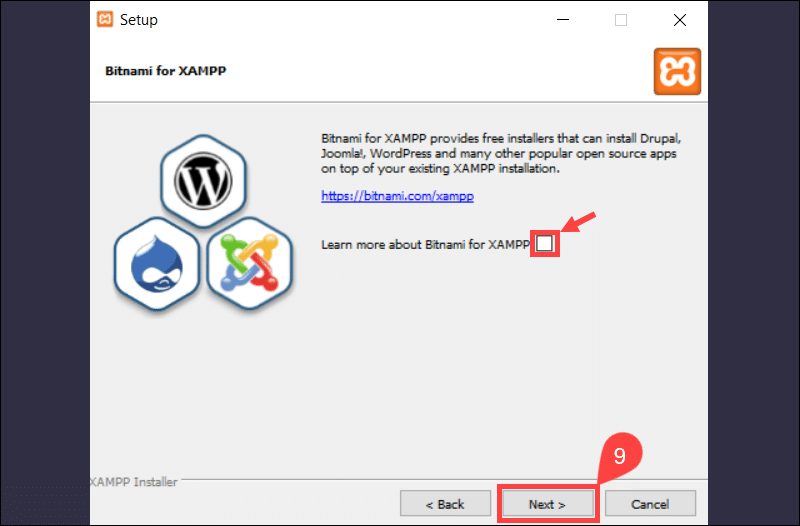
9. Uncheck the box if you do not want to visit the Bitnami XAMPP presentation and select Next.
10. Click Next to install XAMPP.
The system takes a few moments to complete the installation.
11. Click Finish to close the Setup Wizard and access the XAMPP Control Panel.

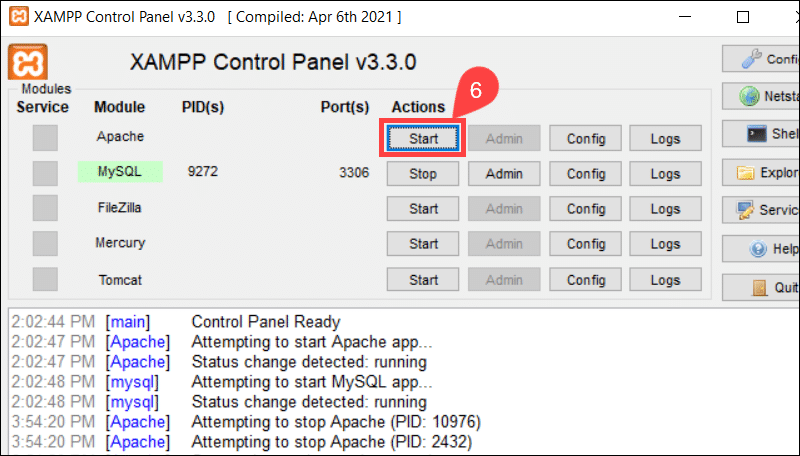
12. Start Apache and MySQL to confirm that the modules work correctly.
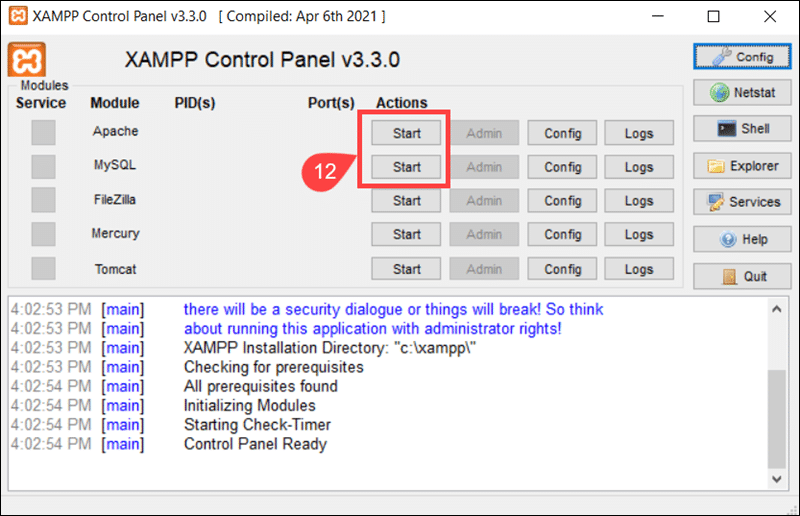
It may be necessary to modify the default Apache port if other applications on your system already use ports 80 and 443.
Step 2: Install Composer
Composer allows you to reuse third-party libraries, repackage Magento Open Source with other components, and reduce PHP compatibility issues.
1. Visit the official Composer page and download the Composer-Setup.exe installer for Windows.

The installer automatically sets up the PATH environment variable and makes Composer globally available from any directory.
2. Start the installer and select the install mode.

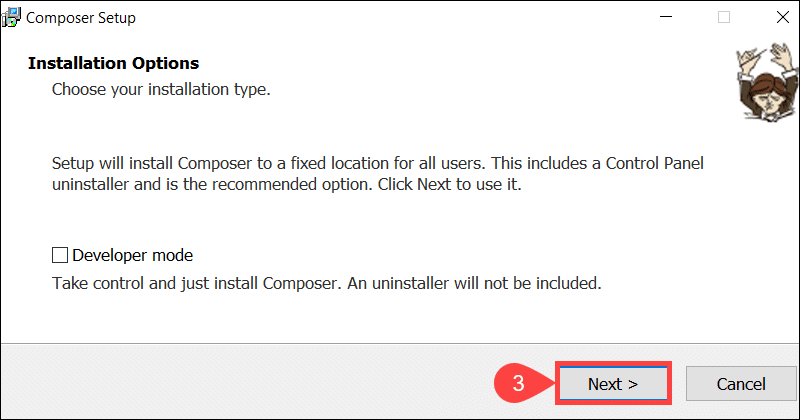
3. Choose an installation type. Check the box if you want to install Composer in Developer mode and select Next to proceed.
4. Check the box to add the C:\xampp\php\php.exe path and click Next.

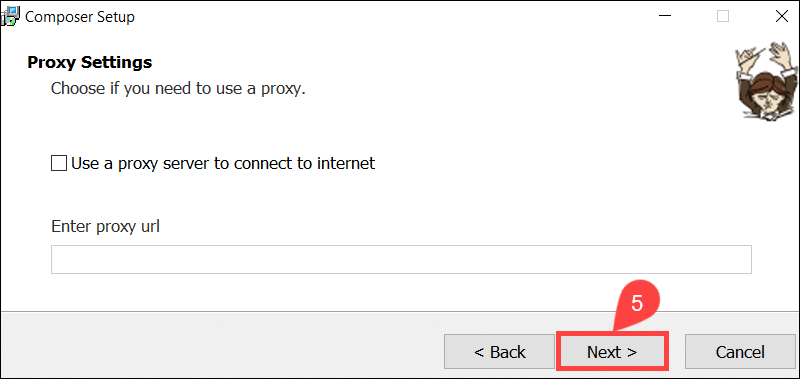
5. Select Next if you do not plan to use a proxy server.
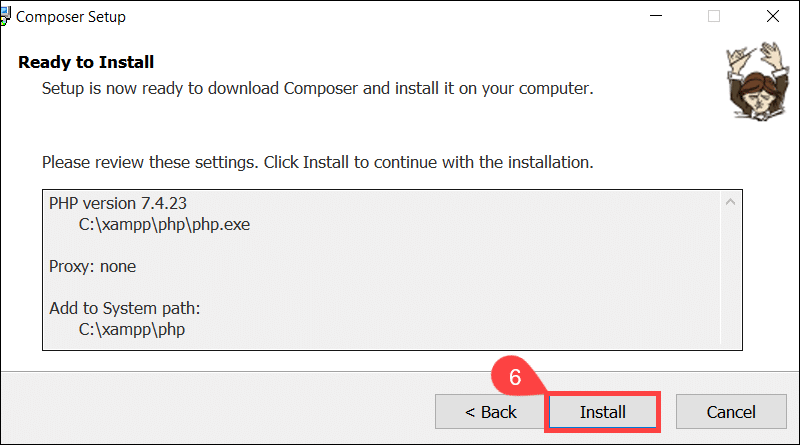
6. Review the settings to confirm that the PHP version and path are correct and select Install.
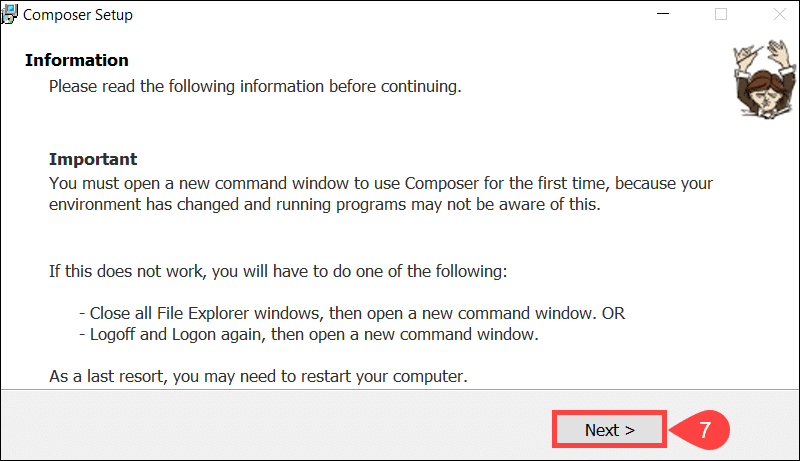
7. Read the general Composer troubleshooting advice and select Next.
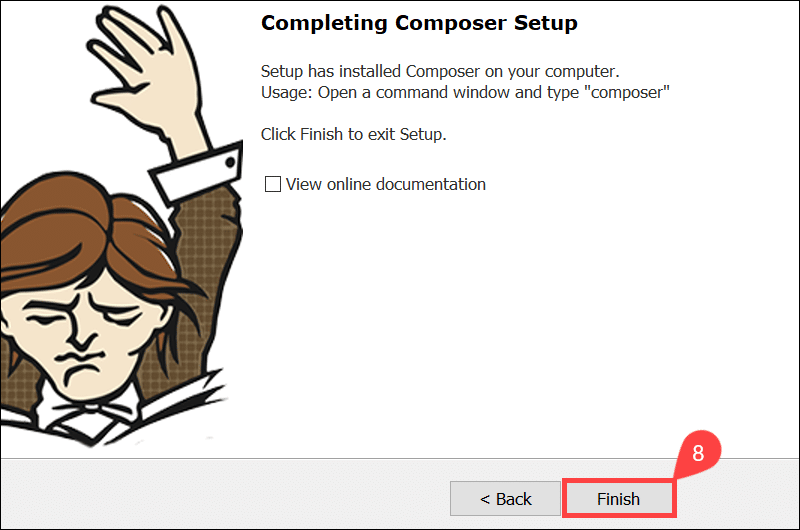
8. Click Finish to complete the Composer setup.
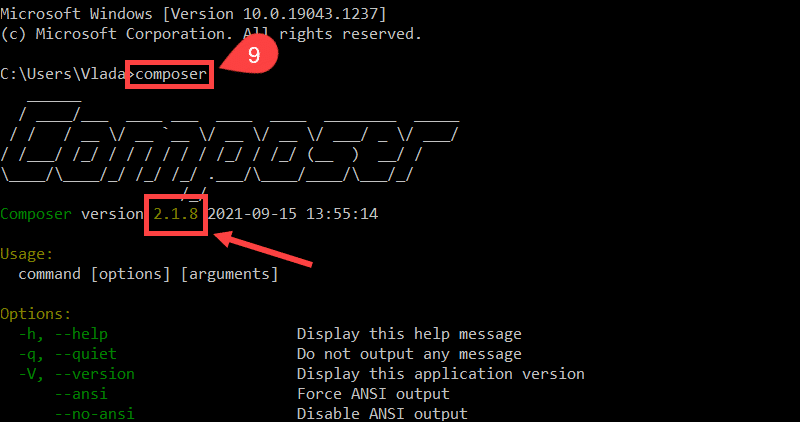
9. Access the Windows command line (cmd) and enter the following command to check if Composer is working:
composerThe output confirms that Composer 2.1.8 is successfully installed.
Magento 2.4.1 and earlier releases require Composer version 1.x.
Step 3: Install Elasticsearch
Magento uses Elasticsearch as a catalog search solution. The Magento 2.4 installation cannot proceed without installing and configuring Elasticsearch.
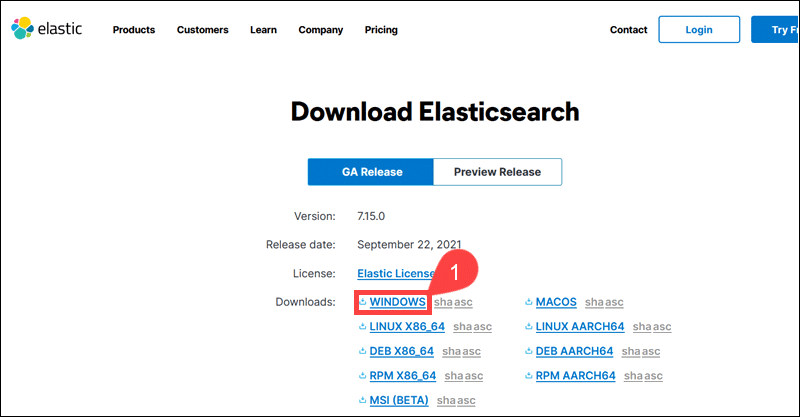
1. Visit the official Elastic page and download Elasticsearch for Windows.
2. Extract the compressed files from elasticsearch-7.15.0 within the C:\xampp\htdocs directory.
3. Access the C:\xampp\htdocs\elaticsearch-7.15.0\bin folder and run the elasticsearch.bat file as an administrator.
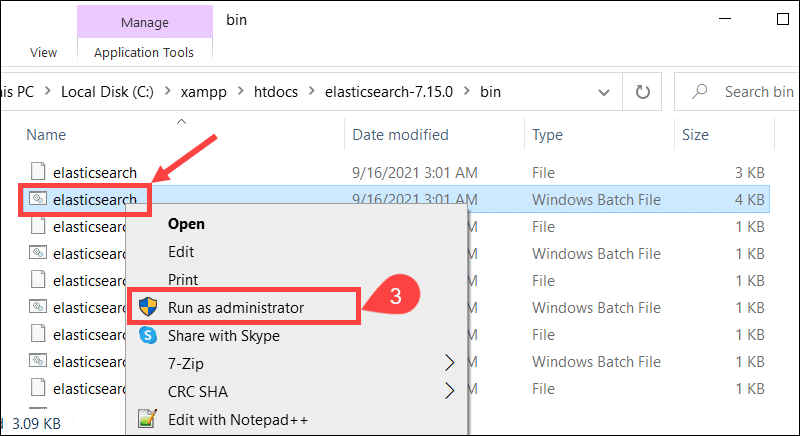
The system launches Elasticsearch and opens the command prompt.
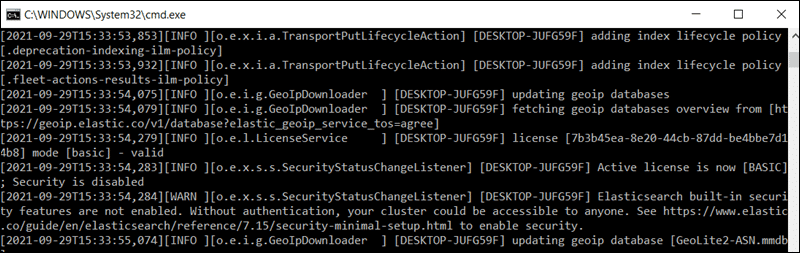
Always keep Elasticsearch running in the background when using Magento.
4. Use a preferred browser and navigate to localhost:9200.
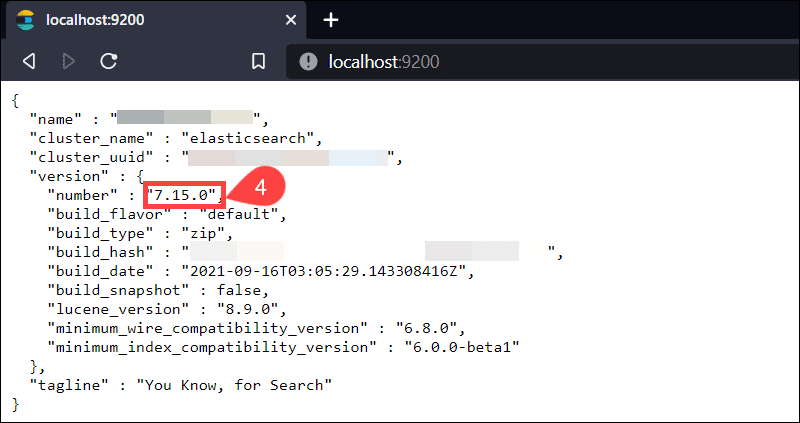
The version number confirms that Elasticsearch is working as intended.
Step 4: Modify php.ini File
Magento requires a set of PHP extensions for server-side scripting. The extensions are installed by default but may need to be enabled manually.
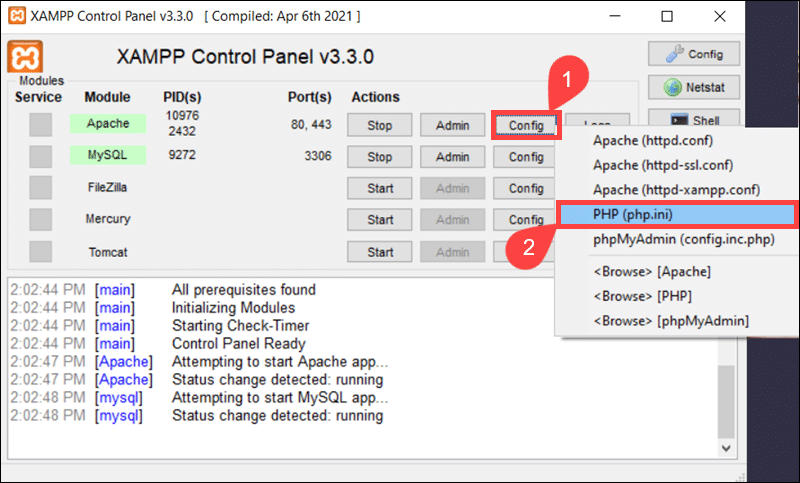
1. Access the XAMPP control panel and select the Apache Config tab.
2. Open the php.ini file.
3. Remove the semi-colon (;) to uncomment the following lines:
;extension=intl
;extension=soap
;extension=xsl
;extension=sockets
;extension=sodium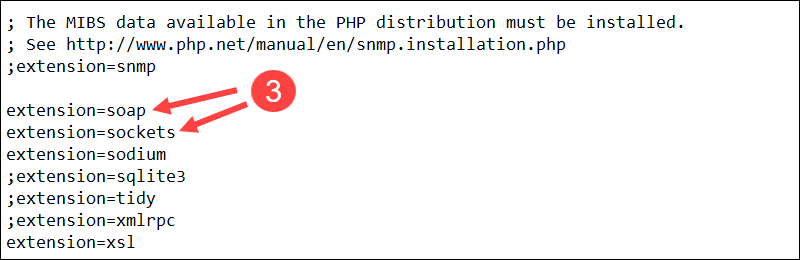
4. Change the PHP memory limit and execution time:
max_execution_time=18000
memory_limit=4G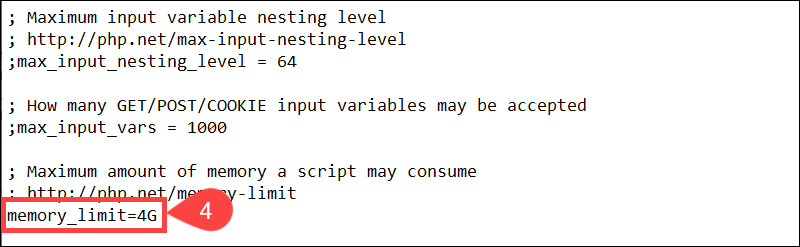
5. Save the changes and exit the php.ini file.
6. Restart the Apache service from the XAMPP control panel.
Modifying PHP extension settings and the memory limit in the php.ini file is essential for a smooth Magento installation.
Step 5: Create MySQL Database and User
Magento 2 needs a MySQL database to store data and settings related to users, products, and catalogs. To create a Magento database:
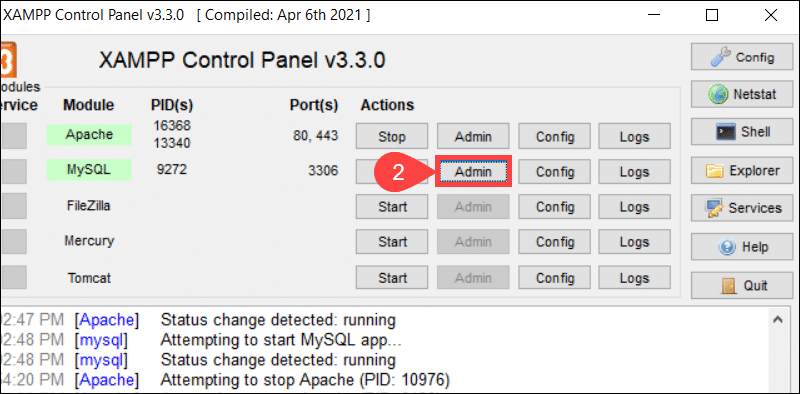
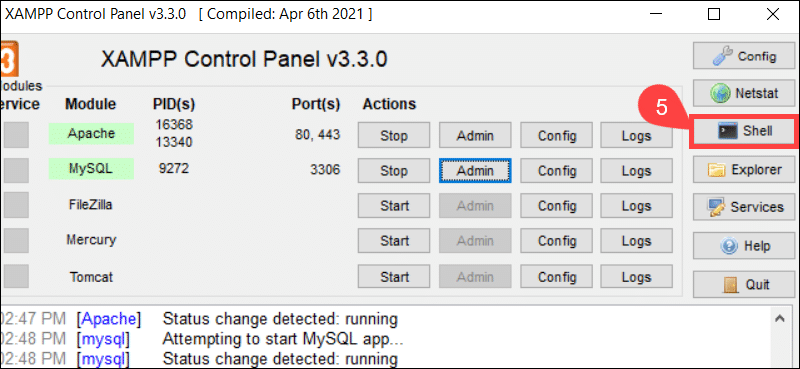
1. Open the XAMPP control panel.
2. Select Admin to access the phpMyAdmin interface.
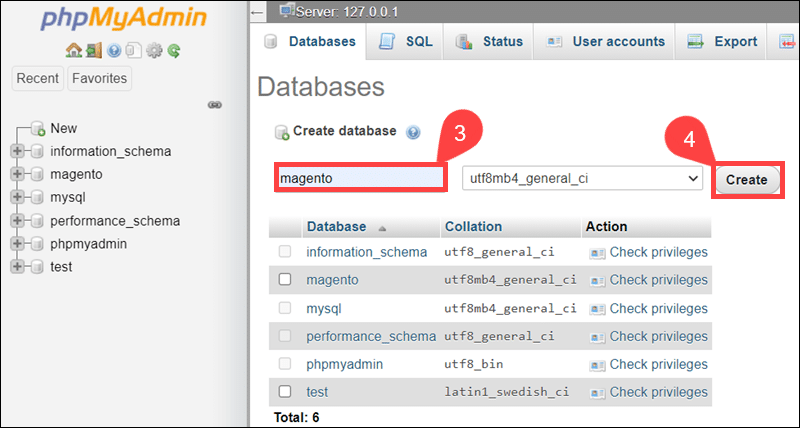
3. Open the Databases tab and enter a database name, for example, magento.
4. Click Create.
5. Access the XAMPP Shell.
6. Enter the following command to change the MySQL user password:
mysqladmin.exe -u root passwordThe system asks you to enter a new password and confirm the new password for the root user.
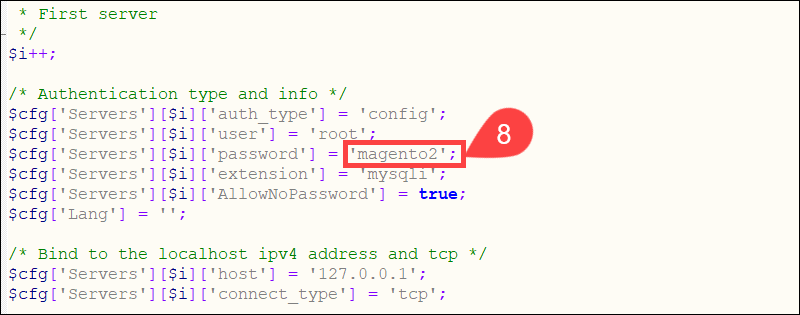
7. Access the C:\xampp\phpMyAdmin\ folder.
8. Use a text editor, like Notepad++, to access and modify the config.inc.php file.
Inserting the new password in the Authentication type and info section of the file ensures that phpMyAdmin uses the new password to log in by default. In this example, the MySQL user password is magento2.
9. Use XAMPP to restart Apache and MySQL.
Access phpMyAdmin to confirm that the new password works.
How to Install Magento on Windows (Step-by-Step)
Step 1: Download Magento 2.4.3
1. Visit the official Magento website and create a free user account.
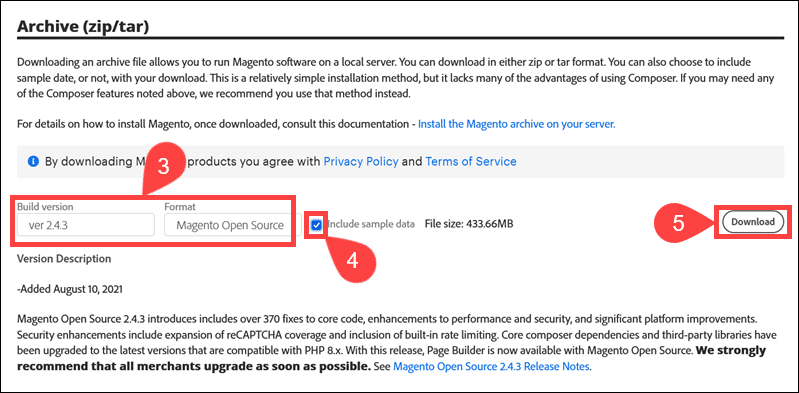
2. Access the Magento Downloads page and locate the Archive (zip/tar) section.
3. Select the Magento Open Source version build (the latest version is 2.4.3).
4. Check the box to include sample data in the archive file.
5. Click Download.
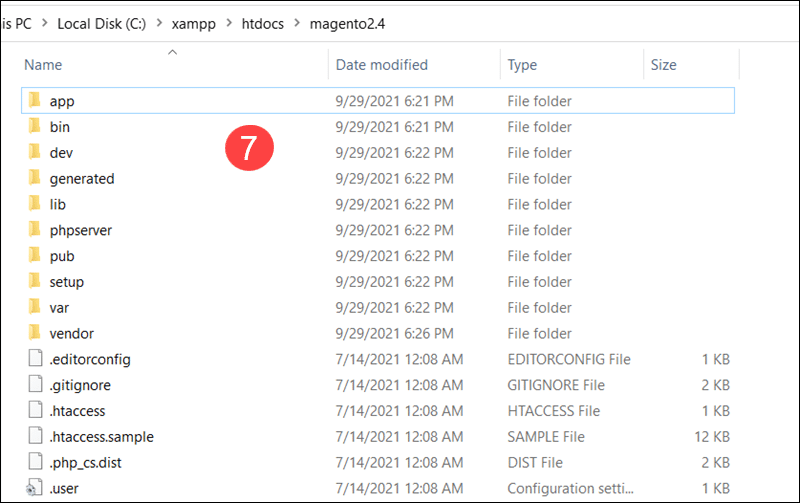
6. Create a new folder in the C:\xampp\htdocs directory, for example, C:\xampp\htdocs\magento2.4\.
7. Extract the compressed files from the downloaded Magento archive and place them within the magento2.4 folder.
Step 2: Set Up Apache Virtual Hosts
To set up an Apache virtual host:
1. Access the C:\xampp\apache\conf\extra\ folder.
2. Use Notepad++ to open the httpd-vhosts.conf file.
3. Append the following content to the file:
<VirtualHost *:80>
    DocumentRoot "C:/xampp/htdocs/magento2.4/"
    ServerName mystore.magento.com
</VirtualHost>

<VirtualHost *:80>
    DocumentRoot "C:/xampp/htdocs/"
    ServerName localhost
</VirtualHost>
Change the information to match your system’s data, like the store’s IP or domain name.
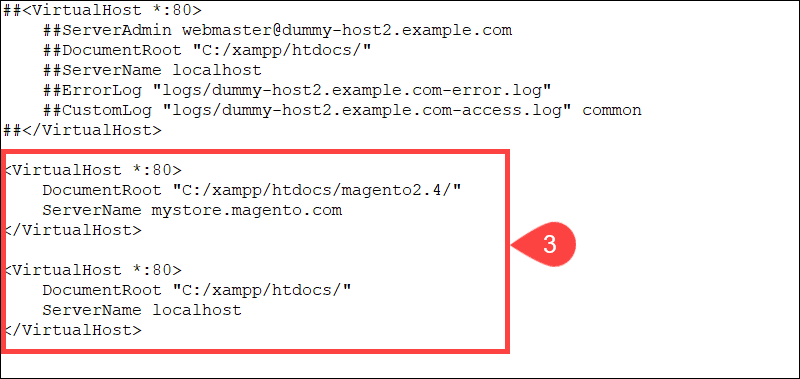
In this example, the path to the Magento installation directory is C:/xampp/htdocs/magento2.4/. The path needs to match the location of your installation folder.
4. Access the C:\Windows\System32\drivers\etc\ folder.
5. Run Notepad++ as an Administrator and open the hosts file.
6. Add the following in the Windows hosts file:
127.0.0.1 mystore.magento.comSave the changes and exit the file.
7. Use XAMPP to restart the Apache service and apply the changes.
Step 3: Install Magento 2.4.3
To install Magento 2.4 on Windows:
1. Open the Windows command line.
2. Access the Magento root directory:
cd C:\xampp\htdocs\magento2.4\3. Enter the following command to install Magento:
php bin/magento setup:install --base-url="http://mystore.magento.com" --db-host="localhost" --db-name="magento" --db-user="root" --db-password="magento2" --admin-firstname="Bruce" --admin-lastname="Banner" --admin-email="thehulk@store.com" --admin-user="Hulk" --admin-password="Hulk123" --language="en_US" --currency="USD" --timezone="America/Chicago" --use-rewrites="1" --search-engine="elasticsearch7" --elasticsearch-host="localhost" --elasticsearch-port="9200"If necessary, edit the information to match your requirements and system configuration:
- base-url - The location (URL) of your store.
- db-host - If Magento is on the same server as your database, use localhost. If you are using a separate database server, enter the hostname of that server.
- db-name - The name of the MySQL database.
- db-user - The username of your MySQL user.
- db-password - The password for your MySQL user.
- admin-firstname and admin-lastname - Enter the full name for the Magento admin user.
- admin-email - Enter a contact email for system notifications and password resets.
- admin-user/admin-password - Create login credentials for the Magento Admin control panel.
- language - The default language for your store.
- currency - Define the base currency for your store.
- timezone - Controls the default time zone for Magento.
- use-rewrites - Enable rewrites by setting the value to 1.
- search-engine - The default search engine value needs to be set to elasticsearch7.
- elasticsearch-host - If Elasticsearch is on the same server as Magento, use localhost. If you are using a separate server, enter the hostname of that server.
- elasticsearch-port - The default Elasticsearch port number is 9200.
4. The output confirms that the installation is complete.
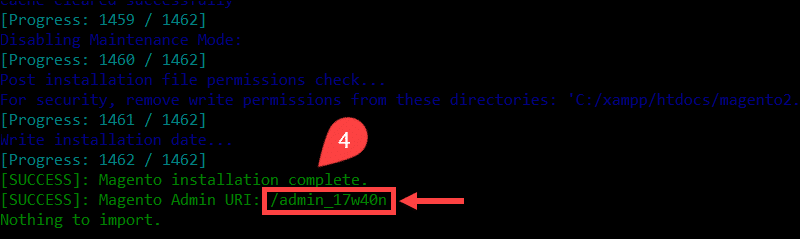
The system creates a random Magento Admin URI and displays the value at the end of the installation process.
Take note of the value as it allows you to access the Admin panel. If you need to retrieve the Admin URI at a later point, use the following command:
bin/magento info:adminuriThe command needs to be executed from the Magento root directory.
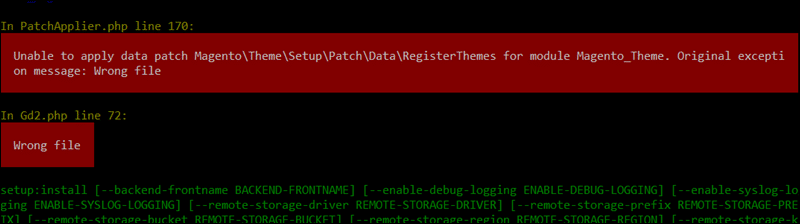
In PatchApplier.php line 170 Error
Errors such as the In PatchApplier.php line 170 Error are not uncommon during the Magento installation process.
In PatchApplier.php line 170 Error

Unable to apply data patch Magento\Theme\Setup\Patch\Data\RegisterThemes for module Magento_Theme. Original exception message: Wrong file

In Gd2.php line 72
Wrong file
The error message indicates that there is an issue with the Gd2.php file.
To resolve the issue, modify the validateURLScheme function in the Gd2.php file.
1. The file is in the C:\\xampp\htdocs\magento2.4\vendor\magento\framework\Image\Adapter\ folder.
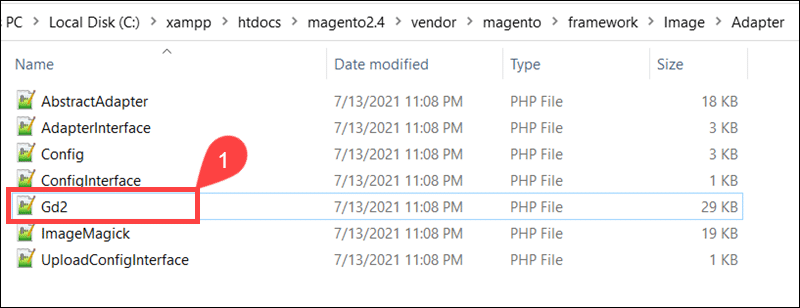
Open the Gd2.php file using a text editor and add && !file_exists($filename)at the end of line 98. Copy the following line of code and replace the existing line.
if ($url && isset($url['scheme']) && !in_array($url['scheme'], $allowed_schemes) && !file_exists($filename)) {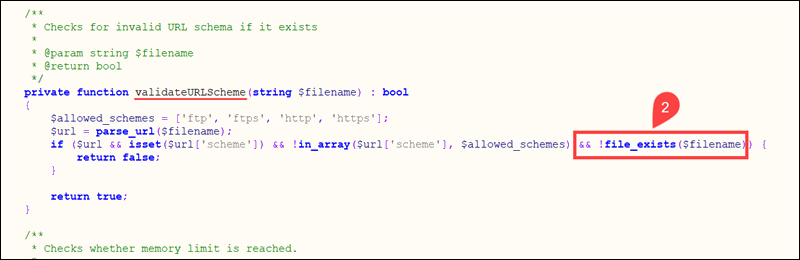
3. Save and exit the file.
4. Initiate the Magento installation command from the Magento root folder. It takes several minutes for the system to complete the installation.
Step 4: Access Magento Storefront
Ensure that Apache, MySQL, and Elasticsearch are all active and running.
1. Use a browser and access the Magento storefront. Enter the store's base URL defined in the Magento installation command. In this example, the store URL is mystore.magento.com.
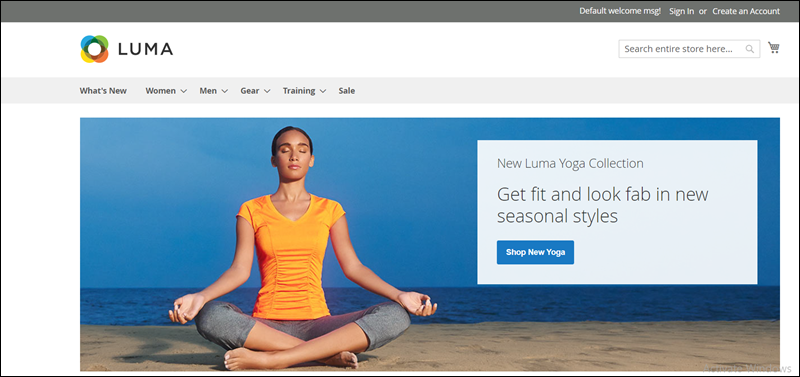
2. Once the page loads, it displays the default Luma theme.
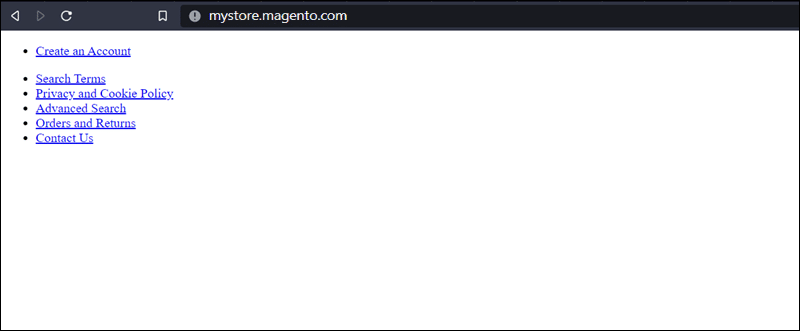
No Static Content in Storefront
If Magento does not load static content, you need to edit the Validator.php file.
1. Access the C:\xampp\htdocs\magento2\vendor\magento\framework\View\Element\Template\File folder.
2. Open the Validator.php fileusing Notepad++.

3. Locate the following line of code in the inPathInDirectories function (line 141):
$realPath = $this->fileDriver->getRealPath($path);4. Replace the existing line with:
$realPath = str_replace('\\', '/', $this->fileDriver->getRealPath($path));
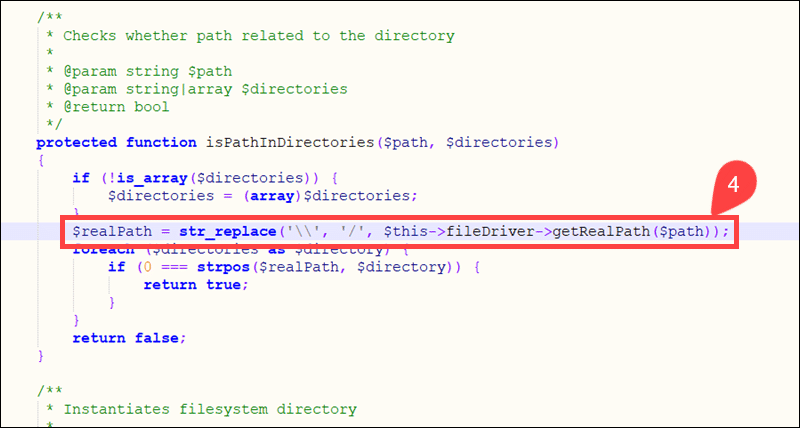
5. Save and exit the Validator.php file.
6. Access the C:\\xampp\htdocs\magento2.4\app\etc\ folder.
7. Open the di.xml file using a text editor.
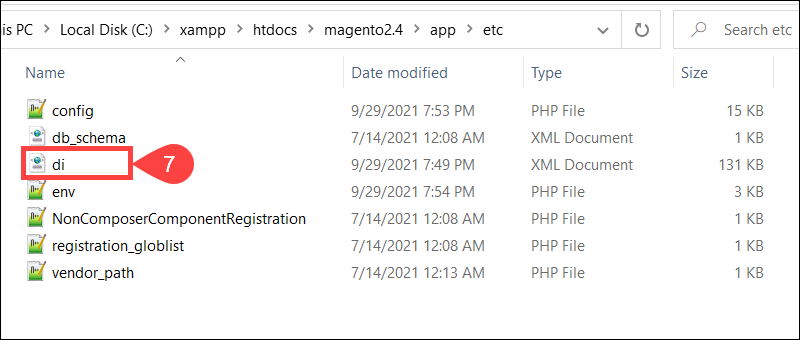
8. Locate line 756 in the di.xml file:
Magento\Framework\App\View\Asset\MaterializationStrategy\SymlinkReplace the line with:
Magento\Framework\App\View\Asset\MaterializationStrategy\Copy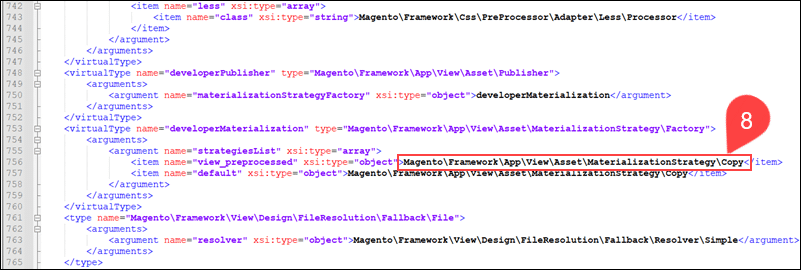
9. Save and exit the file.
10. Access the Windows command line.
11. Execute the following commands from the Magento root directory to upgrade the database and deploy static view files:
php bin/magento indexer:reindex
php bin/magento setup:upgrade
php bin/magento setup:static-content:deploy -f
php bin/magento cache:flush
php bin/magento catalog:images:resize
It takes several minutes for each command to complete the action. Reload the Magento storefront to confirm that the static content is now visible.
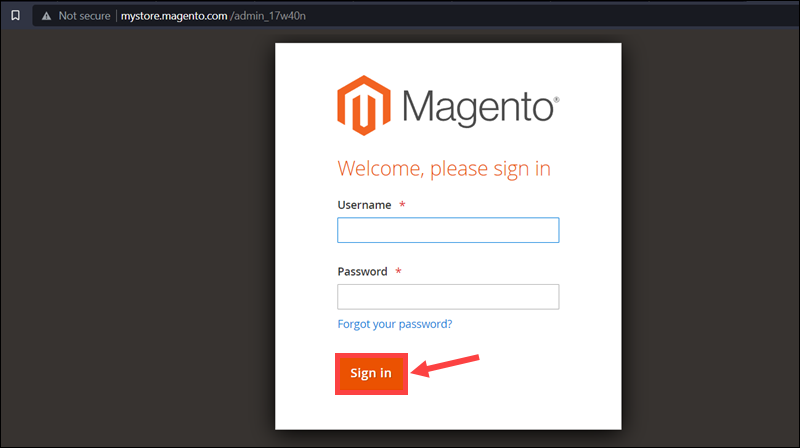
Step 5: Access Magento Admin
Access the Magento admin panel by adding the admin URI to the store’s frontend URL:
http://mystore.magento.com/admin_17w40nEnter the Admin username and password you created during the installation process and Sign In.
Magento 2.4 uses two-factor authentication to provide a secure environment for administrators. You cannot log into the Magento admin panel unless you have a Mail Transfer Agent (MTA) or an SMTP server.

An alternative solution is to disable the two-factor authentication module.
Enter the following command from your Magento root folder:
php bin/magento module:disable Magento_TwoFactorAuthReload the page to access the Magento admin panel.
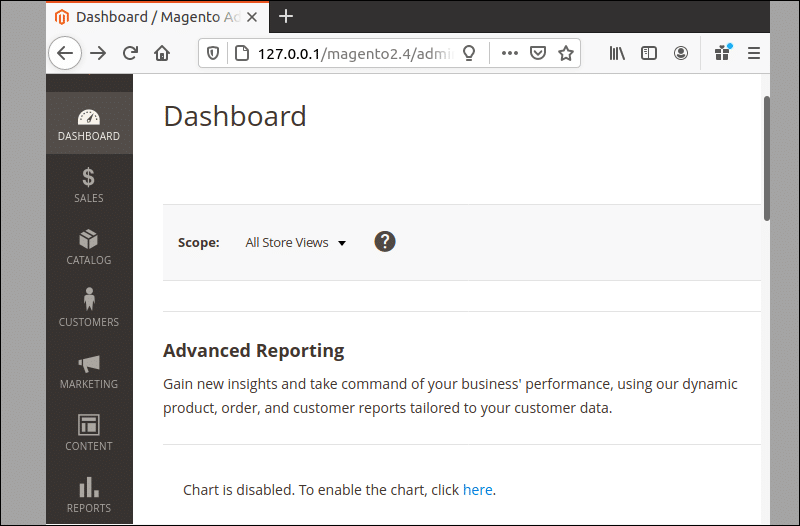
Use the Admin to get to know and extensively test Magento's capabilities and features.
Conclusion
You have successfully installed the latest Magento version (2.4.3) on your local Windows system. Each step along the way helped you learn more about how Magento works and about its components and background systems.
Magento is a versatile and flexible framework that enables you to build up your ecommerce store regardless of its size or business model. To experience Magento in a production environment, find out how to install Magento in Linux.
