Introduction
Employing a customer service representative for every online shopper who requires assistance is impossible. Nevertheless, people still wish for quick and personalized customer service. So, how does an online business tend to numerous potential customers without employing an army of agents? The answer is a chatbot.
Chatbots simulate human responses in digital communication. They help online shoppers navigate through shops, check product stock, find contact information, place orders, track shipments, and much more. Online businesses, ecommerce in particular, recognize the potential of chatbots and employ them any chance they get.
Find out how to add a chatbot to a website using the three most popular methods and explore the possibilities of this versatile tool.
What Is a Chatbot?
A chatbot is a type of software designed to simulate human conversation by providing relevant responses to user input (queries).
Chatbots are an increasingly popular customer service tool for online businesses, especially the ecommerce industry, because they:
- Reply in record times.
- Serve customers 24/7/365.
- Require minimal maintenance.
- Serve a multitude of customers simultaneously.
- Add a human touch to online shopping and compensate for the lack of in-person customer service.
Note: Learn more about chatbots in Ecommerce.
Chatbot Types
Depending on how they generate responses, chatbots can be divided into two categories:
- Rule-based (scripted) chatbots. A chatbot of this type looks for keywords or key phrases in user queries and matches them to pre-written (scripted) responses.
- Artificial intelligence (AI) chatbots. This kind of chatbot looks at the context behind user queries and generates a response using artificial intelligence.
Businesses should be aware of both categories' advantages and disadvantages before choosing which to deploy.
Rule-based chatbots excel in cases where users seek information (contact information, customer support channels, and FAQs and documentation), but answer queries only if they are formatted in a particular way. In addition, rule-based chatbots may fail to understand queries with typos.
AI chatbots excel at page navigation, product filtering, and providing all kinds of useful information. The caveat to these chatbots is that they take slightly longer to generate responses and may misinterpret language they are not taught (for example, abbreviations or jargon).
Adding a Chatbot to Your Website
There are three ways to add a chatbot to a website:
- Using the Meta Chat Plugin.
- Using a no-code chatbot platform.
- Creating a chatbot via a chatbot provider’s API.
Meta Chat Plugin
Facebook page owners can integrate the Messenger chatbot to their business website using Meta’s Chat Plugin.
To add the Chat Plugin to your website:
1. Log in to your Facebook account.
2. Navigate to your page by selecting the shortcut on:
- The left-hand Shortcut panel.
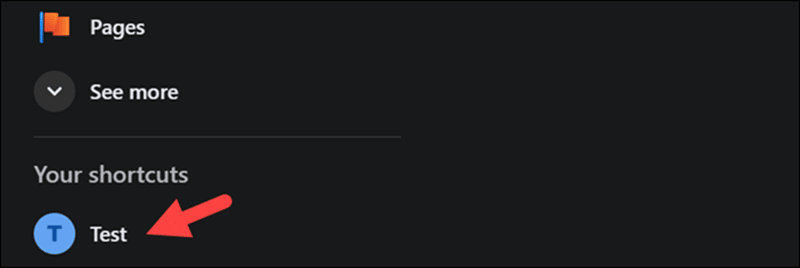
- The right-hand Your Pages and Profiles panel.

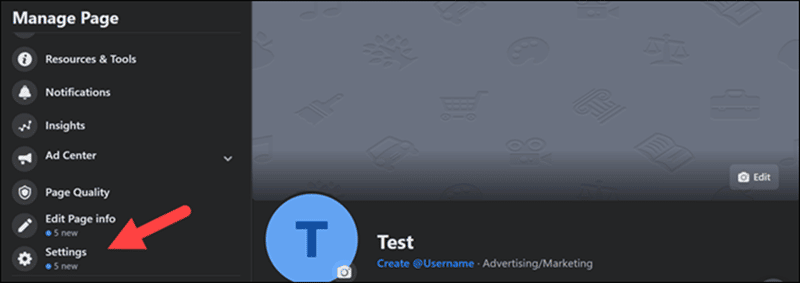
3. Scroll down the Manage Page panel and select Settings.
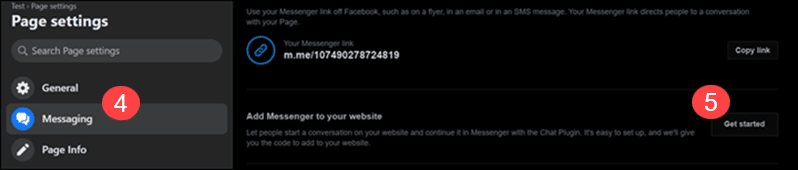
4. Select Messaging.
5. Under the Add Messenger to your website panel, click Get Started.
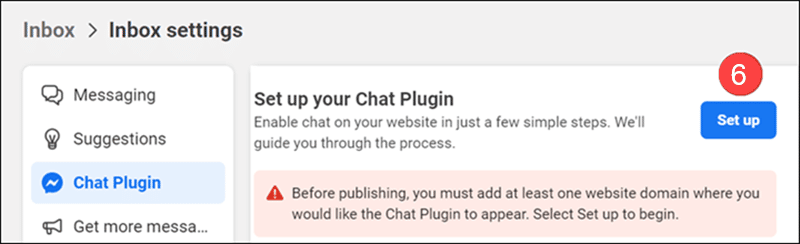
6. Under the Set up your Chat Plugin tab, select Set up.
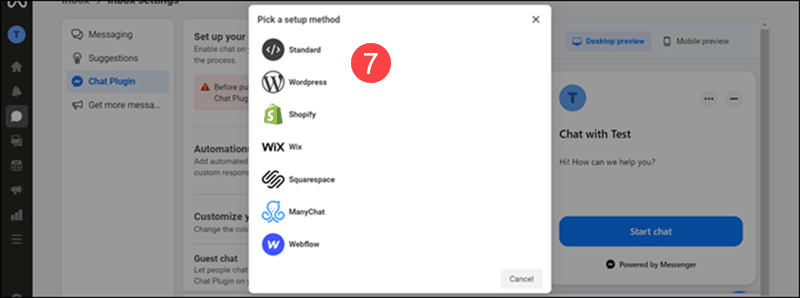
7. Depending on whether the website was built from scratch or using a website builder, pick the appropriate setup method.
8. Select a language for the chatbot.
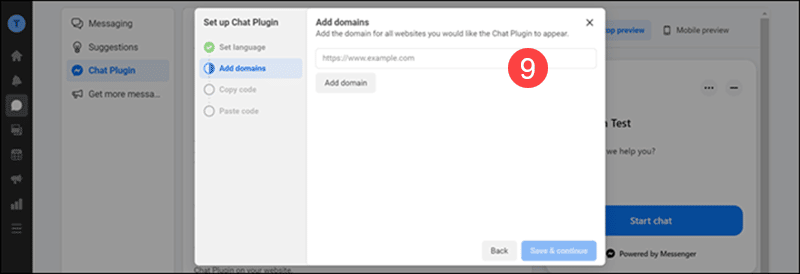
9. Provide the domain of the website where the chatbot will appear.
10. Copy the chatbot’s code.
11. Paste the code after the <body> tag in the .html files of pages where the chatbot should appear.
Adding Chat Plugin to a WordPress Website
Prerequisite: The person adding the Chat Plugin must be the business page’s administrator and logged in to Facebook before proceeding with the following steps.
1. Open WP admin.
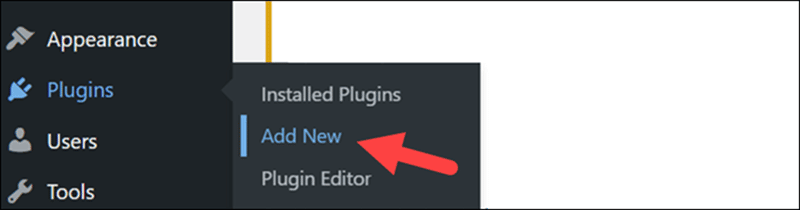
2. Hover over the Plugins button in the left-hand menu.
3. Select Add New.
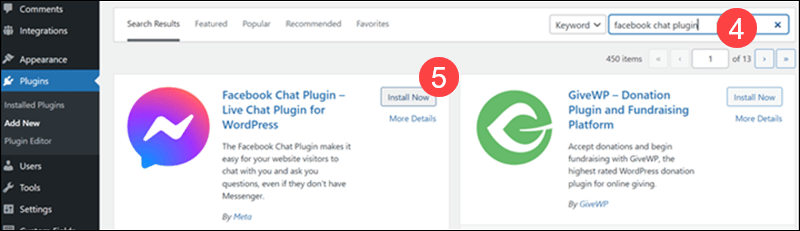
4. Enter Facebook Chat Plugin in the search bar.
5. Click Install Now in the Facebook Chat Plugin tab.
6. Activate the plugin.
Adding Chat Plugin to ManyChat
Note: If you have a ManyChat account, log in to it and skip to step 13.
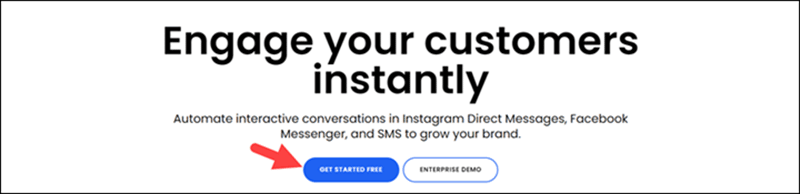
1. Visit the ManyChat website.
2. Click Get Started Free.
3. Select Facebook Messenger.
4. Click Continue With Facebook to connect ManyChat to your account.
5. Confirm permissions.
6. Confirm your email address.
7. Enter the verification code.
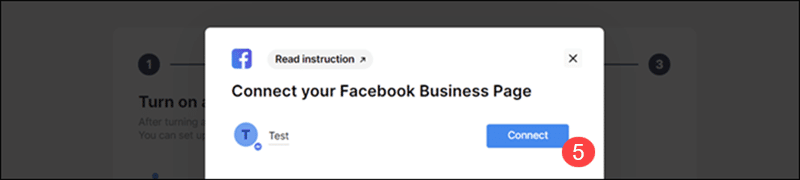
8. Click Connect next to the Facebook page whose chatbot you want to add to your website.
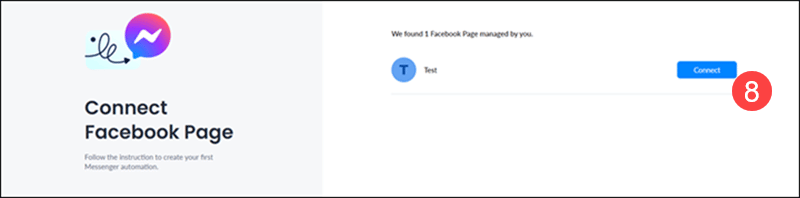
9. Click Next.
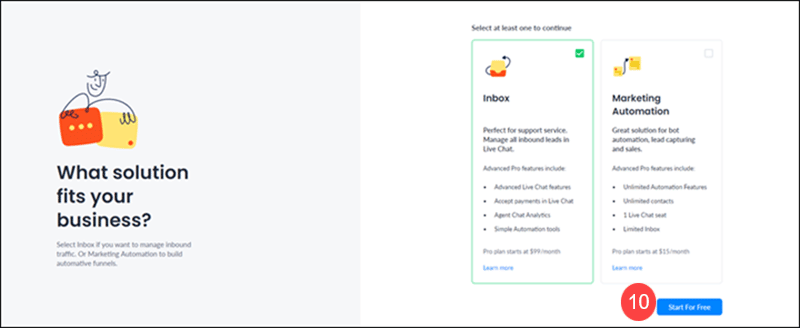
10. Select Inbox and click Start For Free.
11. Click Start With Free Plan.
12. Answer questions regarding the purpose of your account.
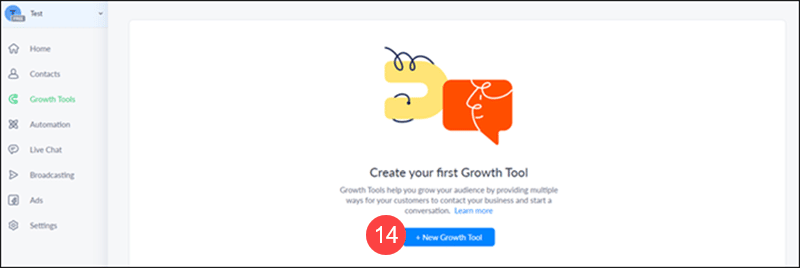
13. Select the Growth Tools tab in the left-hand panel.
14. Click + New Growth Tool.
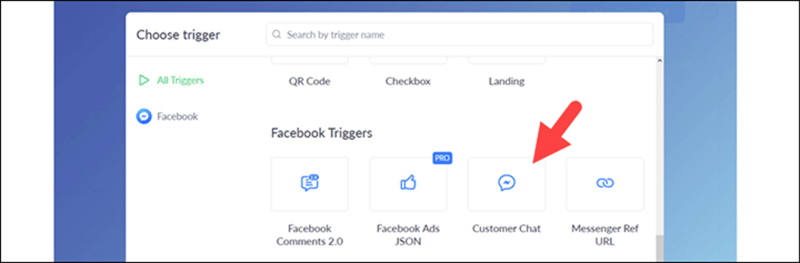
15. Scroll down and select Customer Chat.
16. Click Install JavaScript Snippet.
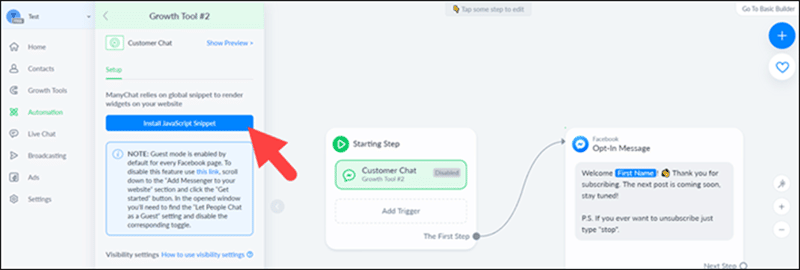
17. Click Install ManyChat Snippet.
18. Copy the code and paste it on pages where you want the chatbot to appear.

Adding Chat Plugin to Chatfuel
1. Sign up/log in to your Chatfuel account with Facebook.
2. Confirm permissions.
3. Answer questions about your business.
4. Click Connect Facebook Page.

5. Click Connect next to the correct page.
6. Select a plan.
7. Click Automation in the left-hand panel.
8. Select Flows>Add Blank Flow>Add Messenger Flow.
9. Choose Website as your entry point.
10. Select Customer Chat.
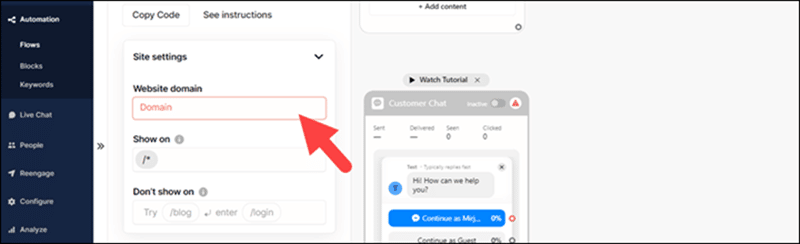
11. Click the contents of the block that appears.
12. Enter your website’s URL in the Website Domain field.
Adding Chat Plugin to a Shopify Website
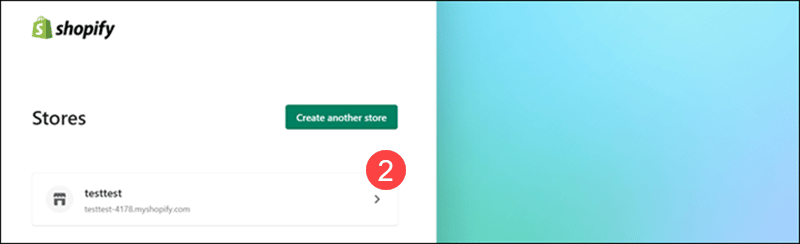
1. Log in to Shopify.
2. Select the store for which the chatbot is intended.
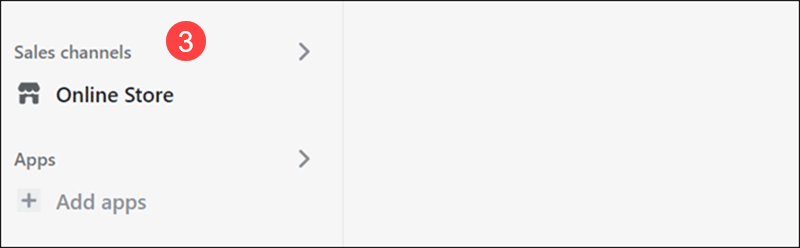
3. On the left-hand admin panel, select the desired sales channel (store, blog, etc.).
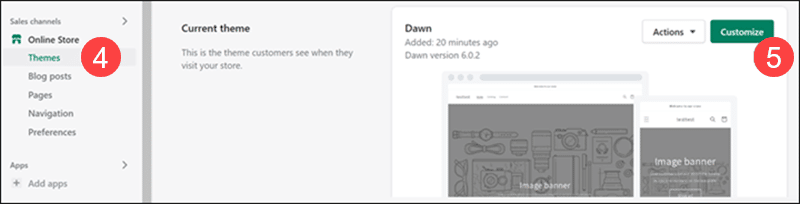
4. Select Themes.
5. Click the Customize button next to the Current Theme.
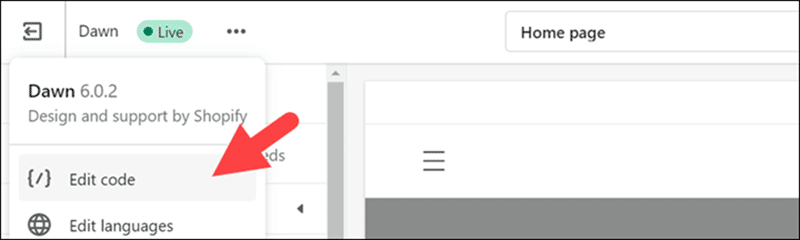
6. Click the three dots icon in the upper left corner.
7. Select Edit Code.
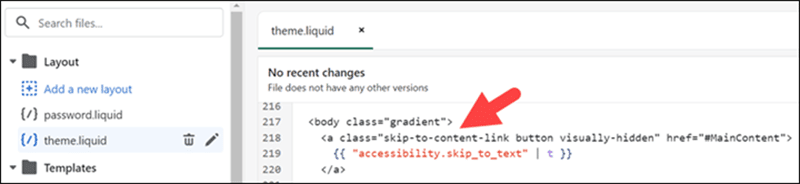
8. Locate the main theme file (typically named theme.liquid).
9. Scroll down to the <body> tag and paste the Chat Plugin code snippet in the first line after it.
10. Save.
Adding Chat Plugin to a Wix Website
Prerequisite: To add custom code to a Wix website, the website owner must upgrade to a paid plan and connect a custom domain.
1. Log in to your Wix account. This will open the Wix dashboard.
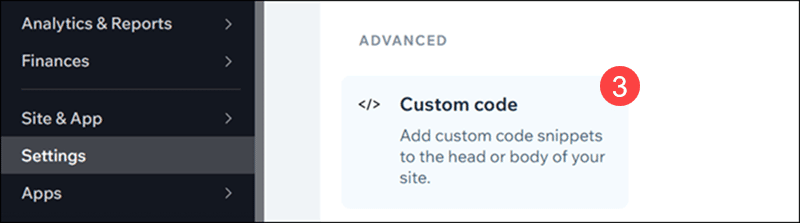
2. Click Settings in the left-hand panel.
3. Scroll down to the ADVANCED section and click Custom code.
4. Click + Add Custom Code in the upper right corner of the page.
5. Paste the Chat Plugin code snippet in the Paste the code snippet here section.
6. Enter a recognizable name for the code, for example, Messenger.
7. Specify whether Wix should add the custom code to specific pages or all pages.
8. Select Head as the section to which the code should be applied.
9. Click Apply.
Adding Chat Plugin to a Squarespace Website
Prerequisite: Users who want to add custom code to their website must upgrade to the Business or Commerce plan.
1. Log in to your Squarespace account.
2. Click Settings in the admin panel.
3. Scroll down and click Advanced.
4. Click Code Injection.
5. Paste the Chat Plugin code snippet in the Footer section.
6. Save.
Adding Chat Plugin to a Webflow Website
Prerequisite: Users must be using a paid plan to add custom code to a Webflow website.
1, Log in to your Webflow account.
2. Select the website for which the chatbot is intended.
3. Click the Webflow logo in the upper left corner of the page.
4. Select Project Settings.
5. Select the Custom Code tab.
6. Paste the Chat Plugin code snippet in the Footer section.
Use a No-Code Chatbot Platform
No-code chatbot platforms allow users with limited or no coding knowledge to design and deploy chatbots. These platforms include user-friendly visual interfaces that make it easy to:
- Design the infrastructure of the conversation.
- Create chatbot triggers.
- Add content to responses.
Because of that, no-code chatbot platforms are the most popular option for creating chatbots. This popularity is reflected in the array of platforms users can choose from.
Examples of no-code chatbot platforms include:
| PLATFORM | PROS | CONS |
|---|---|---|
| WotNot |
|
|
| Intercom |
|
|
| Landbot |
|
|
Create a Chatbot via a Chatbot Provider's API
Chatbot API integration refers to connecting a chatbot to a website using an application programming interface (API). APIs allow different applications to send information to each other.
Chatbot API use cases include:
- Data collection
- AI/machine learning
- Response automatization
- Content-rich responses
- Retrieving order and shipping data
Chatbot API integration is done by developing custom connections, using an integration platform, or via a connector application. Most chatbot APIs have a separate platform and require the user to add code to their website or enable a plugin in the case of a website builder.
Note: Merchants can integrate chatbots with payment APIs to provide payments via chatbots. Chatbots can initiate payments and return a payment URL for customers. This type of sales channel is very popular in omnichannel marketing.
Examples of chatbot APIs include:
| PLATFORM | PROS | CONS |
|---|---|---|
| Dialogflow |
|
|
| Amazon Lex |
|
|
| Microsoft Bot Framework |
|
|
Benefits of Chatbots: What Do You Gain?
Chatbots provide substantial benefits to businesses:
- Low deployment and maintenance costs. Most chatbot platforms offer a free version, but even paid plans are cost-effective compared to hiring in-house representatives. Platforms also come with customer support, meaning most of the maintenance is transferred to a third party.
- Improved customer service and support. Chatbots raise customer satisfaction because they reply in real-time and excel at answering frequently asked questions. In cases where human intervention is needed, most chatbots can be automated to turn into live chat.
- Easy data collection. Thanks to APIs, chatbot platforms collect data on best-selling products, customer satisfaction ratings, customers’ most common struggles, and concerns, etc. In addition, AI chatbots collect conversations to allow all chatbots in the network to learn from each other.
- Better customer data analysis. More data collected means more information from which to gain insight. In addition, chatbot platforms typically collect all data in one place (often a CRM), making it easier to manage and analyze.
- Easy personalization. Chatbots can be programmed to retrieve customer data to provide a personalized experience.
- Better customer engagement. On average, chatbots have a 35-40% engagement rate, but the percentage can go as high as 90% when a chatbot features a clever and attractive design.
- High customer satisfaction. Chatbots reply quickly and accurately, increasing the quality of customer service.
- Competitive advantage. Customers are likely to give up on a purchase when a business fails to provide easy access to important information. According to PSFK, 74% of users prefer using chatbots to find answers to simple questions.
- Unlimited application possibilities. Chatbots have a plethora of use cases, and new features are constantly being developed.
Conclusion
Given their popularity and versatility, it is safe to say that chatbots will be used for years to come.
Use the information provided in this guide to choose a solution that suits your business and add a chatbot to your website.
