YNOT Mail Setup Walkthrough
About YNOT
YNOT Mail is a powerful combination of the Internet's best email marketing software plus performance-enhancing services and technologies that will increase deliverability and can protect your company's reputation with ISPs. YNOT mail was made with the adult and e-gaming industry in mind and, with a rich list of features, it provides all the necessary tools for running sophisticated email marketing campaigns.
To use YNOT Mail, you must agree to maintain your own opt-in email lists and provide subscribers with the ability to opt-out of future mailings.
Overview
Setting up a successful YNOT mail campaign for your CCBill Customers is easy. From start to finish, all you need to do is:
- Register a YNOT Mail account and choose your monthly mail usage.
- Export Your CCBill Customers’ data.
- Import Customers’ data into your YNOT account.
- Create and send an email campaign.
Whenever you see a blue question mark icon in the YNOT Mail user interface, place your cursor over it for more information.
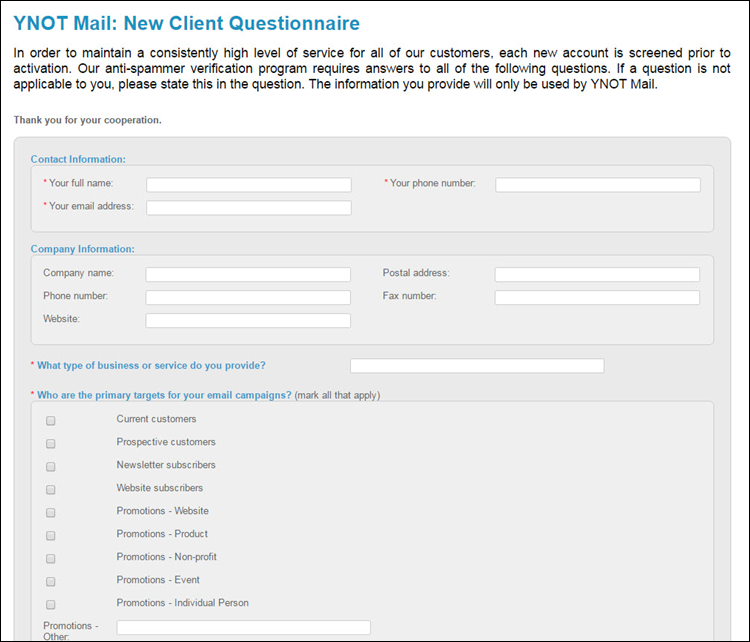
1. Register a YNOT Email Account
Before starting you need to register a YNOT email account. Browse to https://www.ynotmail.com/ and select Get Started. You will need to provide information and fill in the following sections:
- Contact Information
- Company Information
- Technical contact(s)
- Emergency contact(s)
- Billing Information
- Number of emails per month
- Accept Legal terms
2. Export Customers' Data
In order to export CCBill customers' data, please contact Merchant Support and request your customers' data be exported in CSV format. Our Support Team will export the data and send you the CSV file to your registered email address.
CSV (Comma-Separated Value) is a plain text file with chunks of text separated by columns.
Save the file, you will need it to import your customers' contact information into YNOT email.
3. Import Customer Data
In order to import customer data, you need to have an existing Contact List. If you have already created the contacted list you will import the customer data to, please skip to the How to Import Customer Data? section of the help file.
If you have not created a Contact List, please do the following:
1. Browse to the YNOT email service.
2. Enter your credentials and log in to the service.
3. Navigate to Contact Lists.
4. Select Create a Contact List.
How to Import Customer Data?
1. Navigate to Contacts > Import Contacts from a File.
2. Select which lists to import contacts to. When selected, click Next >>.
3. Set Import Details to your liking. (Format settings is usually set to HTML. If you are unsure about these settings, leave as default.)
4. Under File Details:
- Contains Headers
- Field Separator
- Field Enclosure
- Import File. Click Choose File and navigate to the CSV file we have sent you. Upload the file.
5. Click Next >> to import.
6. Link Import Fields. Map each contact item to a specific value from the drop-down menu on the right.
7. Click Next >> and Import the file.
There is an upload file-size limitation, but generally you can upload CSV files containing up to hundreds of thousands of email addresses and other related information.
View Newly Created Contact List
1. Navigate to Contact Lists > View Contact Lists.
2. Click View Contacts under the Action column in the row of your CCBill contact list.
4. Create an Email Campaign
1. Navigate to Email Campaigns > Create an Email Campaign.
2. Name the campaign and select a format (HTML and Text being the recommended option).
3. Select a template.
4. Click Next >>.

5. Type in the Email Subject. (Up to 50 characters.)
6. Use the edit box to set the email to your liking. Below is the Text Content field in which you enter the text for your email campaign.
7. You MUST add an Unsubscribe Link in order to be Can-Spam compliant. Position the cursor where you want the link to be placed and click on the Custom Fields button.
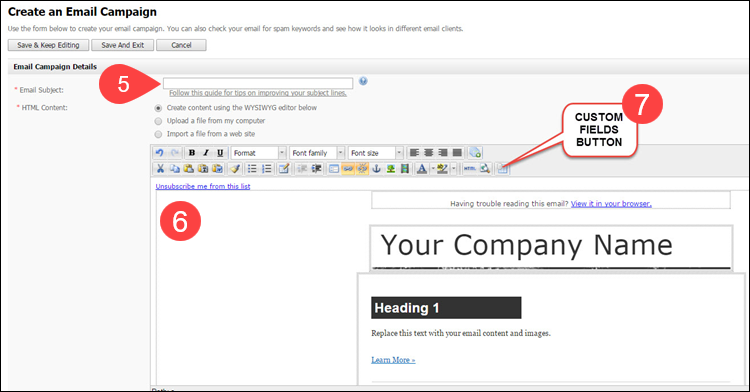
8. Click Unsubscribe Link. The link is inserted into your email.
9 Email Validation. It is advised that you check your email campaign for spam keywords and view your email in different email programs.
10. Preview Your Email Campaign. You can send yourself a copy of the email prior to sending it to your contacts (recommended).
11. Click Save and Exit.
YNOT works closely with clients to get emails into the inbox and protect the sender's reputation. YNOT works with adult companies, webcam models, novelty retailers, distributors, gentlemen’s clubs, or any other legal adult businesses.
Send Email Campaigns
1. Navigate to Email Campaigns > View Email Campaign.
2. Find the newly created Email Campaign in the list and click on Send under the Action column.
3. Set options to your liking and select the contact list you want to send to.
4. Click Next >>.
5. Take a final look at the information and click the Schedule My Email Campaign button.
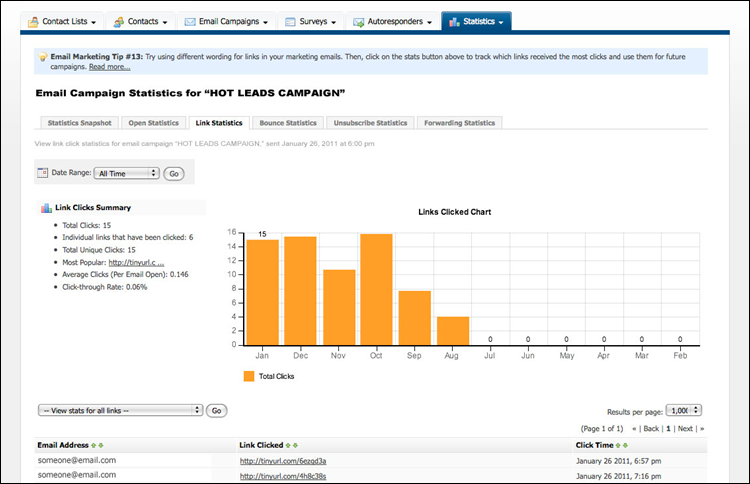
Check the Stats of Your Email Campaign
1. Navigate to Email Campaigns > Email Campaign Statistics. The screen displays a list of all your Email Campaigns.
2. Click View under the Action column in the row of the campaign you want to check stats for.
(See image below for a representation of the Link Statistics page.)
Support Options and Additional Resources
YNOT Email Service
- Information Link: https://www.ynotmail.com/index.php
- Support Link: https://www.ynotmail.com/support.php
- General Inquiries: https://www.ynotmail.com/contact.php
- Sign Up Link: https://www.ynotmail.com/get-started.php
CCBill
- Phone (TF): 800.510.2859
- Hours: 24/7
- email: merchantsupport@ccbill.com
- Live Chat: Click Here!