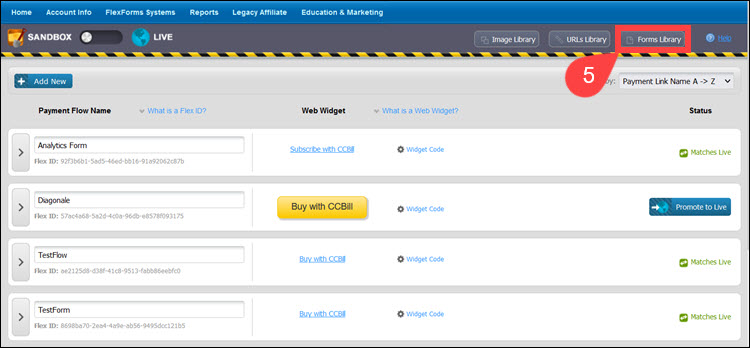
FlexForms Forms Library
Merchants can manage payment flows and forms using the Payment Flow Dashboard or the FlexForms Editor.
Regardless of how merchants choose to create and edit forms, they work with the same collection of forms on the merchant account.
This tutorial explains how to manage payment flows and forms using the FlexForms Editor.
Access FlexForms Editor
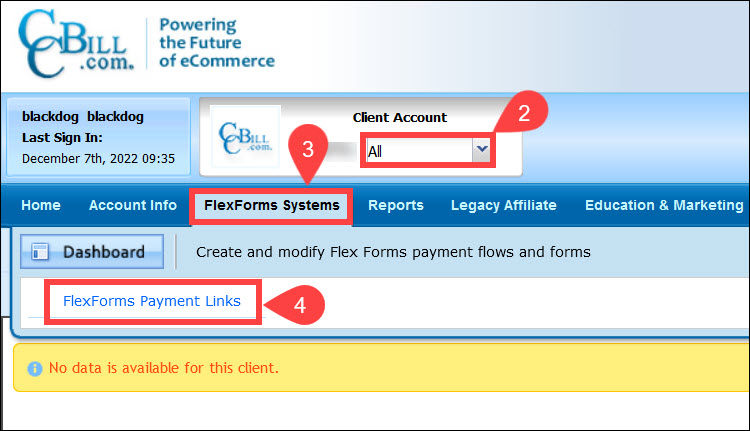
1. Log in to the Admin Portal.
2. Set the subaccount dropdown menu to All.
3. Click FlexForms Systems.
4. Select FlexForms Payment Links.
5. Open the Forms Library.
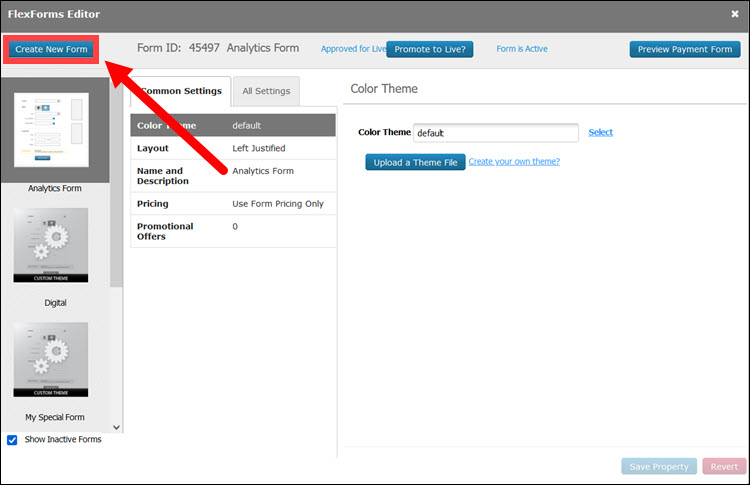
FlexForms Editor
The Create New Form option allows merchants to create and add new payment forms to the Form Library.
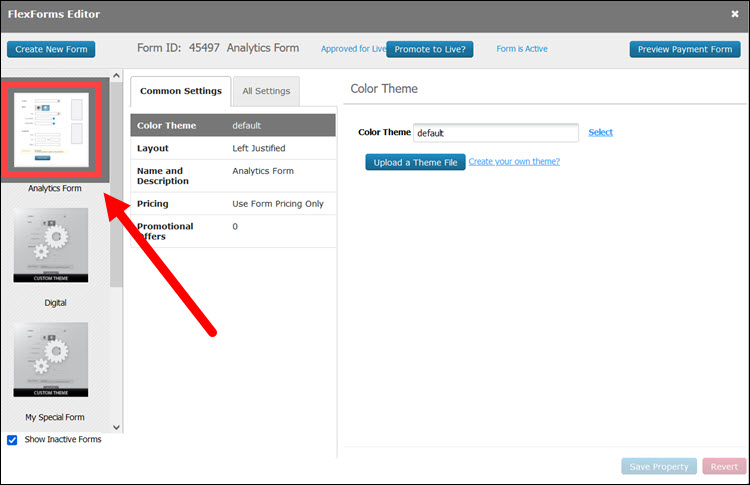
FlexForms Library
The left side of the window displays a scrollable list of forms available in the FlexForms Library. The options on the screen apply to the form selected in the form list. For example, if the Analytics Form is selected, and the information displayed on the dashboard pertains to that form.
The top of the FlexForms Editor screen also displays the status of the selected form and other data:
- Form ID. The FlexForms system assigns each payment form a unique ID number.
- Form Name. Merchants define the Form Name when creating new payment forms.
- Approved for Live/Pending Approval. When the payment form is Approved for Live, it can accept transactions. The Pending Approval status indicates that the CCBill team needs to approve customizations before the form can be used to accept payments. This usually happens when the merchant modifies the payment form by adding images, promotional offers, or custom CSS.
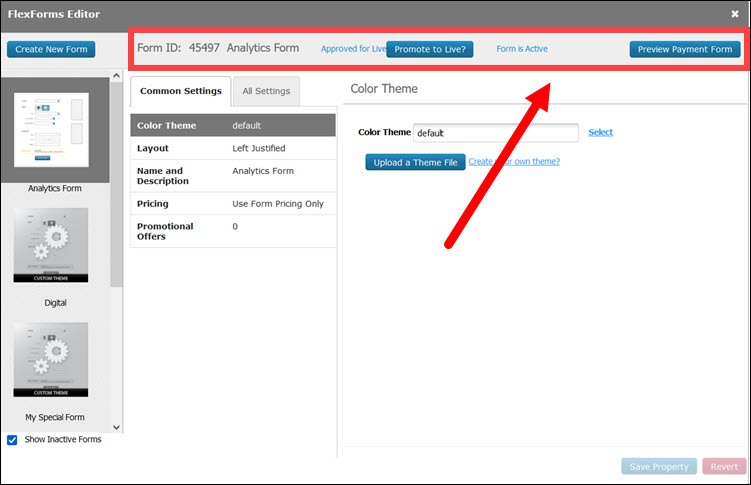
- Promote to Live?. After changes are approved, promoting the form to Live updates EVERY PAYMENT FLOW that uses this form with the new form version. Merchants do not need to promote each flow separately.
- Form Active/Inactive. This indicates the form's status. Inactive forms cannot be used to accept payments.
- Preview Payment Form. Preview changes to the form before promoting it to a live flow. The form preview opens in a new tab.
Changing Form Properties
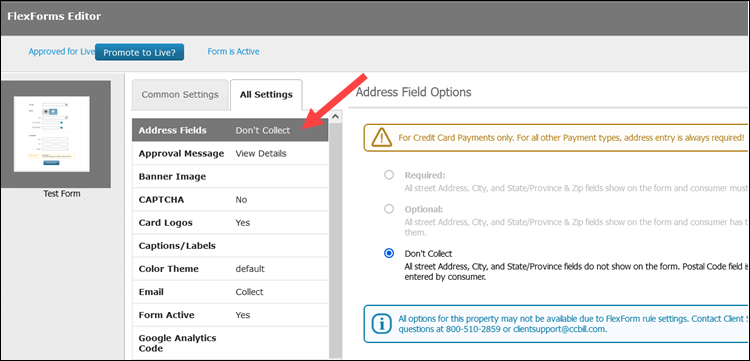
After selecting a payment form, open the All Settings tab to access the available customization options. Click on a property name to display the options for that form property.
Address Fields
Decide if you want to collect customer address information on the payment form. This applies to credit card payments only. The address fields are required for all other payment methods.
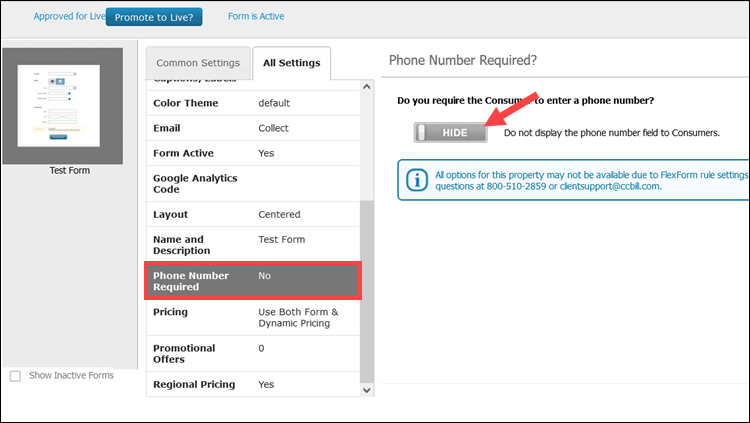
Collect Phone Numbers
The Phone Number Required option allows you to toggle the phone number field and require the customer to enter their phone number.
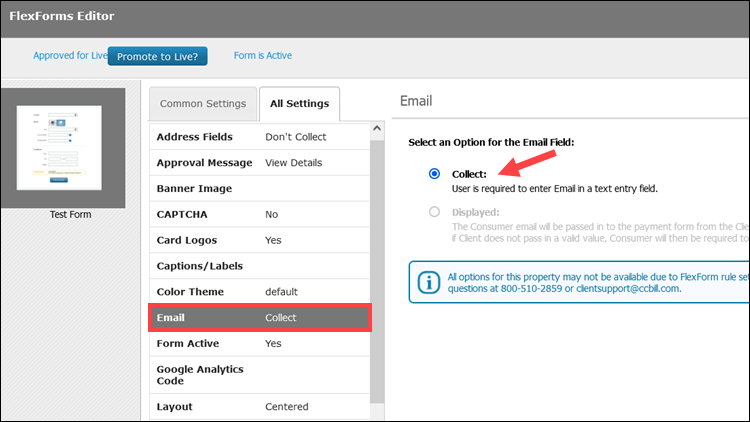
Consumer email addresses are mandatory for initiating a successful transaction. However, you can choose to have customers manually enter their email addresses on the payment form or prefill the field with an email they have previously provided.
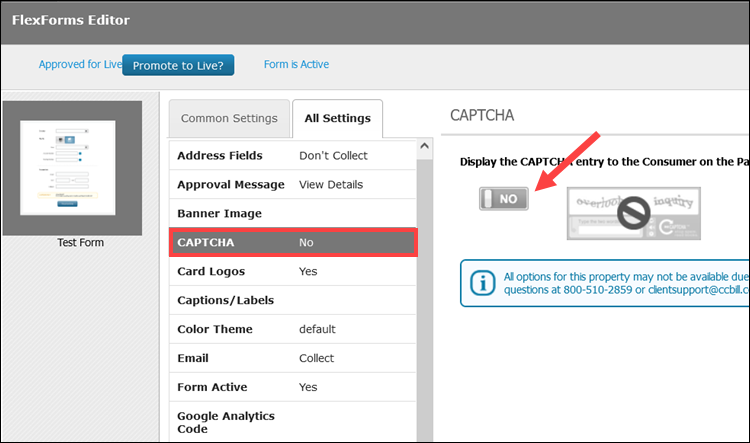
CAPTCHA
Merchants who want an additional security layer on their payment form can add a CAPTCHA by sliding the Yes/No toggle. Keep in mind that adding a CAPTCHA can adversely affect conversion rates.
Card Logos
By default, the payment form displays the main card logos for the acceptable card schemes. However, you can choose to display additional card logos by toggling the Display Secondary Logos button.
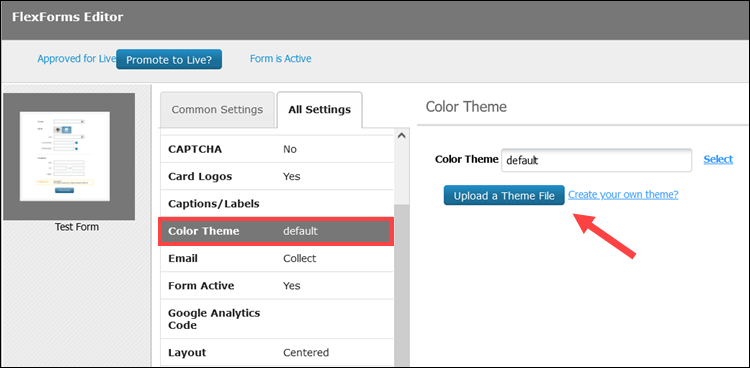
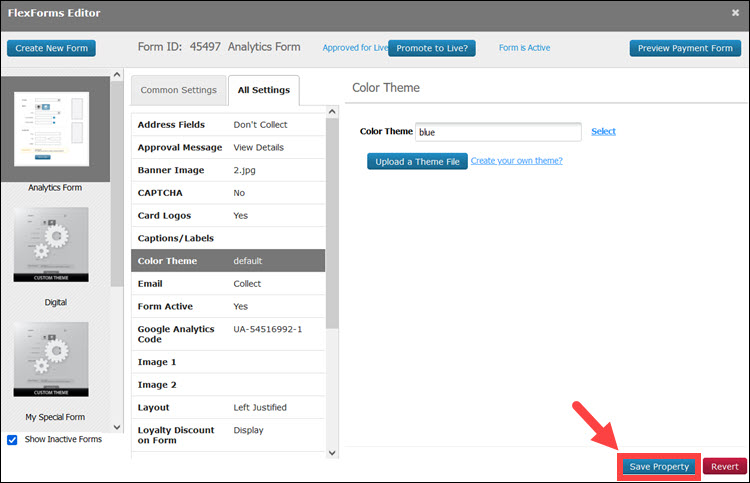
Color Theme
The Color Theme option allows merchants to select a premade theme from the FlexForms Theme Library or edit the payment form’s CSS.
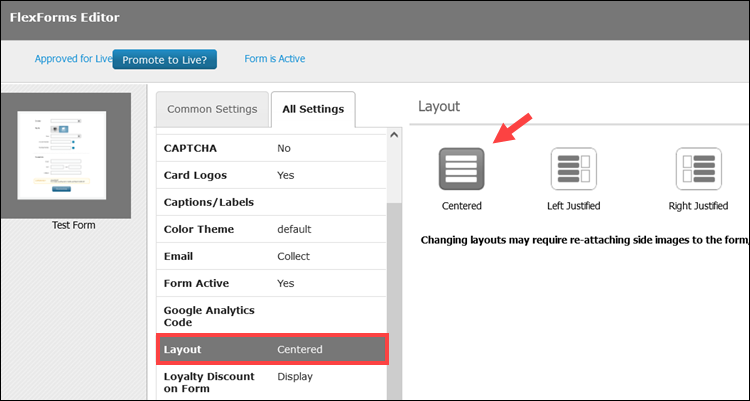
Layout
Choose between Centered, Left Justified, and Right Justified layouts. Changing the layout of an existing form may require re-attaching images to the form.
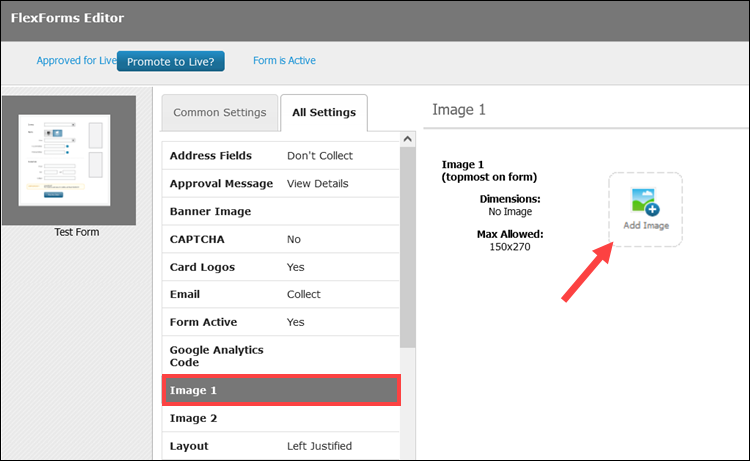
Images
Upload images to your forms. The number of images you can add varies by layout choice. A Centered layout supports only banners, while Right and Left-justified layouts allow for up to two additional images.
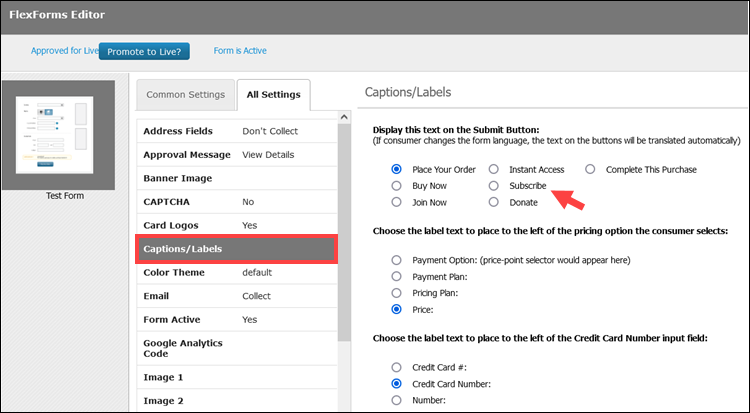
Captions and Labels
Choose from predetermined text options to describe the various fields on the payment form.
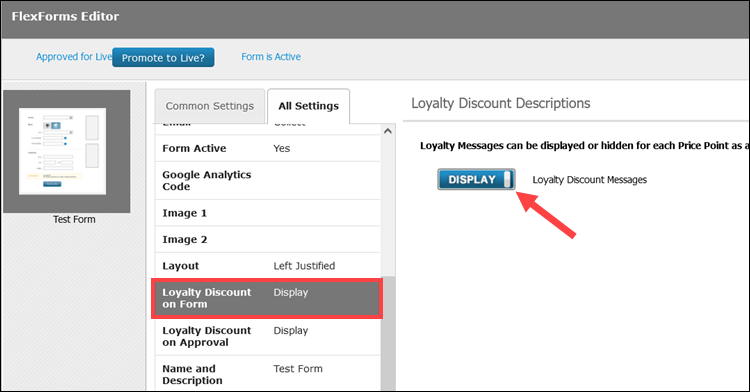
Loyalty Discount on Form
Choose whether to display Loyalty Discounts on the Form. They can be displayed or hidden for each Price Point.
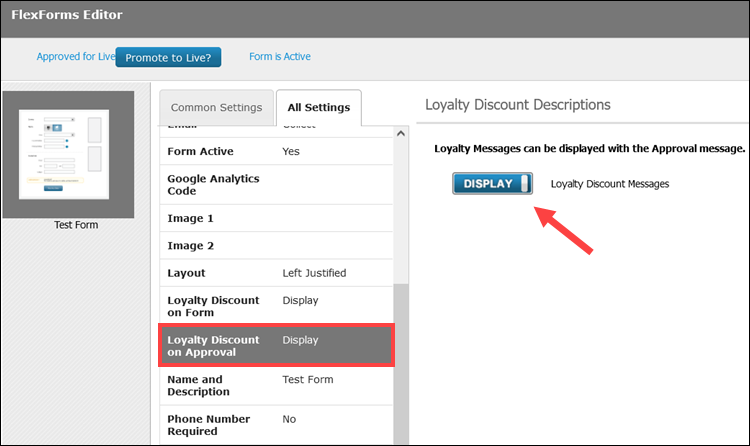
Loyalty Discount in Approval Message
Choose whether to display Loyalty Discounts with the Approval Message after a successful transaction.
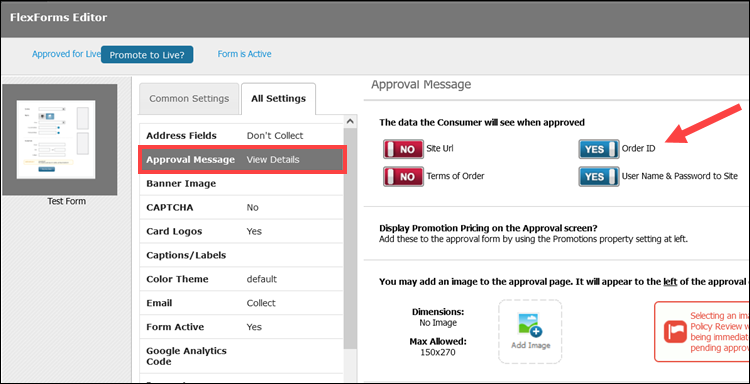
Approval Message
Configure what the customer sees when a transaction is approved.
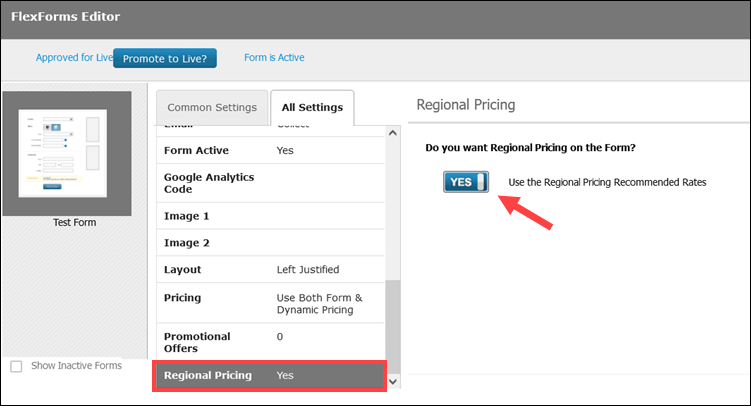
Regional Pricing
Select Yes if you want to enable Regional Pricing on the Form.
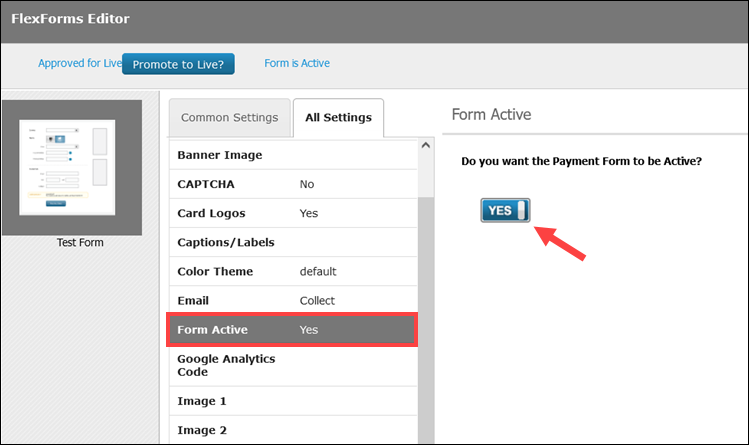
Form Active
Deactivate a payment form if you do not need it anymore.
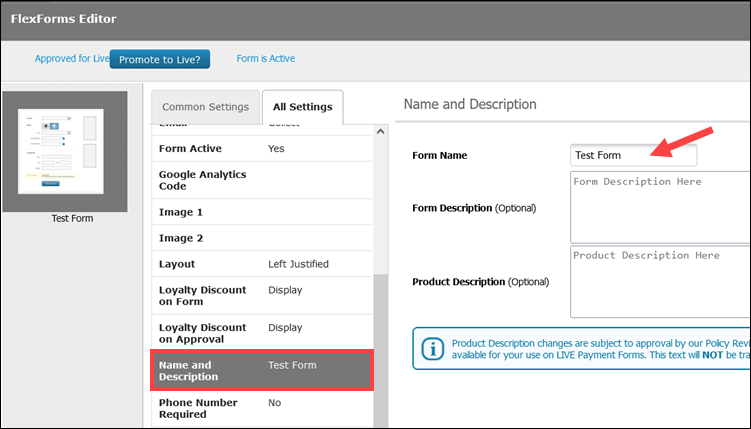
Name and Description
Modify the Form Name, form description, and product description.
Each property has a Save Property button located at the bottom of the screen. The button becomes active only if changes are made.
Promotional Offers
To set up Promotional Offers in the FlexForms Editor:
1. Select a payment form in the Forms Library.
2. Click the Promotional Offers property setting from the Common Settings list.

3. Select a Title for your offer(s). The available options are Special Offer, Today's Special, and Additional Offers.
4. (Optional) Add images to the Special Offers section.
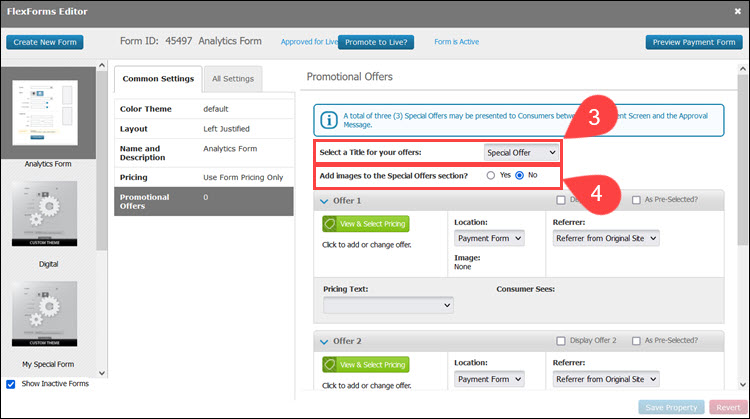
5. Create up to five (5) Special Offers. For every offer, you need to modify the following settings:
- View & Select Pricing. Select an existing price or create a new price point.
- Location. Define if the promotional offer is displayed on the Payment Form or Approval Message.
- Pricing Text. Select one of the two predefined texts. (One text is optimized for selling tangible goods, while the other is optimized for subscriptions.)
- Referrer. Each promotion supports separately configurable affiliate rules to determine which affiliate gets credited for the promotional sale.
- Referrer from Original Site (default). Any affiliate ID on the main/primary sale will get credit if the consumer buys this promotion. (Note that if there is no affiliate ID on the main sale, nobody gets credit.)
- Custom Referrer. This allows the merchant to enter an affiliate ID of their choosing. That affiliate ID will always get credit if a consumer buys this promotion.
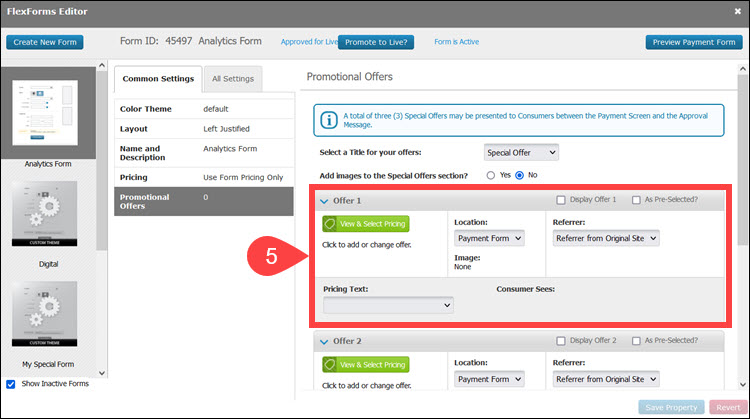
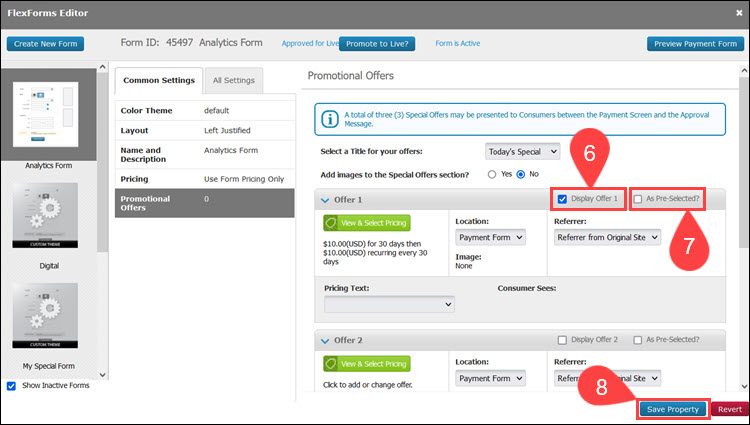
6. Check the Display Offer box to make the offer visible to customers. This option allows you to configure the offer in advance and display it on the payment form later.
7. (Optional) Checking the As Pre-Selected? option means that the promotional offer on the payment form or approval page is going to be pre-checked.
8. Save Property to apply the setting.
The number of special offers that can be presented to customers between the Payment Screen and the Approval Message varies depending on Client Rules.