JPost to FlexForms Guide
This guide is intended to assist merchants in migrating from the legacy JPost form system to the FlexForms system. The document covers the steps necessary to create your first FlexForm and Payment Flow, and it outlines the numerous benefits of the new system.
The links in the guide will direct you to the pages with in-depth instructions for advanced features.
Benefits of Switching to FlexForms
CCBill’s FlexForms system is the improved successor of the old legacy (JPost) forms. The new forms are a dynamic and user-friendly environment for modern payment platforms. FlexForms come with CCBill Pay, a free tool that allows consumers to store payment information and check out faster.
Intuitive FlexForms payment flows allow you to add multiple payment methods on a single form. The flows define a user’s experience by creating a path depending on the transaction status.
Instead of losing potential sales, you can cascade consumers from one form to another or even redirect buyers to a third-party payment processor. This way, you maximize the chances of completing a sale.
Our new responsive payment processing system has many advantages compared to JPost legacy forms.
Some of the benefits are:
- All payment types are on one form. Regardless of the payment method or geo location of a potential consumer, one form covers every scenario.
- One form for all devices. FlexForms adjust to the screen size and the device type. Only one responsive form is needed to cover desktop, tablet, and smartphone devices.
- A/B Testing. Utilize this feature to test the performance of payment forms and flows against each other. A/B testing allows you to determine which form or page yields the best results.
- CCBill Pay. CCBill’s proprietary online service for storing payment methods is only available with FlexForms. Consumers can store up to 25 payment methods for a quicker checkout experience. CCBill Pay makes it easy for consumers to return and complete future purchases.
Before You Start
There are a few critical elements to have in mind before you start working with FlexForms. When you log in to the CCBill Admin Portal to work with FlexForms:
- You need to select All in the Client Account dropdown menu. If a subaccount is set, it is possible to view the options, but you cannot manage FlexForms. The message "You are not authorized to use this function" pops up in that case.
- Make sure you obtain links from the Live Mode for your live website. Links from the Sandbox mode will not work for your consumers. Only logged-in users can preview and test in the Sandbox mode.
Please read important information concerning the form status and form URLs.
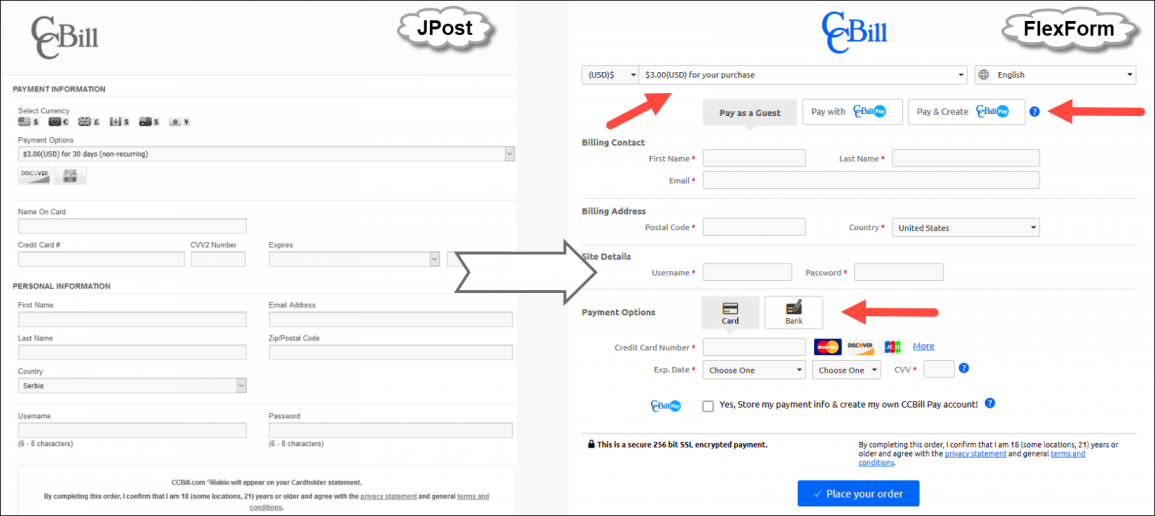
Transition from JPost to FlexForms
Switching to FlexForms from legacy forms is a quick and seamless process. The new flexible payment form system enables you to offer a complete portfolio of products and services on one form.
Instead of having individual forms for the same price for every subaccount and payment method, you now create one form for all subaccounts.
Payment Flow vs. Payment Form
A Payment flow is the path your consumers take depending on whether their payment is accepted or declined. Payment flows can contain multiple forms from the library. You can cascade consumers in the flows from one payment form to another.
Your customers see advanced payment forms on your website as they usually do when purchasing subscriptions or goods. One form can be part of multiple payment flows.
In this example, the merchant has 5 subaccounts and accepts credit card payments and online checks on every subaccount.
A comparison between the JPost form setup and the new streamlined FlexForm setup shows the benefits of the FlexForms system:
| JPost Forms | FlexForms System |
|---|---|
| Create five individual forms for online checks for every subaccount. | Create one form for a payment flow. |
| Create five individual forms for payment cards. | Assign desired prices for individual subaccounts. |
| Total Forms: 10 | Total Forms: 1 |
Create FlexForms Payment Flow and Form
In contrast to JPost, where you start with creating individual forms, in the FlexForm system, we begin with adding a new payment flow:
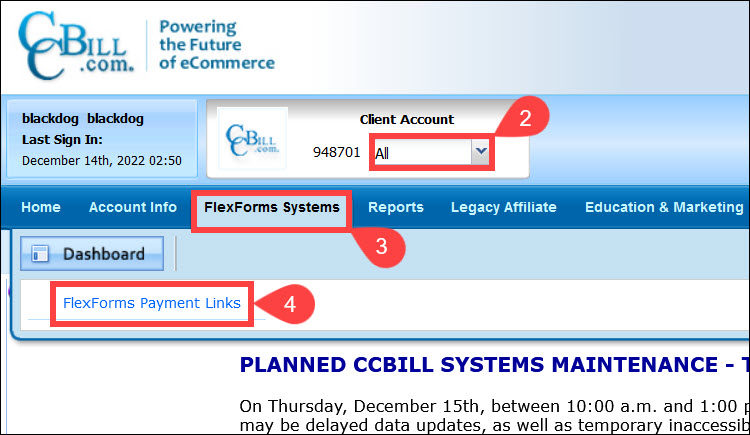
1. Log in to the Admin Portal.
2. Ensure that the subaccount dropdown menu is set to All.
3. Select FlexForms Systems.
4. Click FlexForms Payment Links.
Visit the FlexForms Quick Start Guide for step-by-step instructions on how to create your first payment flow and form.
Preview Payment Form in Sandbox Mode
Before using a form on a live website, you can preview it in the Forms Library. To preview a form:
1. Access the Forms Library from the FlexForms dashboard.
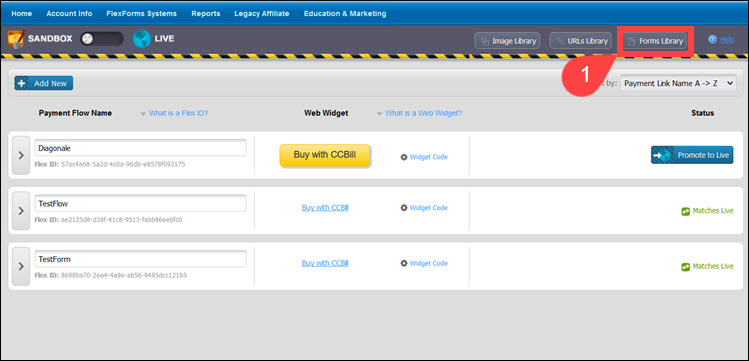
2. Select your form from the left side of the screen.
3. Click the Preview Payment Form button.

A new tab opens, displaying the form you created.
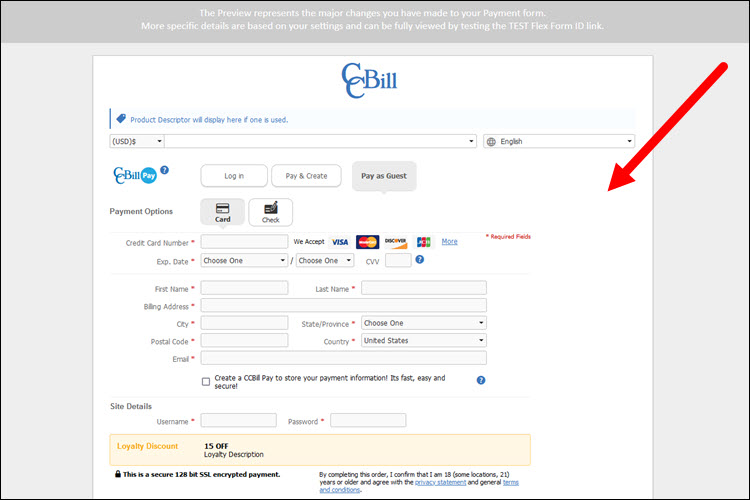
If you want to make changes to the form, you can do so on the same FlexForm Editor window. You can make changes only while you are in Sandbox mode. Refer to the Forms Library for more details.
Promote a Payment Flow and FlexForm to Live
When you are satisfied with how your form looks after you set up the payment flow, promote the flow to live in this way:
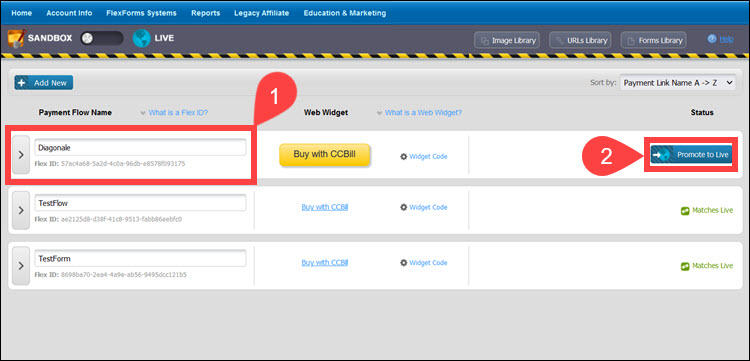
1. Locate the payment flow on the FlexForms Systems landing page.
2. Click Promote to Live button on the right side of the row.
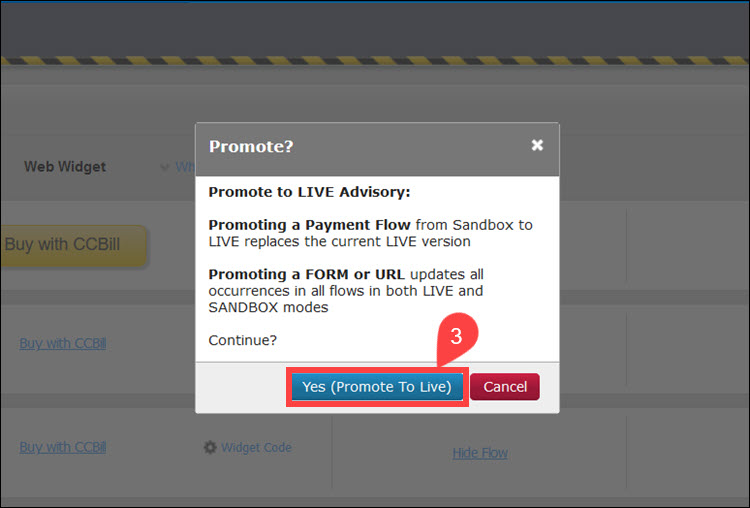
3. Click Yes (Promote to Live) to confirm.
If you make a change to a single form in a live flow, you can promote a form to live instead of a payment flow. To promote a form to live:
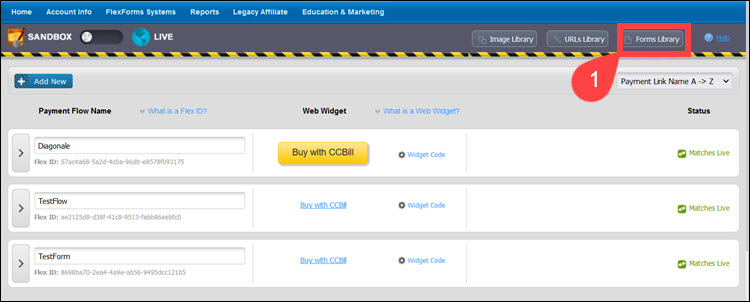
1. Access the Forms Library.
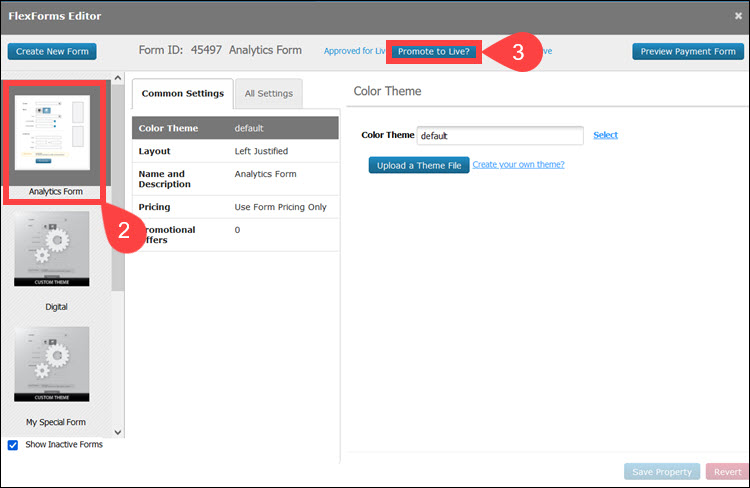
2. Select your form from the left side of the screen.
3. Click Promote to Live?.
4. Click Yes (Promote to Live) to confirm your choice.
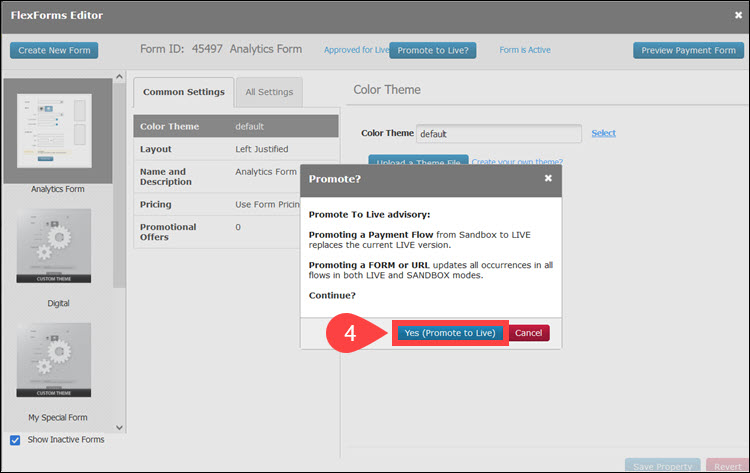
When you promote a form to live, every payment flow that contains the updated form will reflect the changes – there is no need to go to every payment flow and promote it to live.
Replace Live JPost Form URLs with FlexForm URLs
Once you promote your payment flow to live, you need to replace the old JPost form links on your website with FlexForm links. You can choose between a Web Widget and a URL for your call-to-action buttons.
To retrieve a FlexForm URL or Widget Code:
1. Click the Widget Code link on the FlexForms Systems landing page.
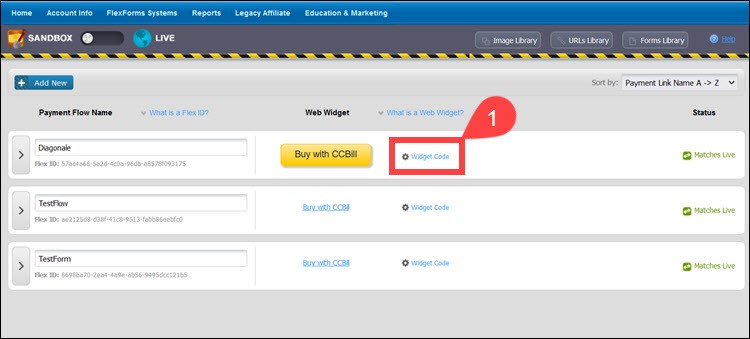
2. Copy the Live Widget Code or URL on the right side and click Close. Remember that copying the links from the Sandbox section will not work, and your form will not be active on the website.
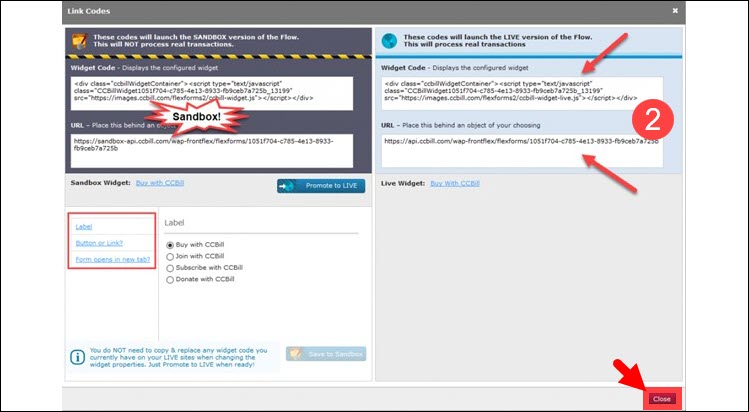
3. Embed the widget code or URL in your website code. Widgets allow you to customize a call-to-action button in the Admin portal.
You only need to embed the code or link to your website ONCE. Any time you update a FlexForm, the changes will reflect on your website as soon as you promote a form to live.
You can also configure the look and behavior of your widgets and links in this section. The Managing FlexForms Payment Flows guide contains details instructions for configuring Web Widgets.
Congratulations! Your customers can now buy your products and services using the improved FlexForms.
Use the FlexForms CSS Guide to customize the CSS color theme of individual forms to match the look and feel of your website.
Support
For any additional questions or assistance with the transition from JPost forms to FlexForms, feel free to contact CCBill Merchant Support 365 days a year.
- Hours: 24/7
- Toll-Free: 800.510.2859
- Email: merchantsupport@ccbill.com
- Live chat
- International number listing: https://www.ccbill.com/contact