Managing FlexForms Payment Flows
A payment flow is the path customers follow when paying on your website. The FlexForms system enables you to control and design unique payment flows and enhance the customer’s checkout experience.
You can redirect customers to custom approval or denial pages, promotional forms, or set up cascades to other payment processors to reduce cart abandonment rates.
In this guide, you will learn how to adjust your payment flows without replacing live links or resetting payment forms.
Payment Flow Map
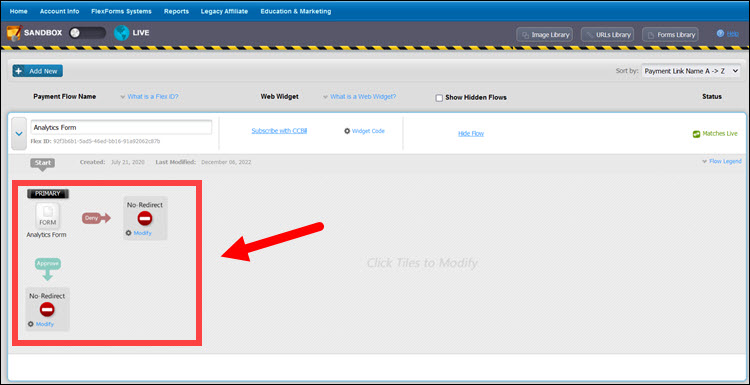
After creating the first payment flow, the FlexForms system displays a user-friendly map that allows merchants to visualize and quickly edit their payment flows and forms.
To access a payment flow map in FlexForms:
1. Access the Admin Portal.
2. Ensure that the subaccount dropdown menu is set to All.
3. Select FlexForms Systems.
4. Click FlexForms Payment Links.
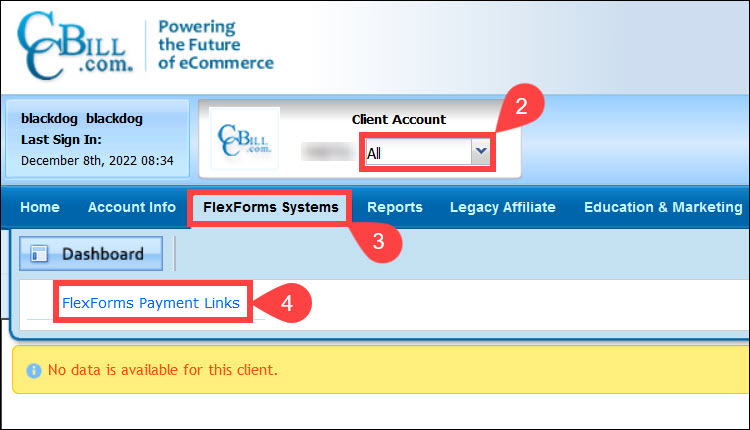
5. Expand the Flow Map for a specific Payment Flow.
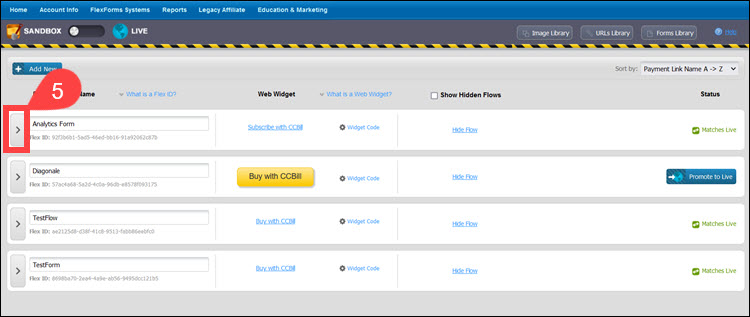
Modify the individual tiles in the flow map to adjust existing and design new payment flows.
Sandbox and Live
All Payment Flows and forms are created in sandbox mode. No external users can access the sandbox link, and any links you obtain from the sandbox can only be used when you are logged in to the CCBill Admin Portal. The sandbox environment is meant only for testing.
At the top of the screen is a toggle switch. The switch indicates which mode you are in.
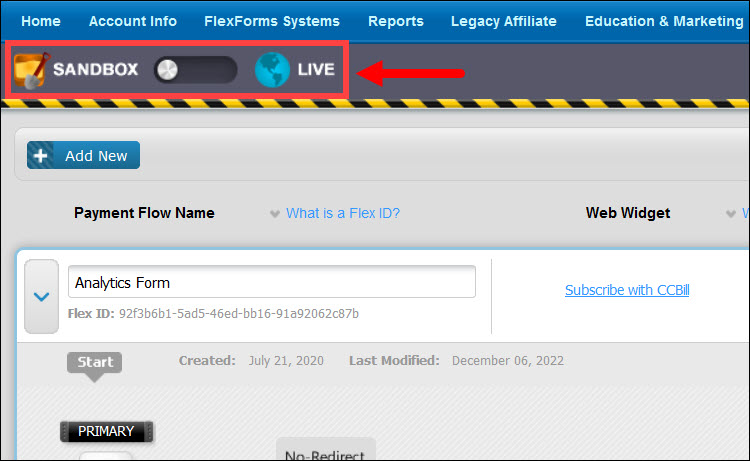
Setting the slider to Sandbox allows merchants to work in the Sandbox environment. This is the default mode and will enable you to create and edit payment flows and forms.
If the slider is set to Live, you can view your live Payment Flows and get the Web Widget and URL code for live forms. You cannot make any changes in the Live Mode.
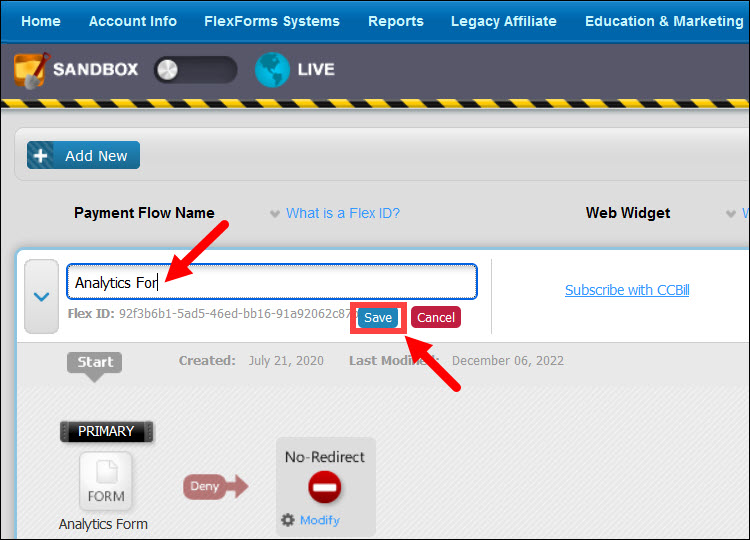
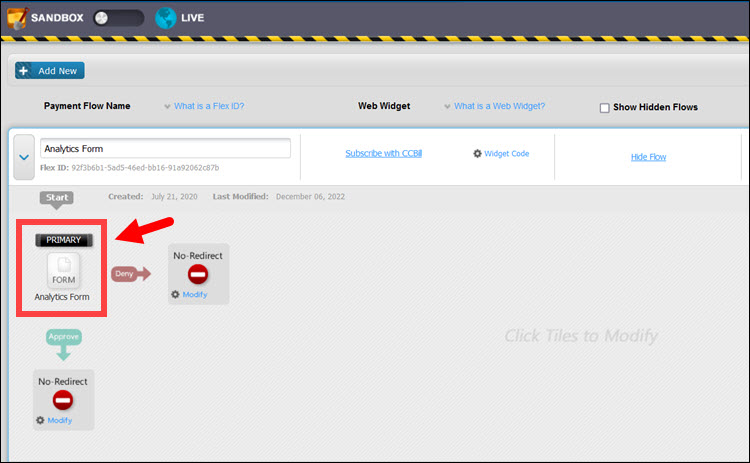
Payment Flow Name
Each Payment Flow must have a unique name. The name is not visible to customers and is intended to help merchants differentiate between different payment flows.
To change to Payment Flow Name, click the name field, update the name, and Save.
Flex ID
The FlexForms system gives each payment flow a unique ID. The Flex ID is used when integrating FlexForms with third-party platforms.
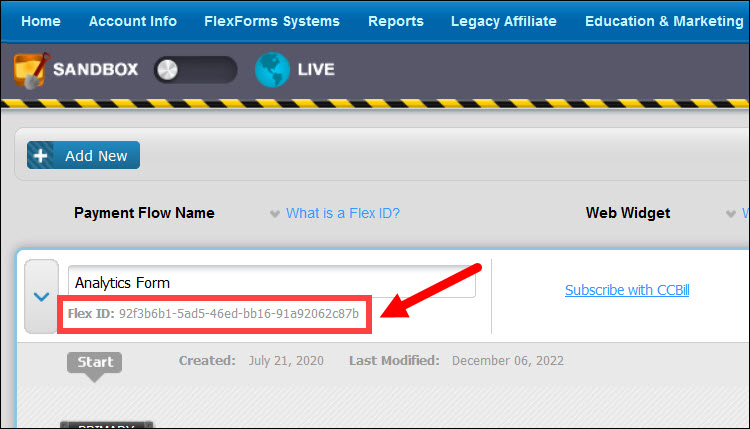
For example, if an ecommerce platform supports CCBill FlexForms, adding the Flex ID enables the platform to redirect the customer to the correct payment flow during checkout.
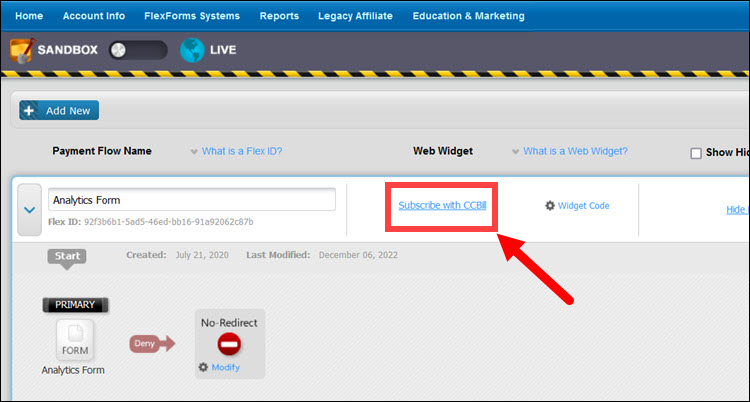
Web Widget
Merchants can place the Web Widget code on their website and modify payment links and buttons from the Admin Portal without updating their website.
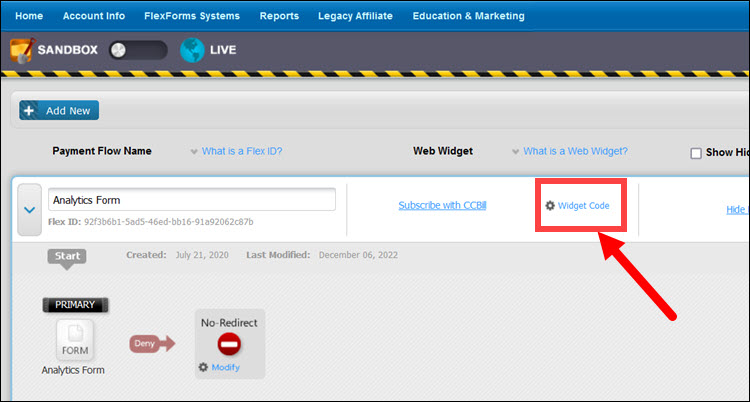
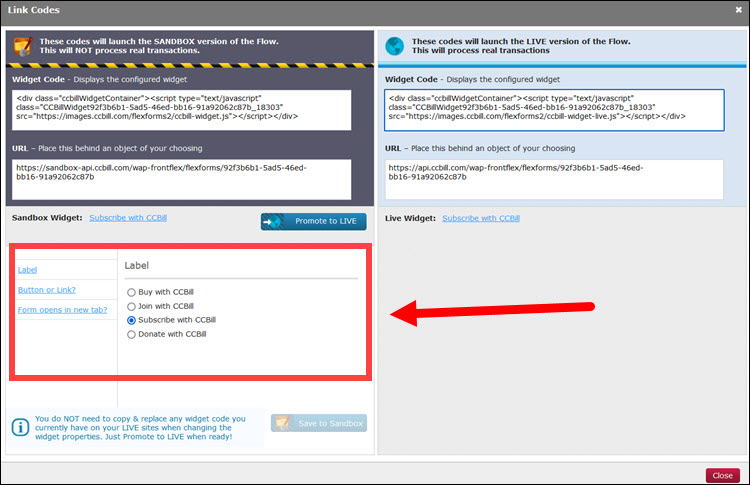
The Widget Code menu (Link Codes) contains direct links and button types that merchants can copy and paste on a website to call a specific payment flow.
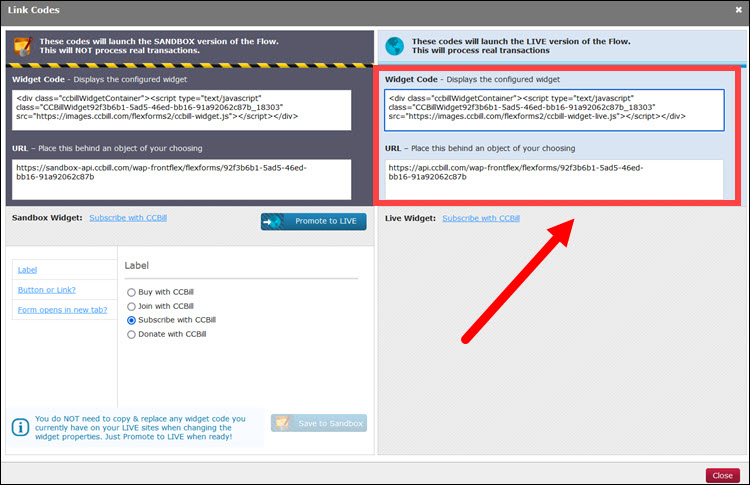
The Web Widgets code is different in Live and Sandbox mode. Use the Web Widget code or link URL from the Live environment and place it on your site so customers can use the payment flow to make purchases.
Edit Widget Label
You can use the Link Codes pop-up window to change the text in the Widget button or link. The available predefined options are:
- Buy with CCBill
- Join with CCBill
- Subscribe with CCBill
- Donate with CCBill
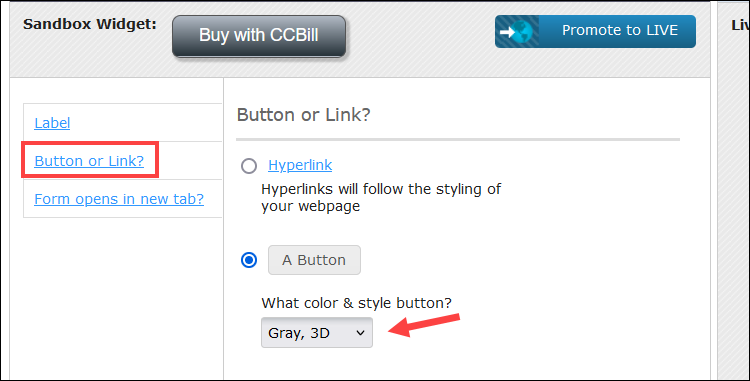
Button or Link
The Web Widget is customizable and can appear as a button or hyperlink. Additional customization options, such as style and color, are available.
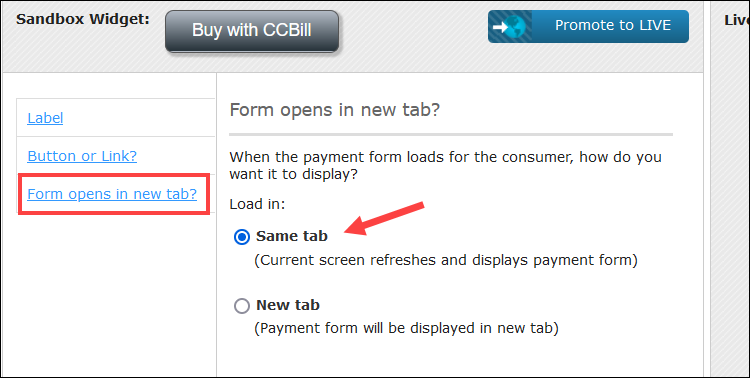
Open Payment From in New Tab
Merchants also have the option to configure the payment form to open in a new tab or in the same tab.
The Web Widget is accessible directly from the Admin Portal and provides merchants with a preview of the payment flow. It is used for testing payments.
Primary Tile
Each payment flow starts with the Primary Tile. The customer is redirected from the Primary Tile and takes the Approval path if their transaction is approved or the Deny path if the transaction is unsuccessful.
By clicking the Primary tile, merchants can edit the starting point of their payment flow. They can create a new form, set a custom URL as the primary tile, or use an existing payment form.
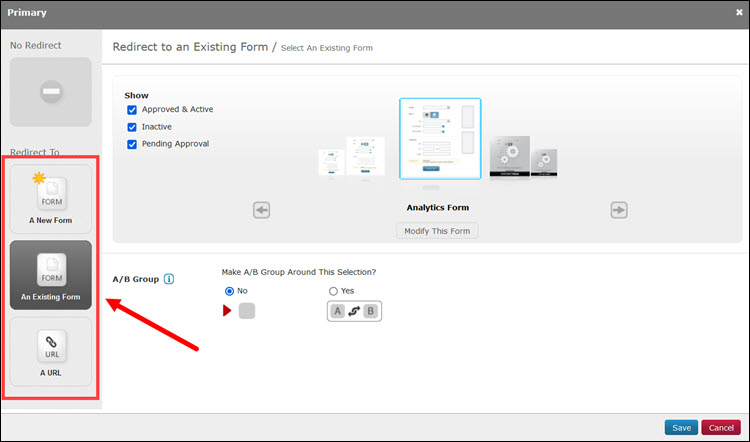
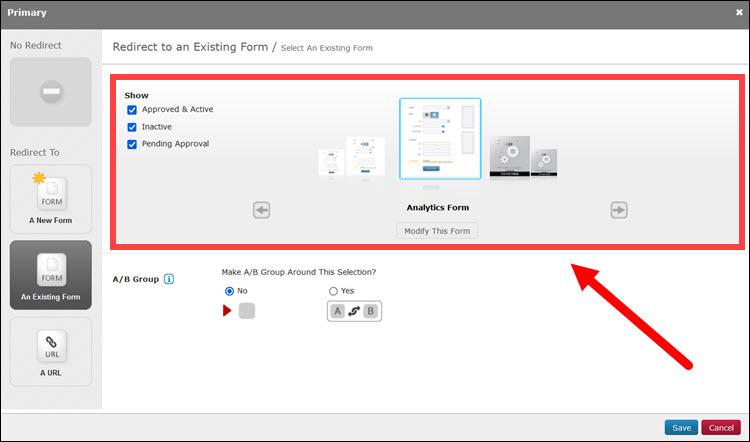
The Form Carousel provides a small preview of available forms in the Forms Library. Merchants can navigate, filter, scroll, and modify form properties.
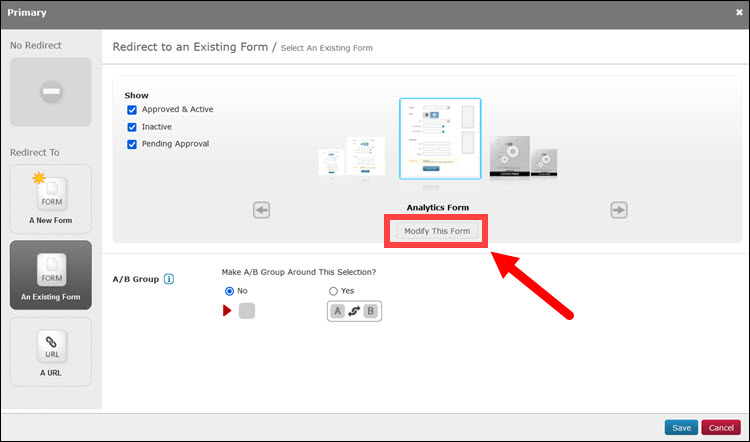
Selecting the Modify This Form option while a form is centered, allows merchants to customize form properties.
The A/B Group section is for creating A/B testing flows and measuring the effectiveness of different flows and forms.
Redirect Tiles
The tiles directly below and to the right of the Primary Tile are called Redirect Tiles. By default, the system creates an Approval and Deny redirect tile. Every new redirect you add always defaults to the same state: No Redirect.
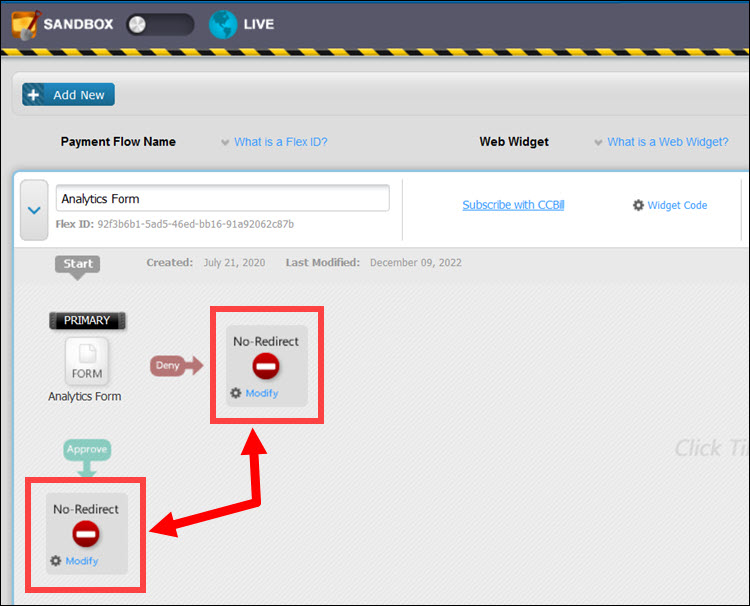
The No Redirect state presents customers with the default CCBill Approval or Deny page, depending on the outcome of their transaction. There are no further redirections.
If you do not want to redirect customers to the default page, click the Modify link on the redirect tiles to add the desired behavior.
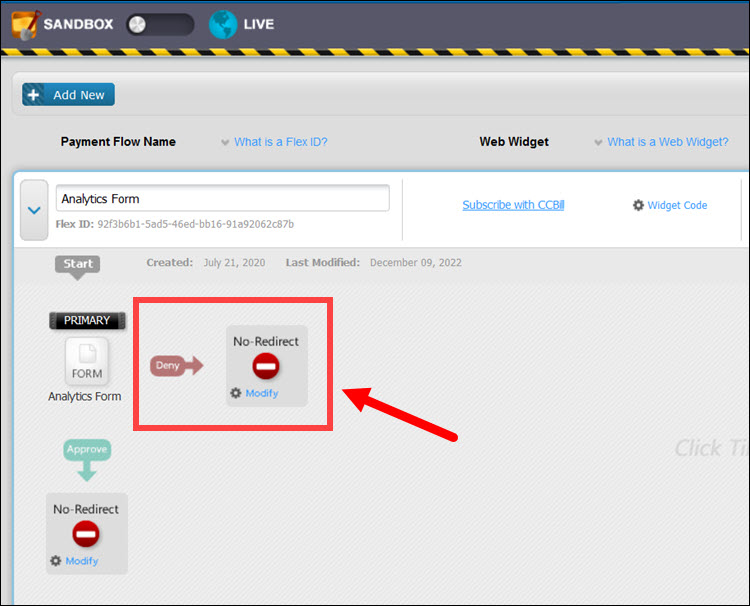
Deny Path
The Path Markers help merchants identify tiles and know when a customer is going to be redirected to the next tile if one exists.
Click Modify in the No Redirect box to the right of the Primary Tile because the Deny Path marker points to that tile. Merchants often use this option to redirect customers to a different form if the initial transaction was unsuccessful.
The Deny Path modification window has similar options and features as the Primary Tile window.
Deny tiles do not have a Payment Flow Name field but have an additional slider for configuring redirection times.
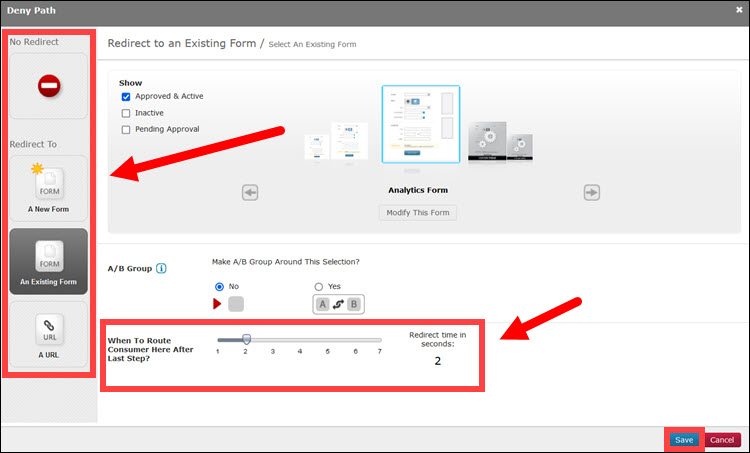
Once you are satisfied with the settings, click Save.
Approval Path
Modifying the Approval Path is similar to editing the Deny Path. However, merchants cannot redirect to a New or Existing form.
They can redirect customers to a URL or add a URL for them to click on instead of being automatically redirected. The unavailable items are grayed out.
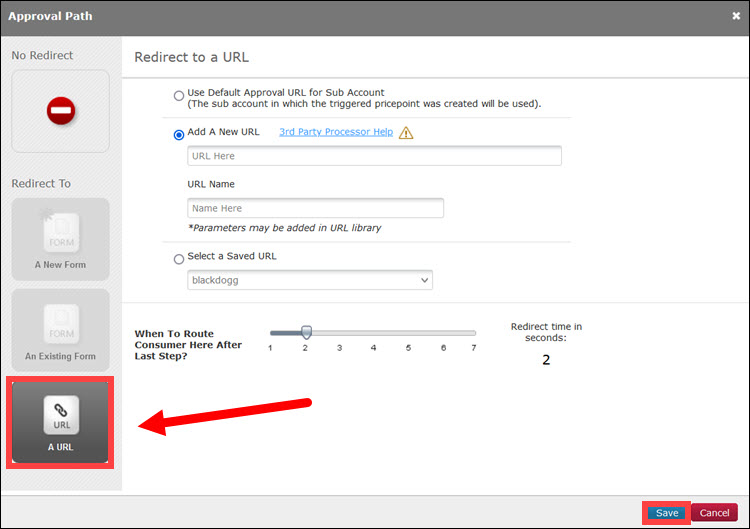
Merchants can use the Approval Path tile to add links to their members’ area or a similar location.