How to Customize Client Upgrade Emails
Upgrade emails notify customers that their subscription has been upgraded to a new pricing plan, while their original subscription was canceled.
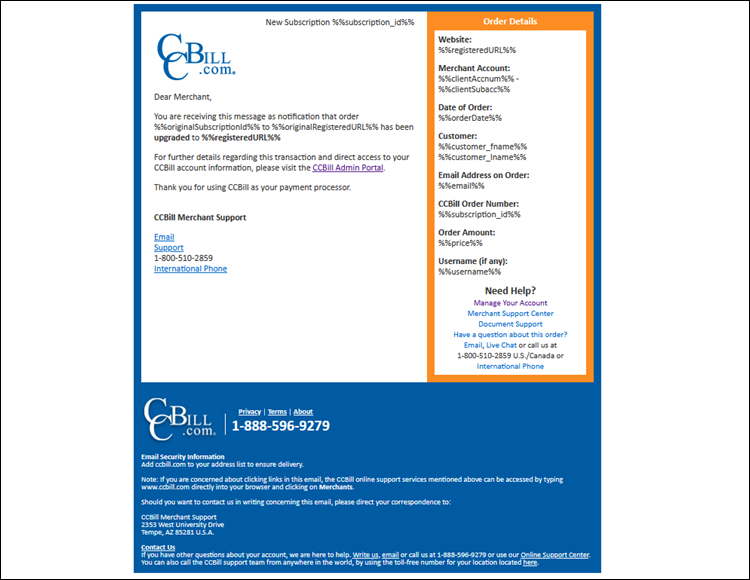
CCBill sends an additional email to the merchant’s registered email address to inform them that a subscription has been upgraded.
Find out how to modify the content and appearance of your Client Upgrade emails.
Step 1: Access Client Upgrade Email
To access merchant-facing Upgrade emails for an individual subaccount:
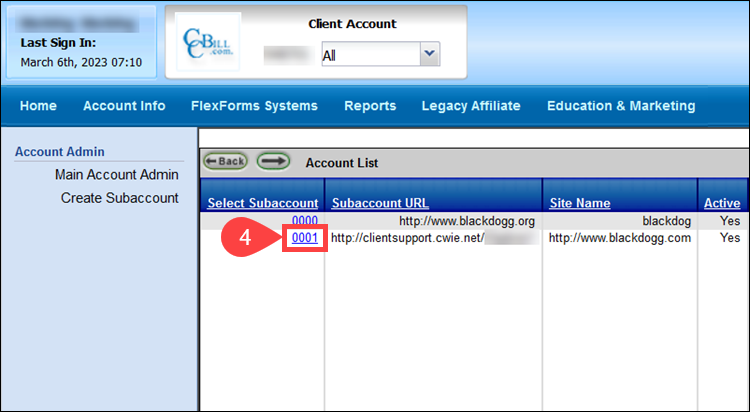
1. Access the CCBill Admin.
2. Click Account Info.
3. Open the Sub Account Admin.

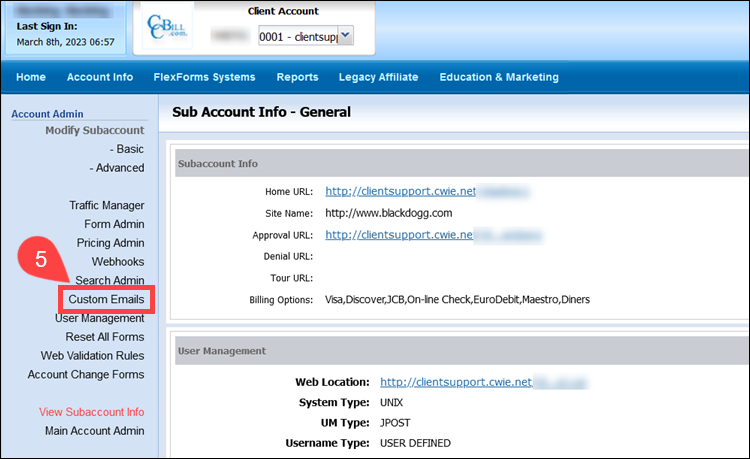
4. Select a subaccount for which you would like to customize emails.
5. Click Custom Emails.
Step 2: Modify Client Upgrade Email
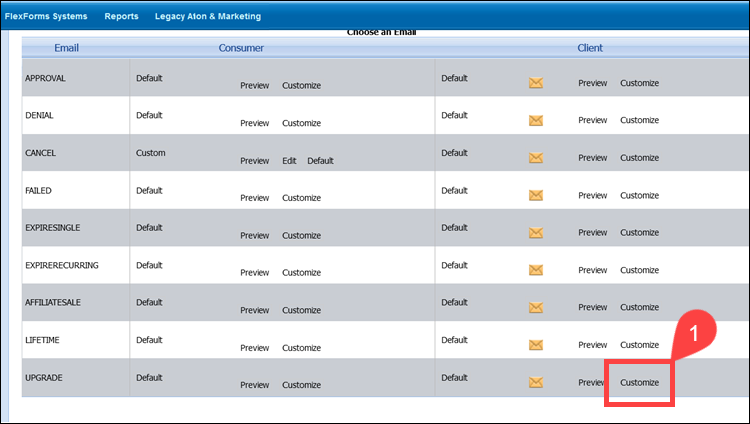
To customize merchant-facing Upgrade emails:
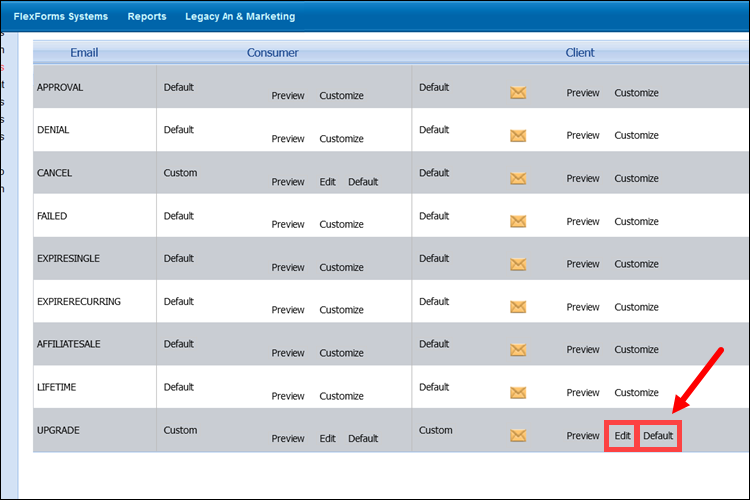
1. Select Customize for the Upgrade email type in the Client column.
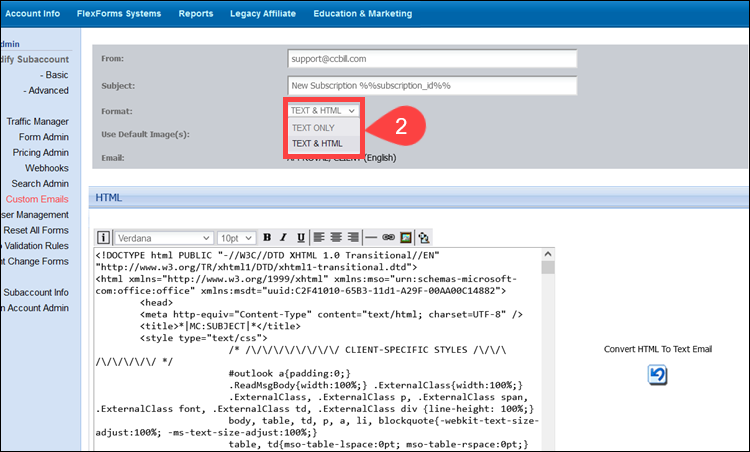
2. Use the dropdown menu to select an email editing format. Selecting an email type does not only determine the editing format but the appearance of the email itself.
- TEXT & HTML – The TEXT & HTML option results in a visually engaging email and includes numerous data variables by default. Continue to step 3 of this section to edit an email using HTML and plain text.
- TEXT Only – The TEXT ONLY email type is a simple textual rendition with only essential transaction information. However, additional variables can be added manually if necessary. Continue to step 9 of this section to edit the email using plain text only.
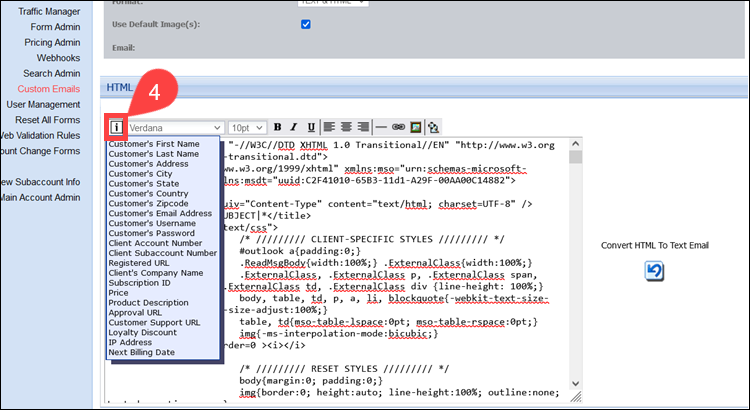
Merchant-facing Upgrade emails contain variables that allow CCBill’s system to automatically insert relevant and personalized customer and merchant data.
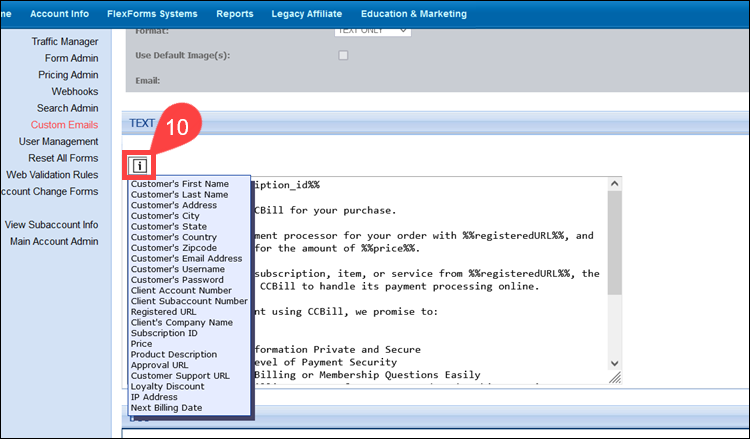
This is a comprehensive list of variables merchants can add when customizing emails:
| DESCRIPTION | VARIABLE | |
|---|---|---|
| 1. | Customer First Name | %%customer_fname%% |
| 2. | Customer Last Name | %%customer_lname%% |
| 3. | Customer Address | %%address1%% |
| 4. | Customer City | %%city%% |
| 5. | Customer State | %%state%% |
| 6. | Customer Country | %%country%% |
| 7. | Customer ZIP | %%zipcode%% |
| 8. | Customer Email | %%email%% |
| 9. | Customer Username | %%username%% |
| 10. | Customer Password | %%password%% |
| 11. | Client Account Number | %%clientAccnum%% |
| 12. | Client Subaccount Number | %%clientSubacc%% |
| 13. | Registered URL | %%registeredURL%% |
| 14. | Client’s Company Name | %%companyName%% |
| 15. | Subscription ID | %%subscription_id%% |
| 16. | Price | %%price%% |
| 17. | Product Description | %%productDesc%% |
| 18. | Approval URL | %%approvalURL%% |
| 19. | Customer Support URL | %%customerSupportURL%% |
| 20. | Loyalty Discount | %%loyaltyDiscount%% |
| 21. | IP Address | %%ipAddress%% |
TEXT & HTML
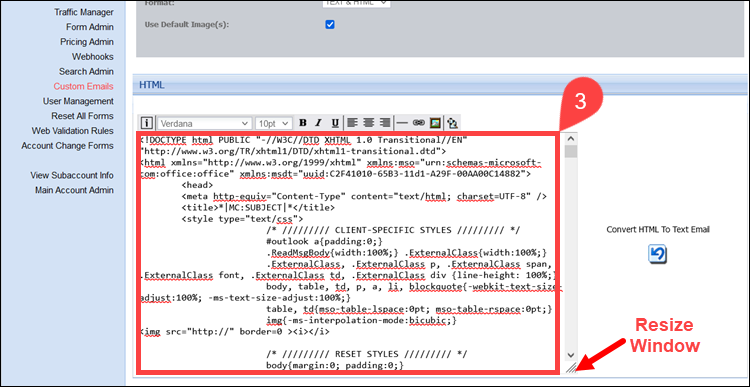
3. Insert the custom HTML content in the editing pane.
Use the double-headed arrow in the lower right corner of the editing pane to resize the window for a better overview of the content.
4. (Optional) Use the i dropdown menu to insert CCBill variables.
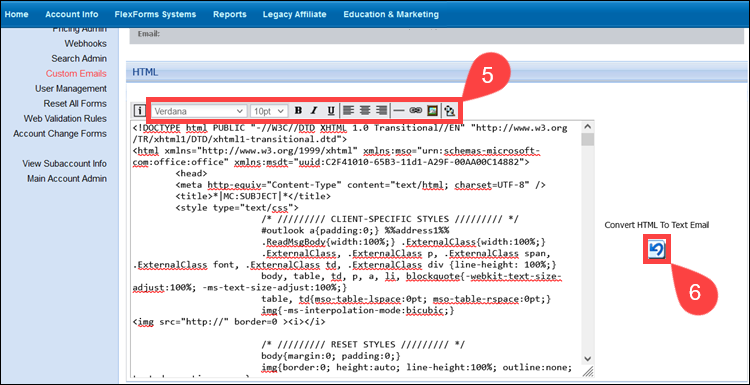
5. (Optional) Use the small toolbar to format the content (i.e., fonts, alignment, text color, indenting, and images).
6. Click the Convert HTML To Text Email button to automatically convert your custom HTML to text.
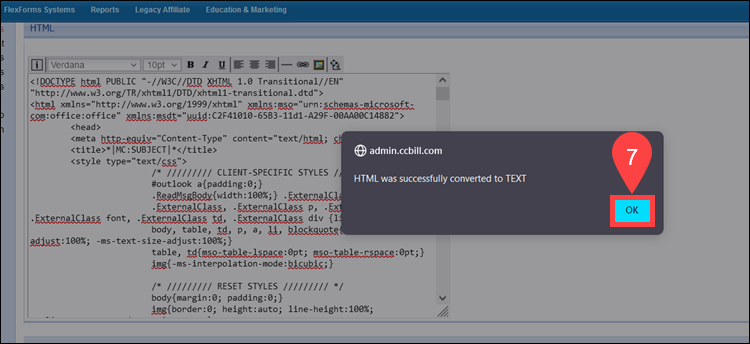
7. Click OK to close the popup window that confirms the HTML was converted to Text.
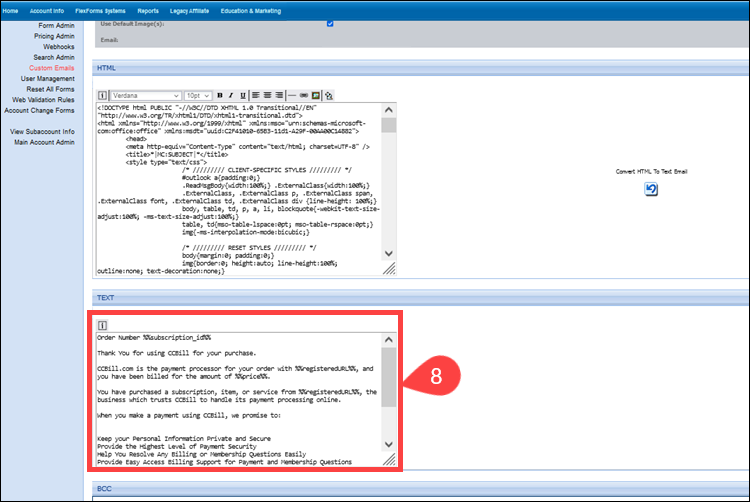
8. The converted text is visible in the Text pane. You can use this pane to make additional edits if necessary.
Changes made in the text pane will not be visible in the preview but will appear in the actual email.
Continue to section Step 3: (Optional) BCC.
TEXT Only
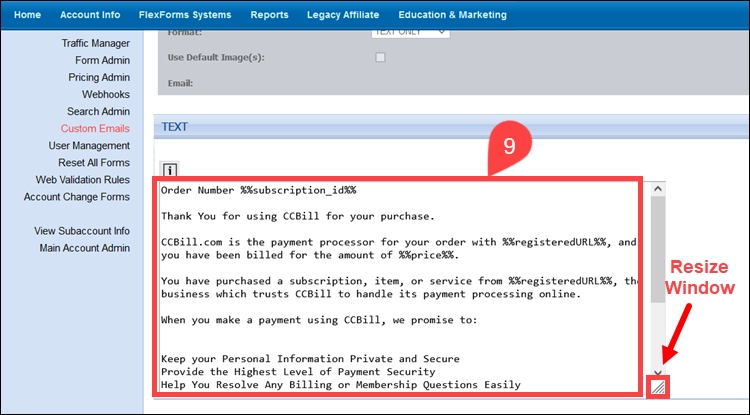
9. Edit the email text directly in the TEXT section.
Use the double-headed arrow in the lower right corner of the editing pane to resize the window for a better overview of the content.
10. (Optional) Use the i dropdown menu to insert CCBill variables into the email text.
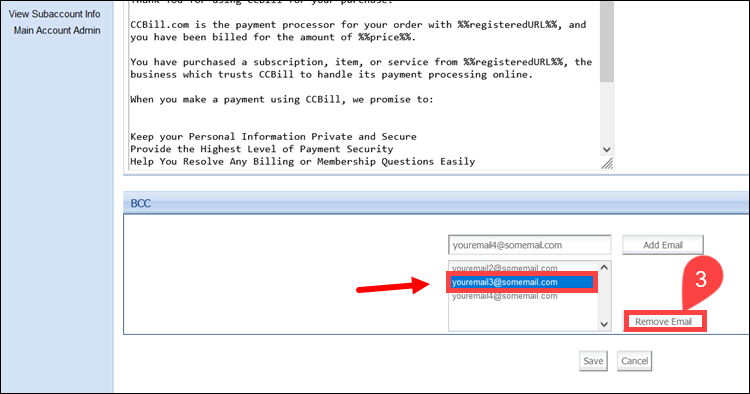
Step 3: (Optional) BCC
Use the BCC (Blind Carbon Copy) section to add email addresses that receive a copy of the Upgrade email. Other recipients cannot see the BCC email addresses.
1. Enter an email address in the BCC field.
2. Click Add Email.
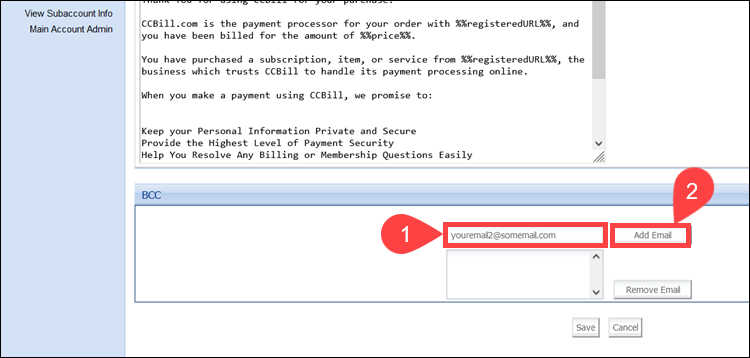
The email address was added to the email list.
3. To remove a BCC email from the list, select the email and click Remove Email.
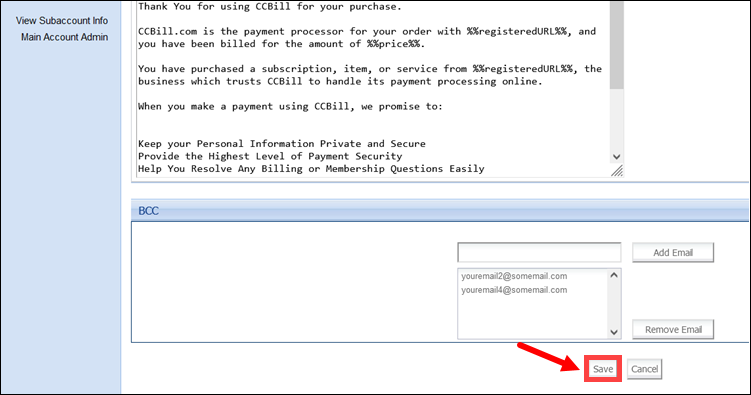
Step 4: Save and Preview Changes
Once you are satisfied with the customized email, click Save.
Clicking Cancel discards all changes and allows you to start over.
To preview the changes, select Preview for the Upgrade email type.
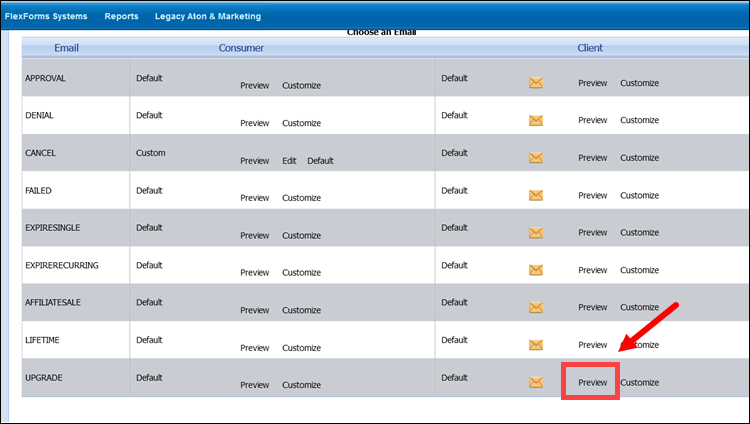
An example of the email is displayed in a new browser window.
After customizing an email template, the menu selection will change to Edit/Default.
Click Edit to make changes to your template, or Default to return to the CCBill template.