How to Create a Datalink User
A Datalink User enables merchants to retrieve raw transaction data from CCBill’s backend systems without accessing the Admin Portal or CCBill Reports.
Merchants can use the Datalink system to:
- Automate data collection and analytics tasks.
- Keep sales information up-to-date and ensure data consistency.
- Maintain historical transaction data records.
The Datalink User is also a prerequisite for submitting requests to the CCBill API. Merchants can integrate with the CCBill API to streamline business processes, add new functionalities, and design custom checkout flows.
The CCBill API allows you to:
- Manage individual subscriptions and update members databases.
- Automate repeated tasks such as user cancellations.
- Add one-click purchases to your payment forms.
- Access affiliate sales data.
Find out how to create a Datalink User and take full advantage of CCBill’s payment processing solutions.
How to Create a Datalink User
To create a Datalink User:
1. Access the Admin Portal.
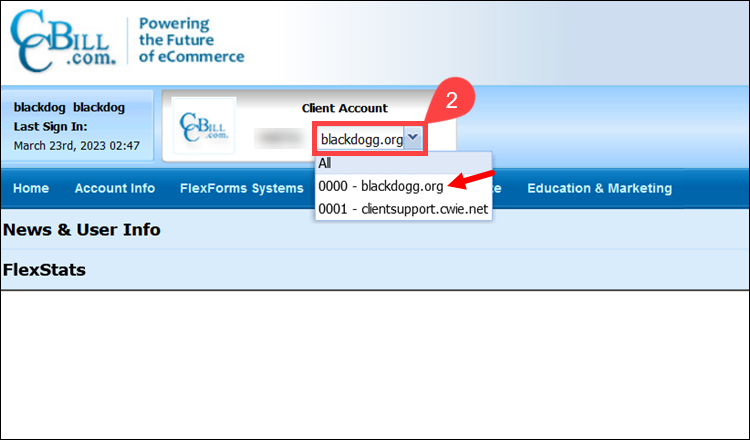
2. Select a subaccount from the dropdown menu.
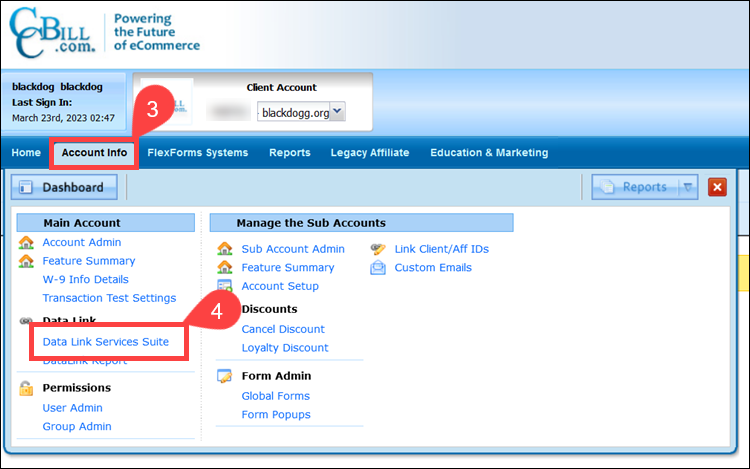
3. Click Account Info.
4. Select Data Link Services Suite.
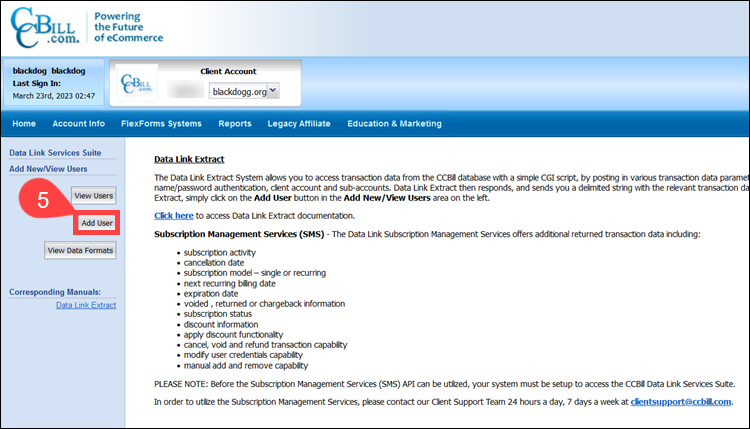
5. Click Add User.
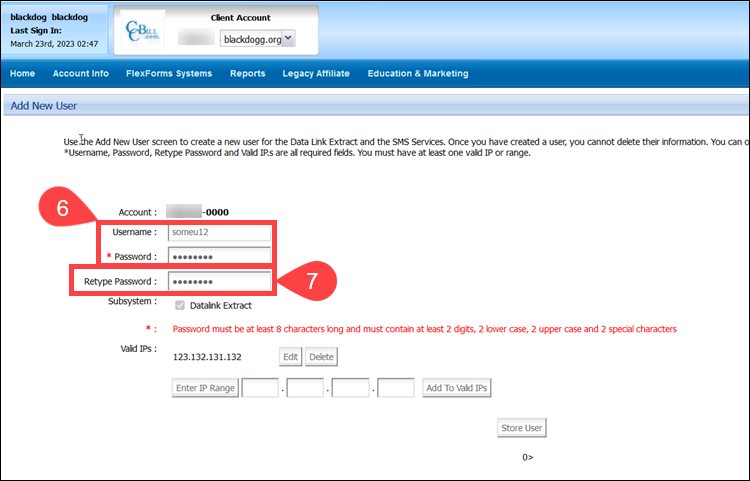
6. Enter a Username and Password.
- Username. The Datalink username must be 6 to 8 characters long and contain at least one digit and one letter.
- Password. The Datalink password must be longer than 8 characters and contain at least 2 digits, 2 lower case and 2 upper case letters, and 2 special characters.
7. Retype the password in the Retype Password field.
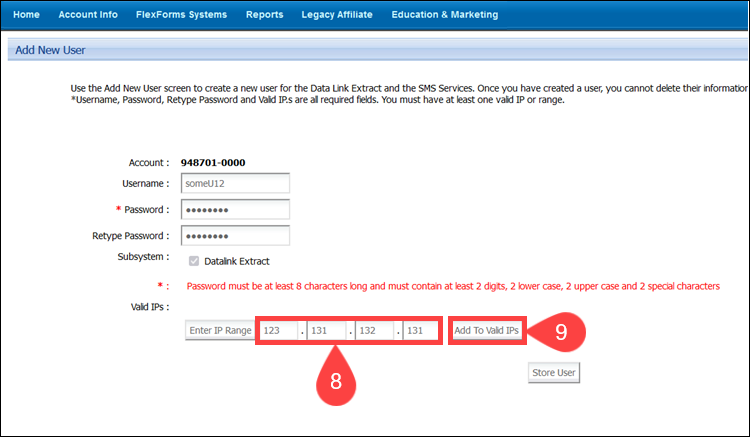
8. Enter the IP address you plan to use when accessing the Datalink system.
Add the IP your system uses when communicating with CCBill’s backend systems. For example, if you are utilizing an automated script, enter the IP of the server the script is located on.
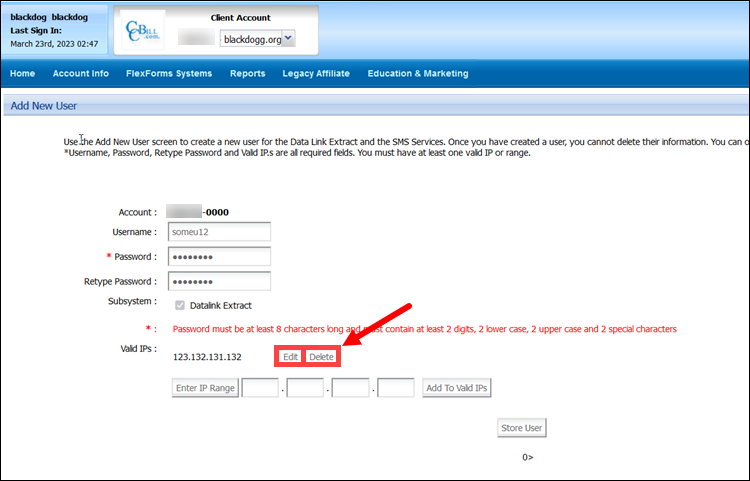
9. Click Add to Valid IPs.
Once you add a valid IP you can use Edit to modify the IP address or click Delete to remove access for a specific IP.
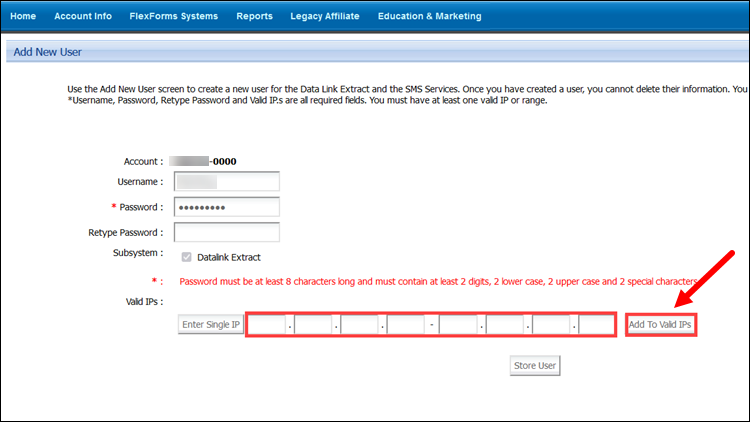
10. (Optional) Click Enter IP Range to enter an IP range of the computer/server that is making the Datalink requests.
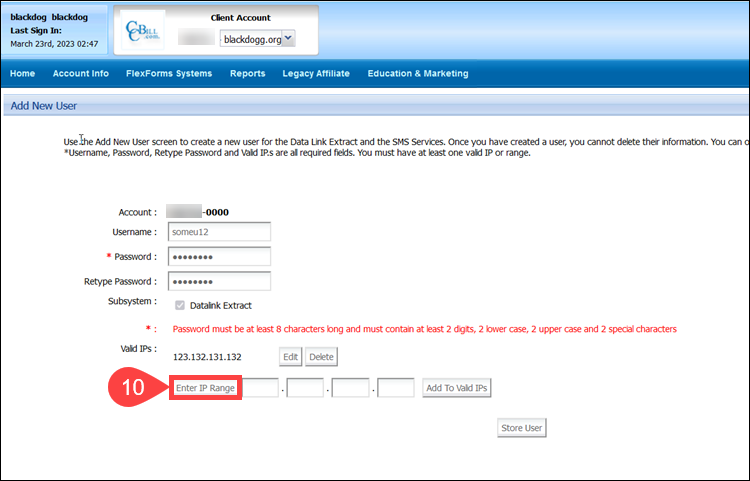
Once you add a range, select Add to Valid IPs.
11. Click Store User.
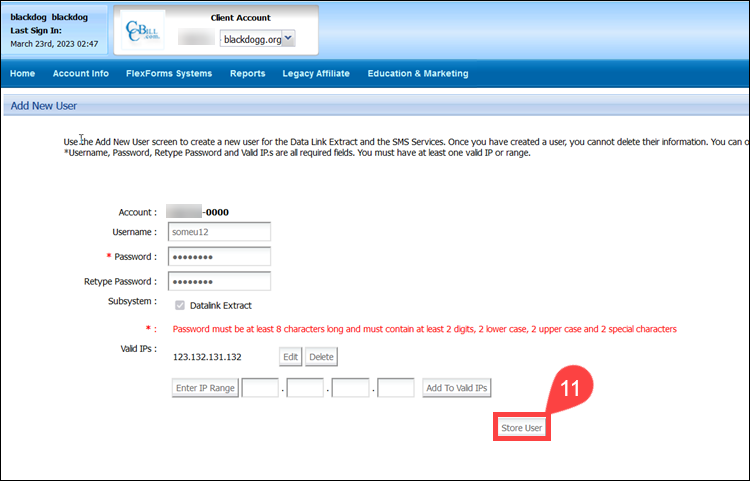
A New User Created pop-up window confirms that a new Datalink User has been created.
Datalink Errors
Datalink generates an error when the system is unable to process your request. Errors are preceded by an Error: string message and echoed as output when displayed in a browser.
The most common reasons for Datalink errors include:
- Invalid field format or absent value.
- Selected period is greater than 24 hours.
- Start date is greater than end date.
- Authentication failed due to incorrect username and/or password.
- IP address locked due to several failed login attempts.
- System is down for maintenance.
- A request has been made within the last 60 minutes.
List Of Datalink Error Codes
| Error Code | Description |
|---|---|
| 01 | Too many failed logins |
| 02 | Failed Login |
| 03 | Inactive username |
| 04 | Check IP failed (most likely out of range) |
Contact CCBill Merchant Support if you require further assistance troubleshooting Datalink errors.