Passthrough Parameters
CCBill merchants can use passthrough parameters to send custom data alongside standard transaction information. You can pass these parameters using the following methods:
- RESTful Transaction API requests
- ChargeByPrevious transactions
CCBill captures and stores this passthrough data along with other payment details. You can view it through Webhooks notifications or in the CCBill Admin portal.
Merchants often use passthrough parameters to:
- Pass custom order or customer IDs to match CCBill transaction data with internal systems.
- Label transactions as Customer-Initiated (CIT) or Merchant-Initiated (MIT).
- Track the origin of the transaction (i.e., website, mobile app, or partner platform).
- Identify which marketing campaign led to a sale.
Creating and Registering a Passthrough Parameter
A passthrough parameter consists of two parts:
- Parameter name. The label that identifies your data.
- Parameter value. The value assigned to that label.
Here's an example of a passthrough parameter:
subType=MITsubTypeis the custom parameter name.MITrepresents the value. It indicates that this is a Merchant-Initiated Transaction.
To start using custom parameters, follow these steps:
Step 1: Create a Parameter Name
Define a custom Parameter name that identifies the data you want to track. The parameter name must meet these requirements:
- It must be a valid XML tag name (starts with a letter or underscore and contains only letters, digits, hyphens, underscores, and periods).
- It must not contain or represent sensitive data, such as credit card numbers or other personally identifiable information (PII).
Apart from these limitations, the parameter name and value can be completely custom, allowing you to create labels that best fit your integration.
Step 2: Register the Parameter with CCBill
Contact CCBill Merchant Support to register and enable your passthrough parameter name in CCBill's backend configuration. Our team will configure the system to accept and process your new parameter.
Once the parameter is enabled:
- The system stores the passthrough data.
- The data is validated.
- The parameter is consistent across all CCBill systems, including Webhooks and the Admin Portal.
This configuration step is essential; without it, the passthrough parameter will not be recognized or stored.
Note: You can still pass unregistered passthrough parameters, and they will appear in Webhooks notifications. However, they are not saved in CCBill's databases or shown in reporting tools.
Step 3: Add Parameter
After creating and registering your passthrough parameter, you can include it in transaction requests. This is how the process works:
- Add the custom parameter to your payment request.
- Your system sends the request to the CCBill transaction endpoint.
- CCBill processes the transaction and includes the parameter with the transaction data.
- The parameter is stored with the payment details and included in Webhooks notifications.
How you add the parameter depends on the integration method:
- For RESTful API requests, include it in the
passThroughInfoobject. - For ChargeByPrevious requests, include it directly as a request parameter.
Example: Charge by Token API Request
In this example, the passThroughInfo object contains the subType=MIT parameter to indicate this is a Merchant-Initiated transaction:
{
   "clientAccnum": 900000,
   "clientSubacc": 0,
   "initialPrice": 5,
   "initialPeriod": 0,
   "passThroughInfo": [
     {
       "name": "subType",
       "value": "MIT"
     }
   ]
}
Your application sends the request to the transaction endpoint:
https://api.ccbill.com/transactions/payment-tokens/{paymentTokenId}When CCBill processes the request, it attaches the passthrough parameter to the transaction. The system returns the parameter in a Webhook notification and stores it for later use.
Example: ChargeByPrevious
You can also include passthrough parameters in ChargeByPrevious requests. In this example, the subType=MIT parameter is included directly in the request to mark the transaction as Merchant-Initiated:
https://bill.ccbill.com/jpost/billingAPI.cgi?action=chargeByPreviousTransactionId&clientAccnum=900000&clientSubacc=0000&username=testuser&password=testpass&newClientAccnum=900000&newClientSubacc=0000&sharedAuthentication=1&initialPrice=5&initialPeriod=0&recurringPrice=0&recurringPeriod=0&rebills=0&subscriptionId={subscriptionId}¤cyCode=840&subType=MITJust like in the API example, CCBill processes the parameter and makes it available in Webhooks notifications and the Admin Portal.
Step 4: Access Passthrough Parameters
Your registered passthrough data is stored in CCBill's internal systems. You can use this data to track transactions and analyze performance across different reporting periods.
Webhooks Notifications
The passthrough parameter is included in the Webhook payload. This allows you to identify transaction details as they happen.
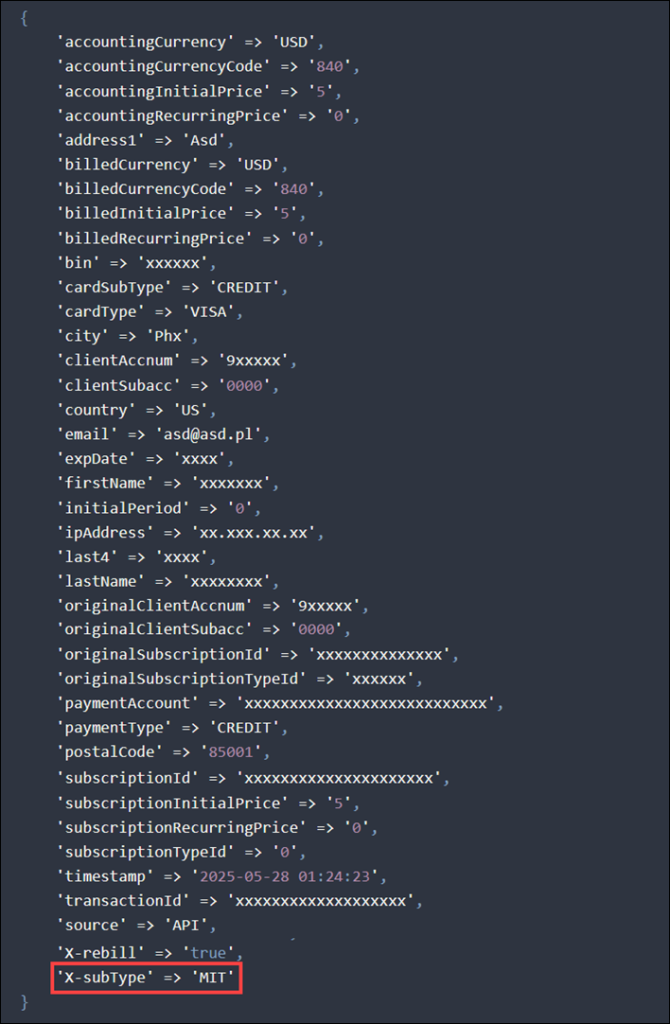
CCBill sends all passthrough parameters with an X- prefix. This prefix helps you distinguish custom passthrough fields from CCBill's standard system parameters.
Admin Portal
You can now also see registered passthrough parameters on each Subscription Information Page in the CCBill Admin Portal.

When you review a transaction, the parameter name and value appear in the Transaction Tags section of the page.