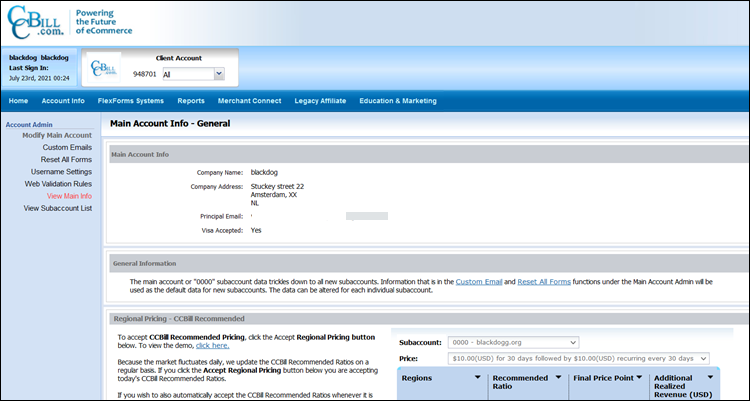
Account Admin
To see the Main Account Admin, make sure that you are currently set to view the Main Account level.
Custom Emails
Custom Emails permit customers to be sent an automatic personalized email with a custom message and take advantage of additional sales opportunities through membership sign up and cancellation activity. The personalization options provide customization features that include customer name, address, username /password, account number, Subscription ID's, company and product information, pricing, decline reasons, and much more.
Custom Emails permit the creation of Approval, Denial, Cancel, Failed, Expire Single, and Expire Recurring emails using customizable templates provided by CCBill.
All merchant email for the subaccount will be sent to this address. Merchant email can be sent to more than one location by separating email addresses with commas (e.g., youremail1@website.com, youremail2@website.com, etc.).
Email Types
- Approval Email. For customers who had their payment approved.
- Denial Email. For customers who had their payment declined.
- Cancel Email. For customers who have cancelled their membership.
- Failed Email. For customers whose payments have failed to rebill.
- Expire Single Email. Notifies the customer when their subscription access is about to expire.
- Expire Recurring Email. Notifies the customer when their recurring billing subscription access is about to expire.
Custom/Default
Click Default or Custom to view the modification history of that email type. Click Close to return.
Suspending Emails
Merchant emails are sent to you (the merchant), whereas Consumer emails are sent to your customers. When you suspend Custom Approval, Denial, Failed, Expire Single, or Expire Recurring emails, they are stopped. When you suspend a Custom Cancellation Email, CCBill will automatically send out a default email. Cancellation emails cannot be stopped.
To suspend Merchant or Customer Emails, click the envelope icon, it will display a circled-out envelope indicating that emails have been suspended. Keep in mind that you may have data in any or all of the Custom Customer emails. If you want to suspend the email, be sure to delete all data in each type of Email format, for instance: text and HTML.
To enable Merchant or Customer Emails click the circled-out envelope icon, it will display the envelope icon indicating that emails have been enabled.
If emails have not been suspended, this is the default state of the system. Both you and your customer will receive Approval, Denial, Failed, Canceled, Expired Single, and Expired Recurring emails.
Preview
Click Preview to view the email base that will be sent.
Customize
Although the CCBill default email template will be functional for most users, it may be modified by clicking Customize which will open a new editing window. Once the customize option has been selected the menu selection will change to Edit/Default. At any time in the future, click Edit to make changes to your template, or Default to return to the CCBill template.
Reset All Forms
This area allows you to refresh the signup form cache. Signup forms are cached on the server to improve performance. For this reason you must reset the form cache in order for changes to forms to take effect.
Click the Reset button on the Reset All Forms page to reset the form cache.
Promo Descriptions
This page allows you to create promotion descriptions. Descriptions use variables to represent pre-defined values; variables are identified by the '%%' identifier. Examples appear below.
Description Formatting
Formatting rules apply as follows:
- Description must include %%price%%.
- Use %%upsaleCompanyName%% for default company name text.
- Custom company text can be created by placing text between %%startUpsaleCompany%% and %%endUpsaleCompany%%.
Examples
- %%price%% to the Zip Archive.
This will display the entire description as a link to the promotional company URL: $5.00 for Unlimited downloads to the Zip Archive - %%price%% for %%startUpsaleCompany%% Super Video Site %%endUpsaleCompany%%
This will display 'Super Video Site' as a link to the promotional company URL: $12.95 for 25 Credits for Super Video Site - Join %%upsaleCompanyName%% at the price of %%price%%
This will display the default company name as a link to the promotional company URL: Join Company Name at the price of $2.95 for your first 3 days followed by $29.95 automatically rebilling every 30 days!
Creating a Description
To add a description, click the Add Description button. Enter the new description in the box and click the Insert button to save the description.
Viewing Existing Descriptions
To view existing promo descriptions, click the View Descriptions button. Results will appear in the report window.
Username Settings
The Username Settings area allows you to specify how to control the usernames and passwords for the customer.
Changing Username Settings here will update these settings for ALL sub accounts.
- Collect Username and Password. Specifies the way to allow the customer to enter or view the authentication information. The following options are available for Collect Username/ Password:
- Show Username and Password Text Fields. Allows the customer to enter both the username and password for authentication.
- Show Username Text Field, Display Password. Allows the customer to enter the username and to view the password but not change it.
- Display Username and Password. Allows the customer to view the username and password but not to change them.
- Hide both Username and Password. Do not allow the customer to view the username and password.
- Display Username, Hide Password. Allows the customer to view but not change the username. The password is concealed.
- Display Username, Show Password Text Field. Allows the customer to view but not change the username and to enter the password.
- Min. Username Length. Lets you specify the minimum number of characters for the username.*
- Max. Username Length. Lets you specify the maximum number of characters for the username.*
- Min. User Password Length. Lets you specify the minimum number of characters for the password.*
- Max. User Password Length. Lets you specify the maximum number of characters for the password.*
*The minimum and maximum length of the authentication data entered by the members/customers are customizable. You can choose a number from 4 to 16 for the username and password fields.
Web Validation Rules
The web validation system is a tool designed to help merchants follow local laws regarding Age Verification within their respective region. The Web Verification allows merchants to soft decline a transaction based on card types, card association (brand) and country.
Changing Web Validation Rules here will update these settings for ALL sub accounts.
The system will then inform the consumer they must contact the merchant directly to get the transaction approved. Merchants may use the tool in any way they choose, as it can be applied for many different reasons.
A 'Rule' is defined as one set of Card Type, Card Association, and Country. Only one Card Type and one Card Association may be selected at a time; however, it is possible to choose multiple countries per Card Type/Card Association relationship.
Card Types are:
- Credit
- Debit
- Pre-Paid
Card Associations reflect the associations enabled for the account:
- Visa
- MasterCard
- JCB
- Discover
- American Express
Countries:
ALL available processing countries are listed, like the United States; this was a UK mandate, however programming expanded the list to cover any potential future changes to laws in other countries that may need a similar setup.
Display message to consumer on:
- Payment Screen
- Decline Screen
Once the Card Type, Card Association, and Country(ies), are selected contact Admin Support to enable the rule.
Anytime a consumer sets off the triggers for the Card Type/Card Association/Country settings, the Instructions to the consumer will be presented to the consumer on the sign-up page or decline page, depending on the settings for that specific web validation rule. In addition, an email is issued to the consumer and a Post is issued to the decline post URL.
The consumer should follow the instructions provided, which should contain the merchant's contact information, so merchants can review and manually approve the transaction or allow the decline to stand.
View Main Info
The View Main Info link simply jumps you back to the Main Account Information page without having to browse back through the menus.
View Subaccount List
The View Subaccount List link is a way to jump to the Modify Subaccount screen without having to go back to browse through the menus.
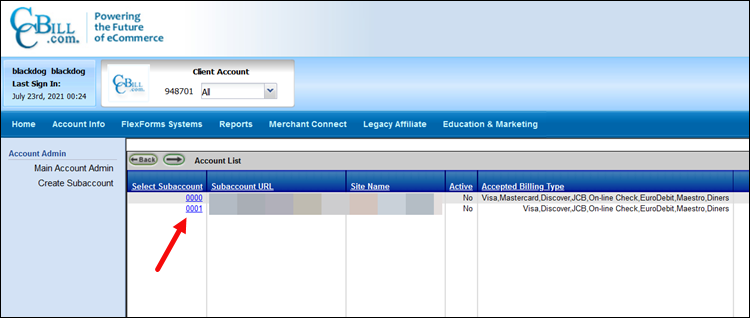
To jump to a subaccount you must first select the subaccount number from the subaccount drop-down menu at the top of the screen, then click the View Subaccount List link.