Decline Lookup
The Decline Lookup report displays declined sign-up attempts on your merchant account over a specified time frame.
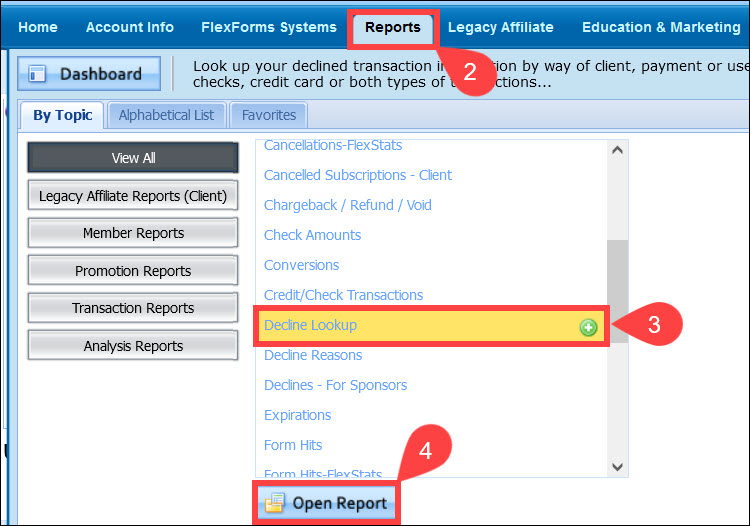
To access the report:
1. Log in to the Admin Portal.
2. Click Reports.
3. Select Decline Lookup.
4. Click Open Report.
5. (Optional) The Lookup Declines From section allows you to search using any of the following criteria:
- Billing Type dropdown menu. Select a billing type for the declines you wish to see.
- Days to look back. Enter the number of days prior to the current date to conduct your search.
- Only Web Validation. Check this box when you want to look up a soft-declined transaction that you wish to approve.
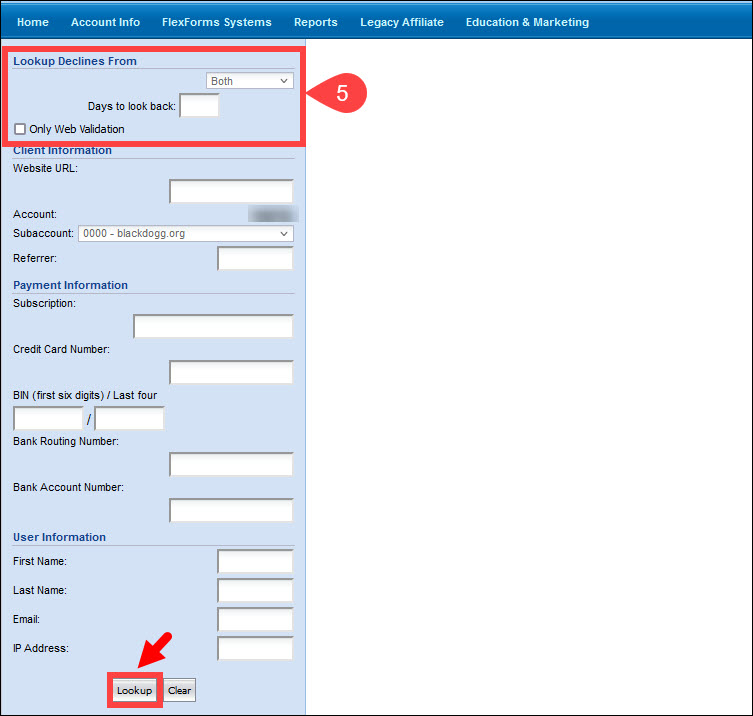
Click Lookup if you do not want to use additional parameters for the search.
6. (Optional) The Client Information section allows merchants to search declines by subaccount, URL, and affiliate number. Merchants can enter any or all parameters for their search.
- Website URL. Enter your website URL.
- Subaccount. Use the dropdown menu to select a specific subaccount.
- Referrer. Enter the account number of the referring affiliate.
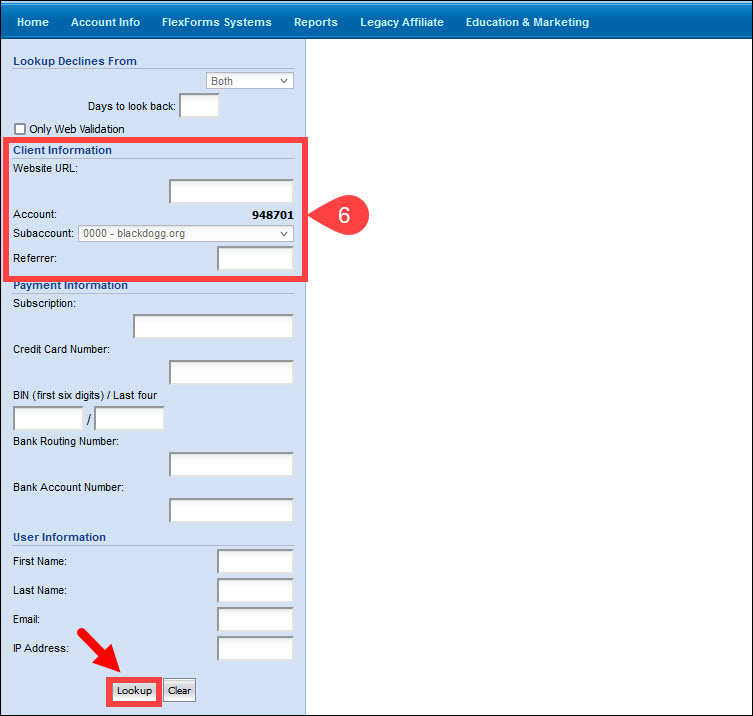
When finished, click the Lookup button to run the report. Results will display in the report window.
7. (Optional) Merchants can search declines using the customer’s Payment Information:
- Subscription. Enter a subscription ID number.
- Credit Card Number. Enter the card number (credit card declines only).
- BIN (first six digits / Last four. The first six and last four digits of the customer’s card number.
- Bank Routing Number. Enter the bank routing number (check declines only).
- Bank Account Number. Enter the bank account number (check declines only).
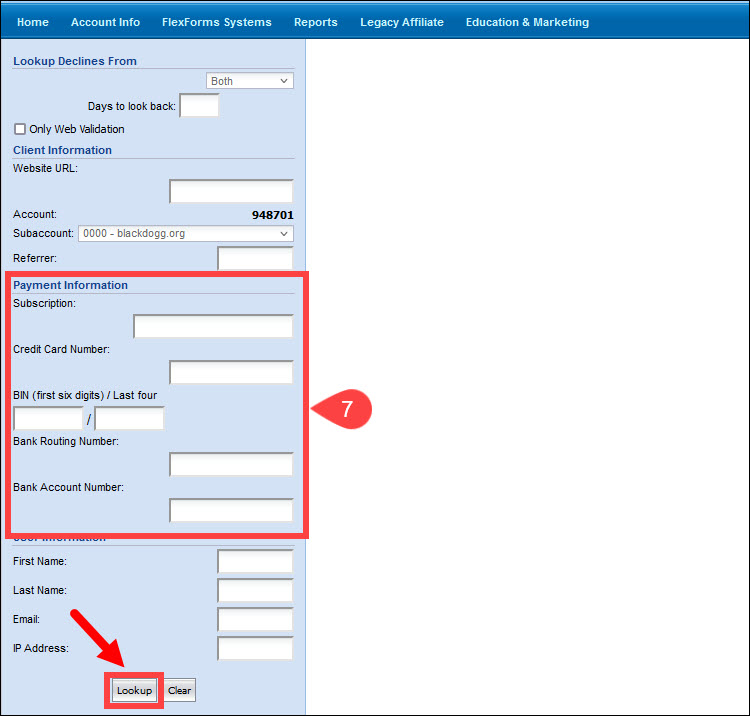
Click Lookup if you do not want to use additional parameters for the search.
8. (Optional) Merchants can search declined transactions using information collected from the customer in the User Information section:
- First Name. Enter the user's first name.
- Last Name. Enter the user's last name.
- Email. Enter the user's email address.
- IP Address. Enter the user's IP address.
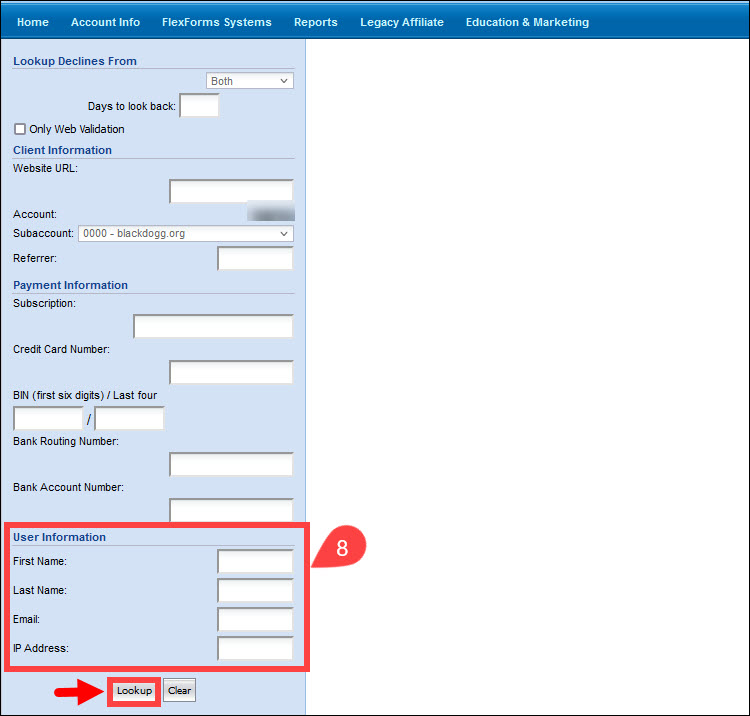
Click Lookup to start the search. You may also click the Clear button to reset all search fields.
Overriding Web Validation Declines
If you use the Web Verify feature, this report will allow you to override a decline that occurred due to your active Web Validation rules.
- Enter information in the search fields to help you locate the transaction and click Search.
- Locate the declined transaction in the search results and click the Decline ID.
- Click the Override the Decline button.
- Enter any notes you want to add to the transaction in the provided text field.
- Click Submit Override.
You will receive a message notifying you of the success/failure of the override process. Declines must be overridden within 72 hours of the original transaction.