FlexForms Overview
The FlexForms system enables CCBill merchants to create globally responsive payment forms using a straightforward drag-and-drop interface.
Merchants do not have to build and manage separate payment links or forms for different payment types, currencies, or languages.
FlexForms are highly customizable, allowing you to control input fields, insert banners, create prices on the spot, and design seamless payment flows.
Using FlexForms, you can reach customers on their preferred devices and platforms and create an engaging consumer experience from the first “Buy Now” click.
You only need to place a link to your live forms and Web Widgets once. It is no longer necessary to insert a new payment link version every time you modify a form or flow.
Why Use FlexForms?
CCBill merchants who implement FlexForms gain the following advantages:
- IP Address Targeting. The customer’s local language, currency, and payment options are displayed by default.
- One Payment Link. All payment options are available on a single payment form.
- Globally Responsive. FlexForms have a responsive design and work with major mobile and desktop browsers.
- Cross-sell and upsell capabilities. Merchants can create and add promotional sales directly on the payment form. Customers can opt in or out of promotional offers by simply checking a box.
- Drag-and-drop interface. Design immersive payment flows using a straightforward visual interface. You can create custom cascades, route traffic, and control design and branding.
- Built-in A/B testing. Test payment form variations side-by-side to see which color, layout, price point, or banner offers the best conversions. You can even test different payment types in one form or compare a third-party processor's payment form with your CCBill FlexForms.
- Dynamic Web Widget. A built-in and customizable checkout button allows merchants to anchor payment flows on their websites without any coding.
- Test Environment. The Sandbox test environment enables you to work on and perfect your forms and flows before sending them live.
- Integrated banner, image, and URL inventories. Upload and define your banners, promotional material, and redirection URLs only once. You can freely access and reference them while modifying payment forms and flows.
FlexForms in the Admin
To start creating your new FlexForms payment flows and forms:
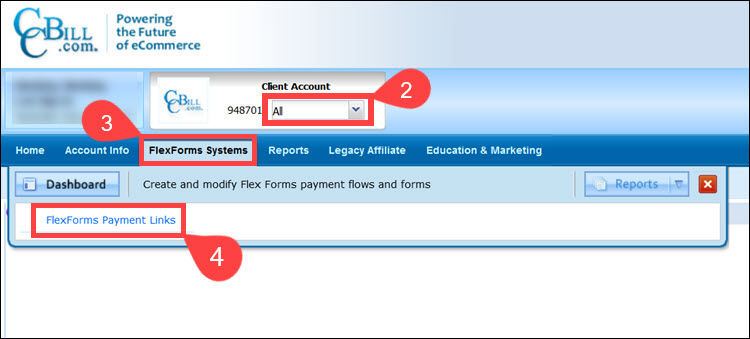
1. Access the Admin Portal.
2. Ensure that All is selected in the subaccount dropdown menu.
2. Open the FlexForms Systems mega menu.
3. Click FlexForms Payment Links.
Visit our FlexForms Quick Start Guide for detailed instructions on how to build and manage your payment flows and forms.
FlexForms Features
The FlexForms interface allows you to manage the different features of FlexForms.
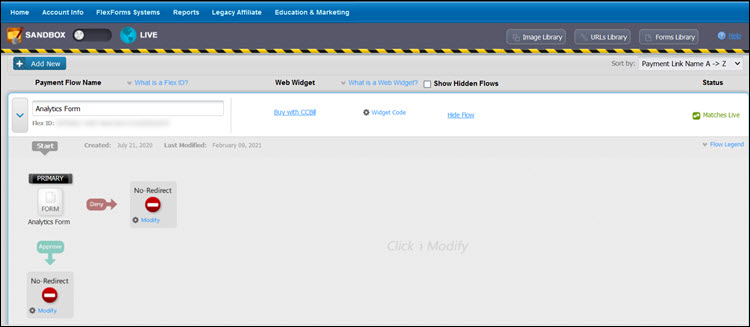
FlexForms Payment Links
Use the default Payment Flows view in FlexForms to configure and manage payment forms, cascades, URLs, and images in payment flows.
Sandbox or Live Mode
The Sandbox\Live toggle switch tells you which mode you are currently working in. Use the Sandbox mode to create and edit payment flows and forms.
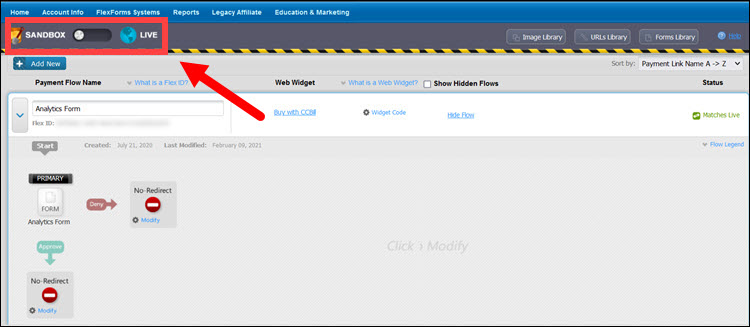
External users cannot access the sandbox link, and any links you obtain from the sandbox can only be used when you are logged in to the CCBill Admin Portal. The sandbox is meant for testing purposes only.
Add New
The Add New button will initiate the creation of a Payment Flow. If you do not have a payment flow, use the Add New button to create one. You will find more information on building payment flows in the FlexForms Quick Start Guide.
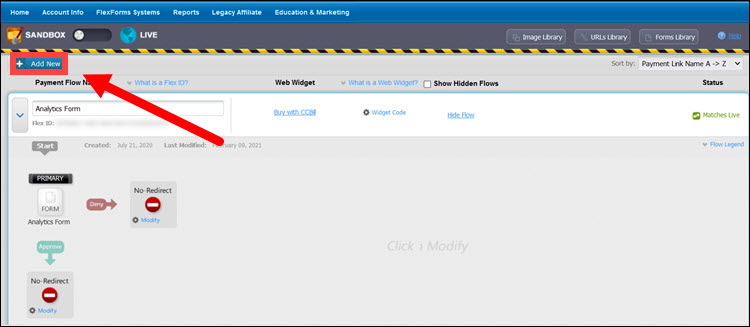
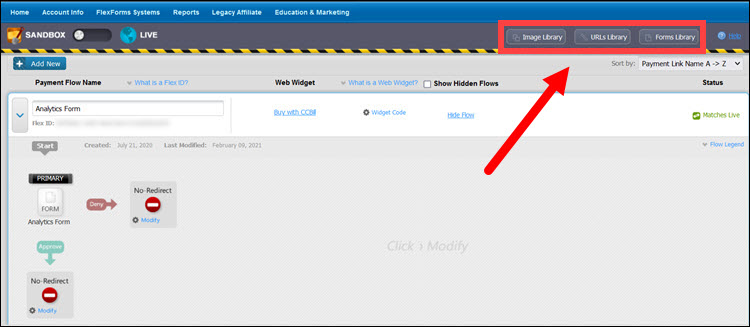
Image Library
The Image Library displays images you have uploaded to the FlexForms system and allows you to add new images.
Detailed instructions on how to use the library are provided in the standalone FlexForms Image Library guide.
URLs Library
This URLs Library contains saved URLs and allows you to add new URLs and modify any variables that should be passed when a customer is redirected to that URL.
Read more about how this is done in the FlexForms URLs Library guide.
Forms Library
This is a library of all forms available for use in payment flows. The FlexForms Forms Library guide discusses the Forms Library in greater detail.
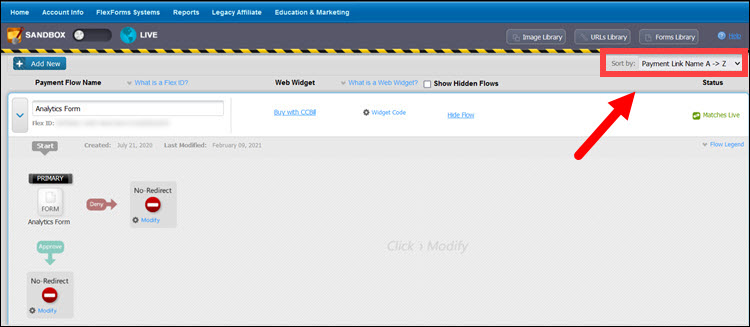
Sort By
The Sort by drop-down menu is helpful when you want to arrange your list of payment flows in a particular way.
Use the FlexForms system’s innovative design and smart checkout features to create an intuitive shopping experience and improve your store’s conversion rates.