Custom Emails
Introduction
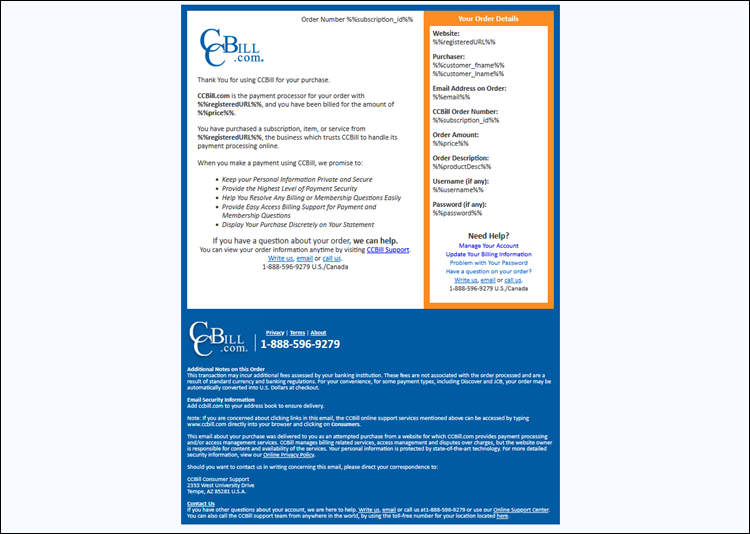
CCBill’s system sends automated emails to your customers when they place an order, subscribe, cancel, upgrade, or if the status of their subscription changes.
At the same time, merchants also receive event-driven emails from CCBill to inform them about transactions that occurred on their merchant account.
Merchants can use the Custom Emails feature to personalize these automated emails with a custom message and take advantage of additional sales opportunities, mitigate cancellations, or supercharge promotional activities.
How to Access Custom Emails?
Emails are configured and customized on the subaccount level.
The Custom Emails settings for subaccount 0000 are the default setting for newly created subaccounts.
To access the Custom Emails menu for a specific subaccount:
1. Access the CCBill Admin.
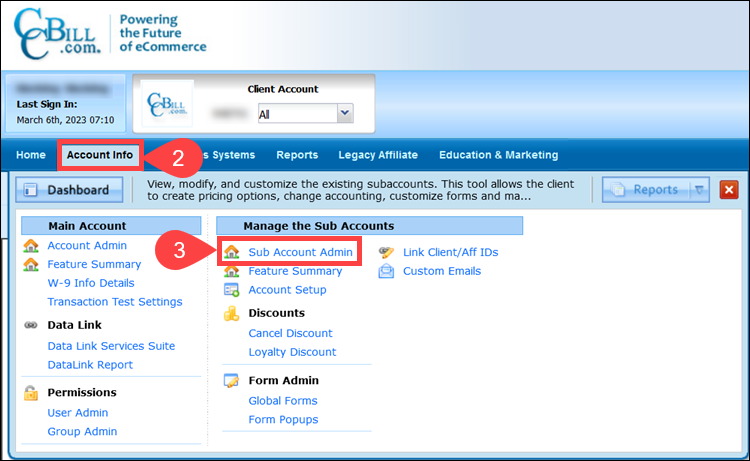
2. Select Account Info.
3. Click Sub Account Admin.
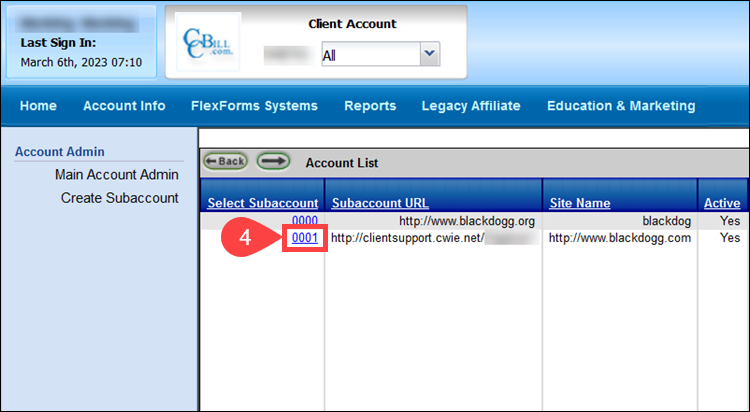
4. Select a subaccount for which you would like to customize emails.
5. Click Custom Emails.
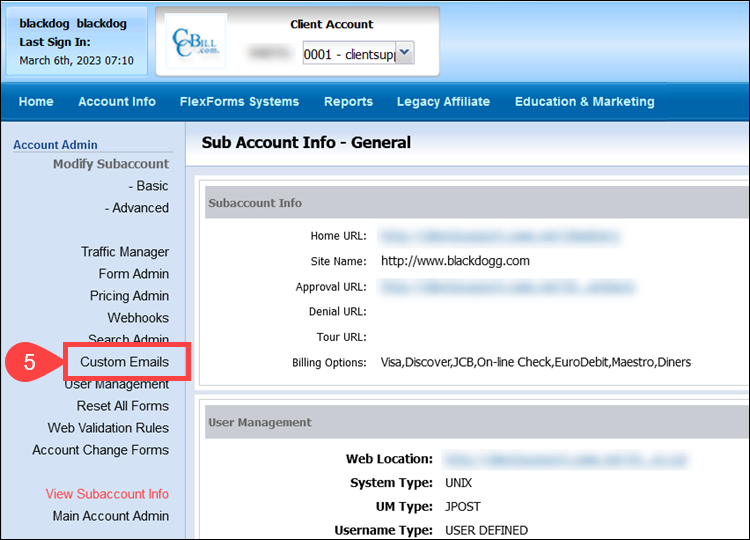
You now have access to the Custom Emails menu for the selected subaccount.
Set Merchant Email Address
To define the email address or addresses for receiving notifications from CCBill’s system:
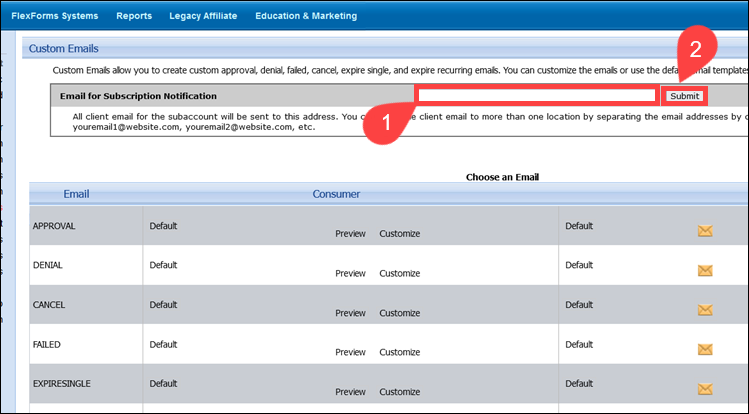
1. Enter an email address in the Email for Subscription Notification field. You can add multiple email addresses by separating them with commas (i.e., youremail1@website.com, youremail2@website.com).
2. Click Submit.
Customizing Emails
By clicking Customize, you can modify default templates for each Consumer and Client (Merchant) email type.
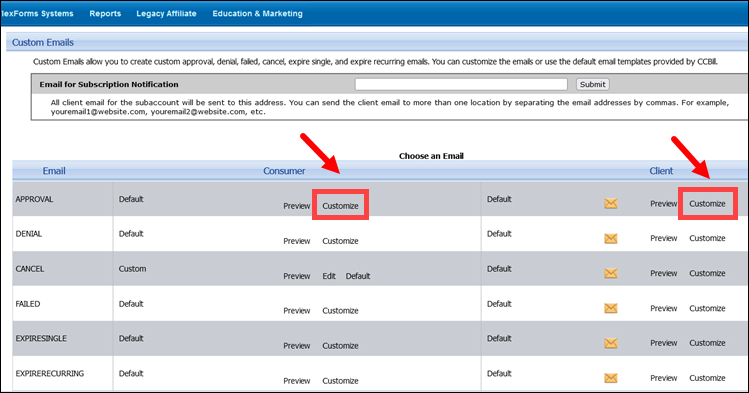
The available templates and the guides for customizing them are listed below. Click on the links for detailed instructions.
| Consumer | Client | ||
|---|---|---|---|
| Approval | Confirms the transaction was successful and contains basic customer and website information. | Approval | Confirms the transaction was successful and contains basic customer information, including the Subscription ID. |
| Denial | Informs the customer that the transaction could not be processed. | Denial | Notifies the merchant that the transaction could not be processed and the reason for the decline. |
| Cancel | Confirms that the customer canceled a subscription and specifies the cancellation date. | Cancel | Informs the merchant that a subscription was canceled and will be inactive the following billing period. |
| Failed | Informs the customer that the subscription failed to renew and that their membership is inactive. | Failed | Notifies the merchant that a subscription has failed to renew. |
| ExpireSingle | Informs the customer that their access is going to expire End of Day (EOD). | ExpireSingle | Informs the merchant that a non-recurring subscription has expired. |
| ExpireRecurring | Notifies the customer that their recurring subscription and access is going to expire End of Day. | ExpireRecurring | Notifies the merchant that a recurring subscription has expired. |
| AffiliateSale | Informed affiliates that a consumer they referred has signed up on the merchant’s website. | AffiliateSale | Informs the merchant that an affiliate has successfully referred a sale. |
| Lifetime | Informs customers that they have purchased open-ended access to the website for no additional cost, for as long as the site is active. | Lifetime | Notifies the merchant that a customer has purchased a lifetime subscription to their website. |
| Upgrade | Notifies customers that their subscription has been upgraded to a new pricing plan, while their original subscription was canceled. | Upgrade | Informs the merchant that a customer has upgraded to a new pricing plan and that their original subscription was canceled. |
Once the customize option has been selected, the menu selection will change to Edit/Default.
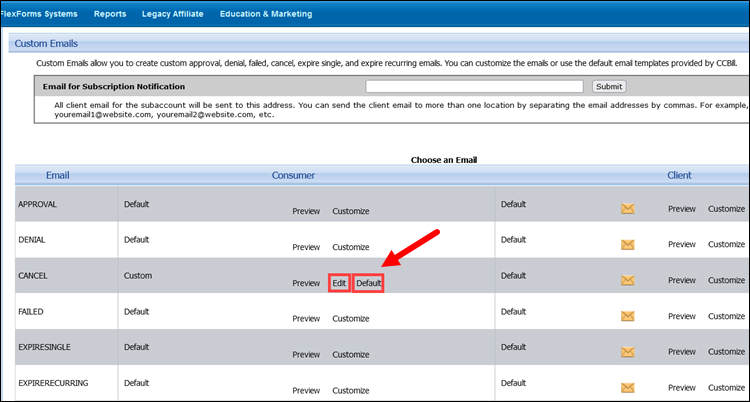
You can click Edit to make changes to your template, or Default to return to the CCBill template.
Custom Email Options
Disable/Enable Emails
Consumer emails are sent to your customers, while Client emails are sent to you, the merchant.
Merchants who want to disable customer-facing (Consumer) emails need to submit a request to CCBill Merchant Support. The merchant must provide an example of an equivalent email they intend to send instead of the default CCBill email.
To disable merchant (Client) emails, click the envelope icon. It will display a crossed out envelope indicating that emails have been suspended.
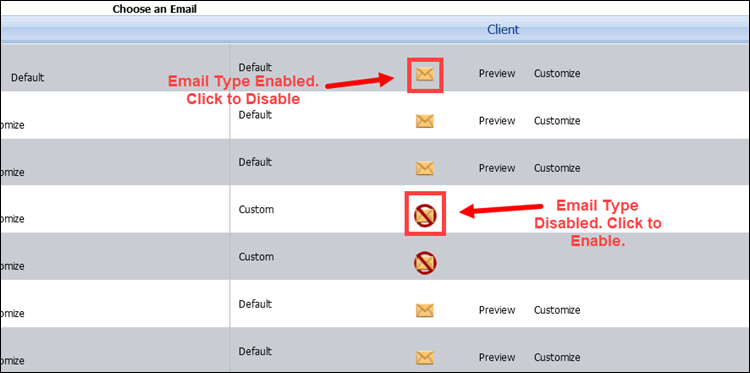
To enable emails, click the crossed out envelope icon. It will change to display the envelope icon that indicates that emails have been enabled.
Change Log
Click Default or Custom to view the modification history of that email type for either Consumer or Client emails.
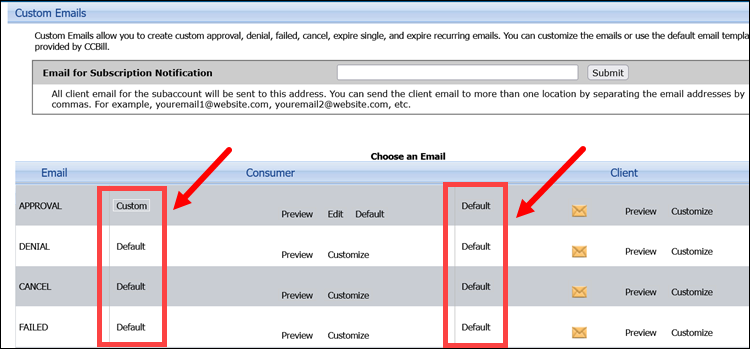
The log provides information on the action that was taken and the date of the logged change.
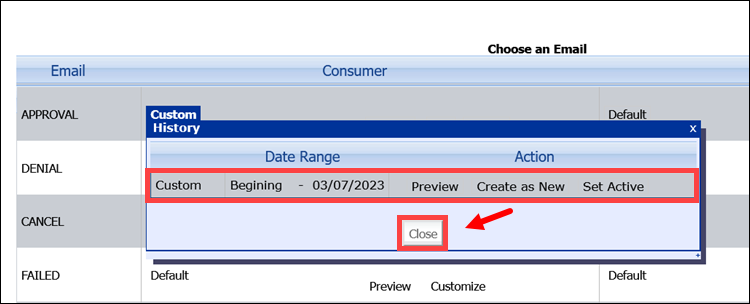
Click Close to return to the Custom Emails menu.
Preview Emails
The Preview option allows merchants to view custom emails for each email type and make additional modifications if necessary.
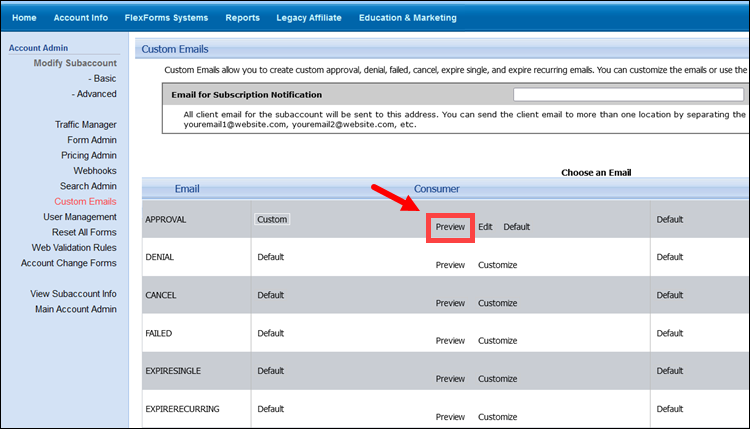
An example of the email is displayed in a new browser window.
