How to Create a New Subaccount? - Quick Start Guide
CCBill merchants can create up to 9999 subaccounts on their main processing account. Each subaccount can be used to accept payments on different websites the merchant owns or to facilitate processing for multiple business models, such as selling tangible items, streaming content, or recurring subscriptions.
The Account Setup Wizard in the CCBill Admin streamlines the subaccount creation process and allows merchants to configure pricing options, payment forms, and user management settings. The complete guide for creating a CCBill subaccount explores every option the wizard provides.
However, in some instances, merchants want to create a new subaccount quickly and complete the technical setup at a later date.
This guide explains how to create a new CCBill subaccount in as few steps as possible.
Create New Subaccount
To create a new subaccount on your CCBill merchant account:
1. Access the Admin Portal.
2. Click Account Info.
3. Select Account Setup.
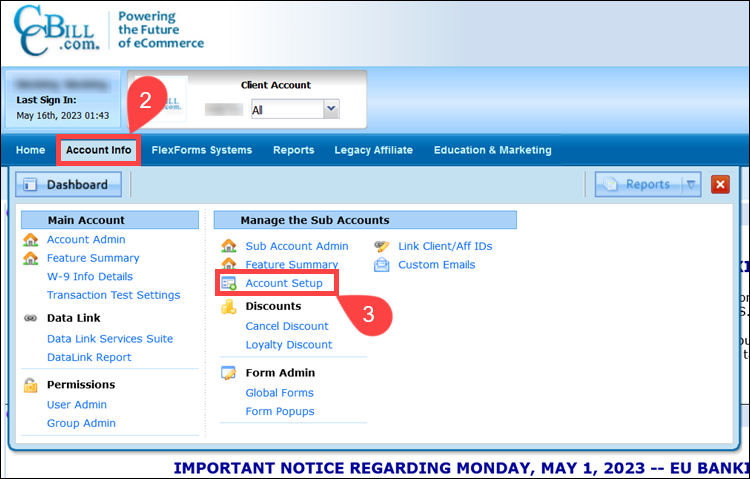
4. The New Subaccount # field displays the next available subaccount number. Merchants are free to enter a different subaccount number if they wish.
5. Click Next.
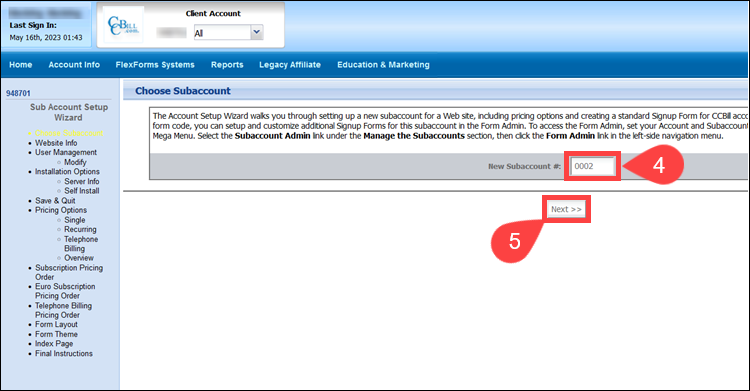
6. Use the Website Info area to enter your website’s URL, additional web locations in the payment flow, and the subaccount contact information. Enter the information in the following required fields:
- Homepage URL. The internet address, base web location, or website for this subaccount’s home page, i.e., https://www.yourwebsite.com.
- Site Name. Enter a custom identifier or a brief description of the type of product sold on the website, i.e., My Ecommerce Store or My Premium Subscription Page. The website name is not visible to the customer and is used as an internal designation on the Subscription Details page.
- Approval URL. The consumer is forwarded to this web location after a successful signup. The Approval URL can be a Thank You Page, members area, purchase confirmation, etc.
7. Select Next.
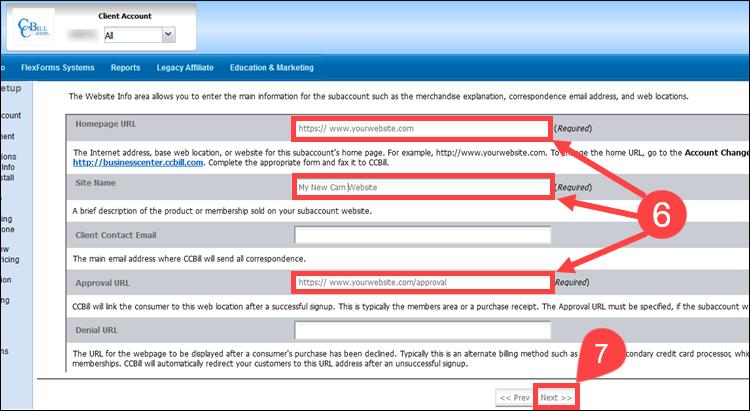
Note: Select Prev if you need to edit the information provided on a previous page.
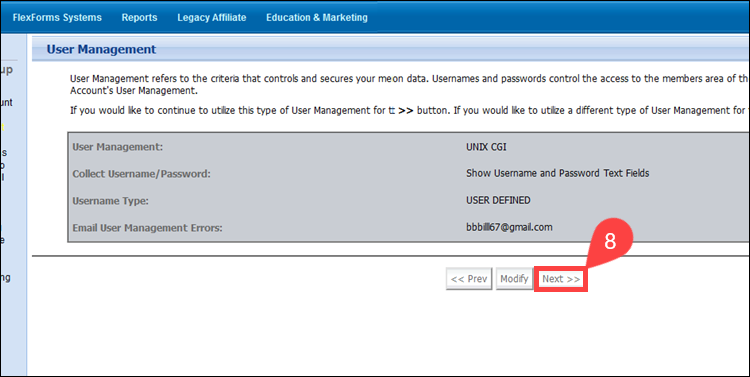
8. Click Next. If you need to configure User Management settings, you can always do so at a later point.
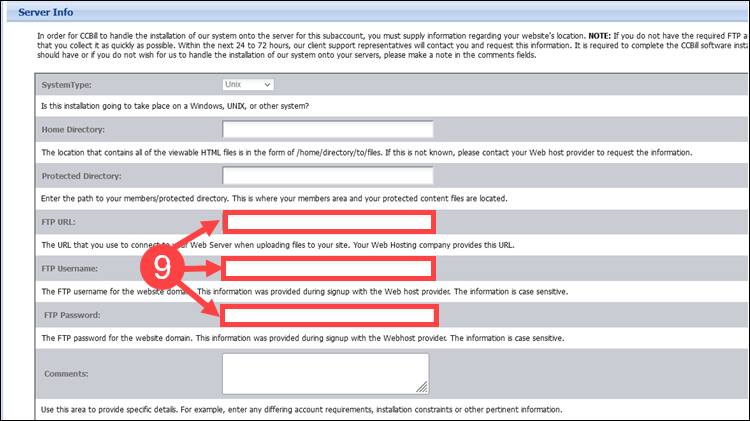
9. (Optional) Merchants who plan to use CCBill's User Management System must provide their FTP URL, Username, and Password. CCBill Support uses this information to install the necessary scripts on the merchant's web server.
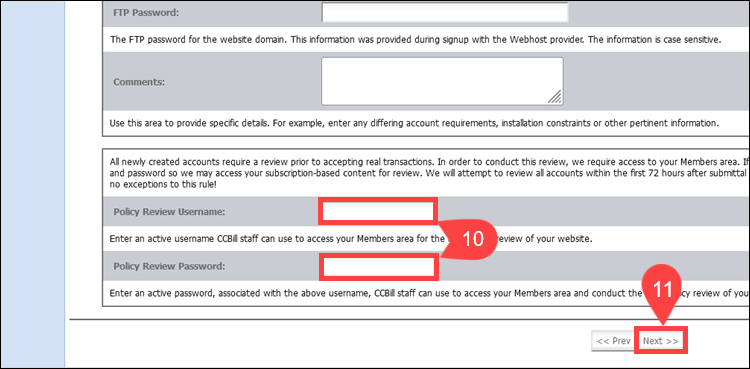
10. (Optional) If your website has a protected area (Member’s area), CCBill needs to review the content before approving a subaccount. To speed up the review process, merchants should provide a username and password for our team to access the content. Enter the credentials in the Policy Review Username and Policy Review Password fields.
11. Select Next.
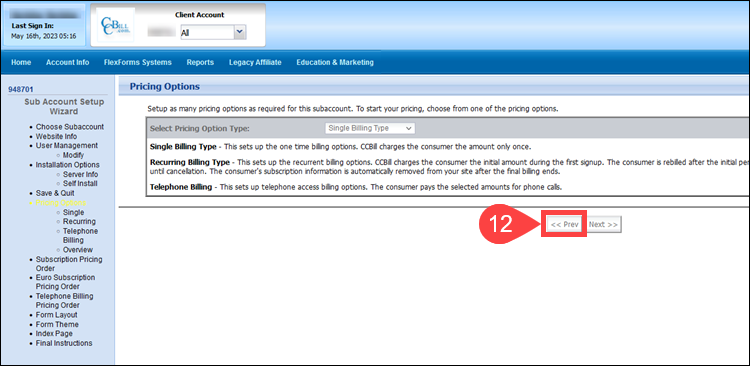
12. Click Prev to skip further subaccount configuration.
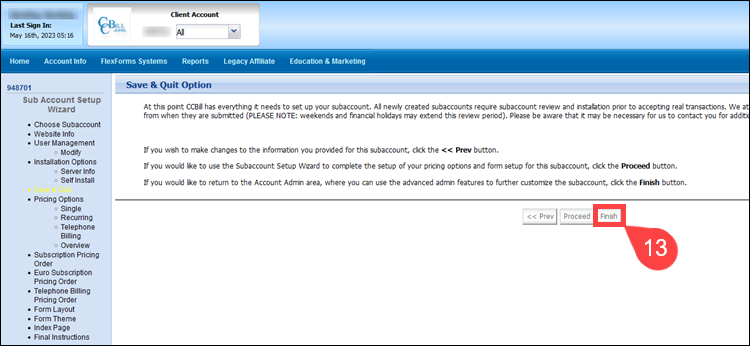
13. Select Finish to complete the subaccount creation process.
Note: To make changes to the information you provided for this subaccount, click Prev. To use the Subaccount Setup Wizard to create prices and forms for this subaccount, click Proceed.
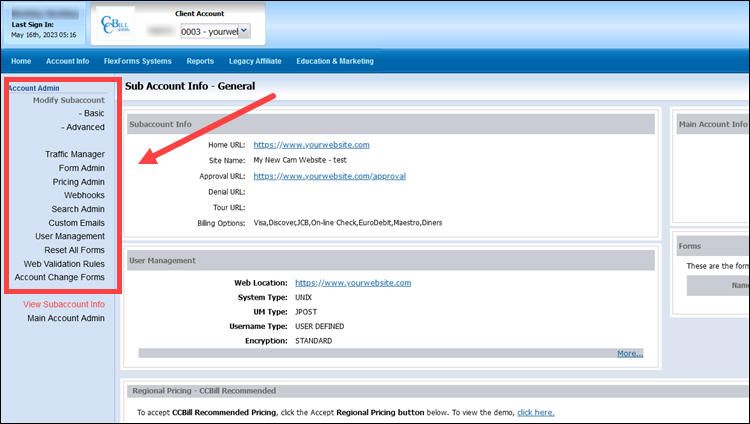
After creating the new subaccount, you will be directed to the Subaccount Info - General area. Use the Modify Subaccount menu to review the information you entered for the new subaccount and modify the subaccount's user management settings, create payment forms, customize emails, and set up prices.
All newly created subaccounts undergo a compliance review before they can accept live transactions. We attempt to review, approve, and install all accounts within 72 hours of submission.
Please be aware that we may need to contact you for additional information during that period.